Paper Pumpkin Kits 2025 Gallery
Although the monthly Paper Pumpkin kit always comes with beautiful designs, the real fun for many of us is using the supplies to make "alternate" designs. Here is my gallery of 2025 Paper Pumpkin creations. I hope you enjoy, and please leave a comment if there are any cards you particularly like.
Become a Subscriber
Click the button below for more information on how you can join in on the fun
All
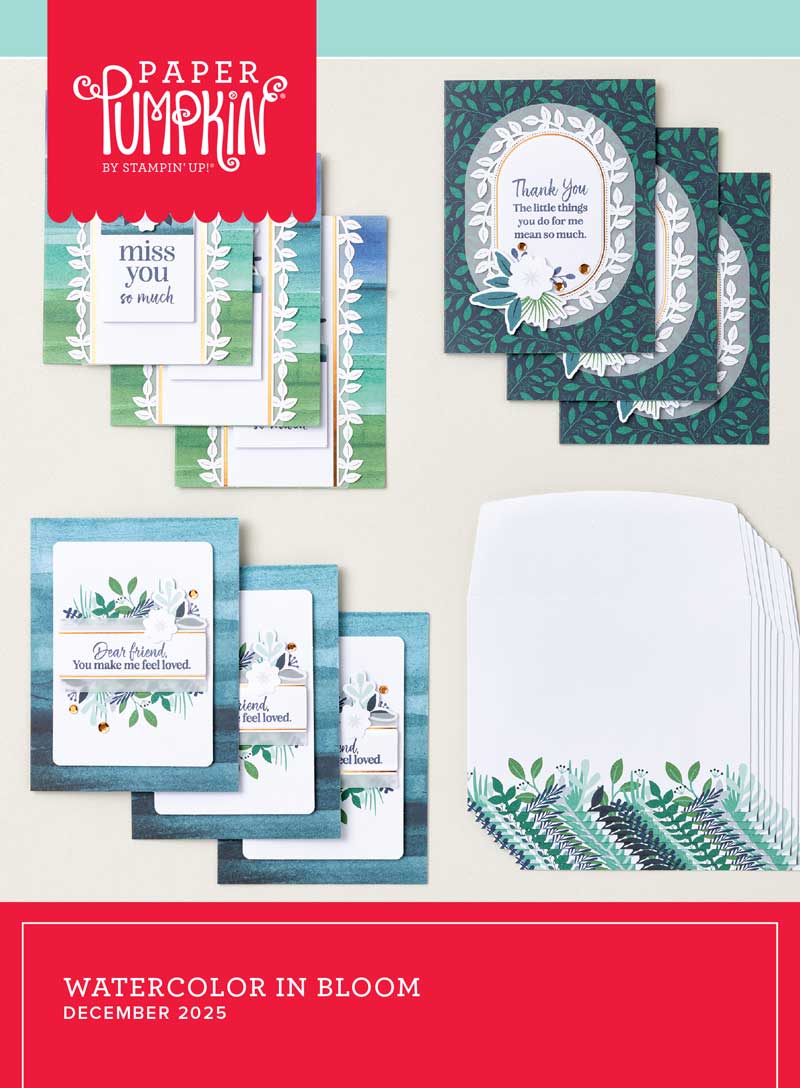
Dec-Watercolor in Bloom
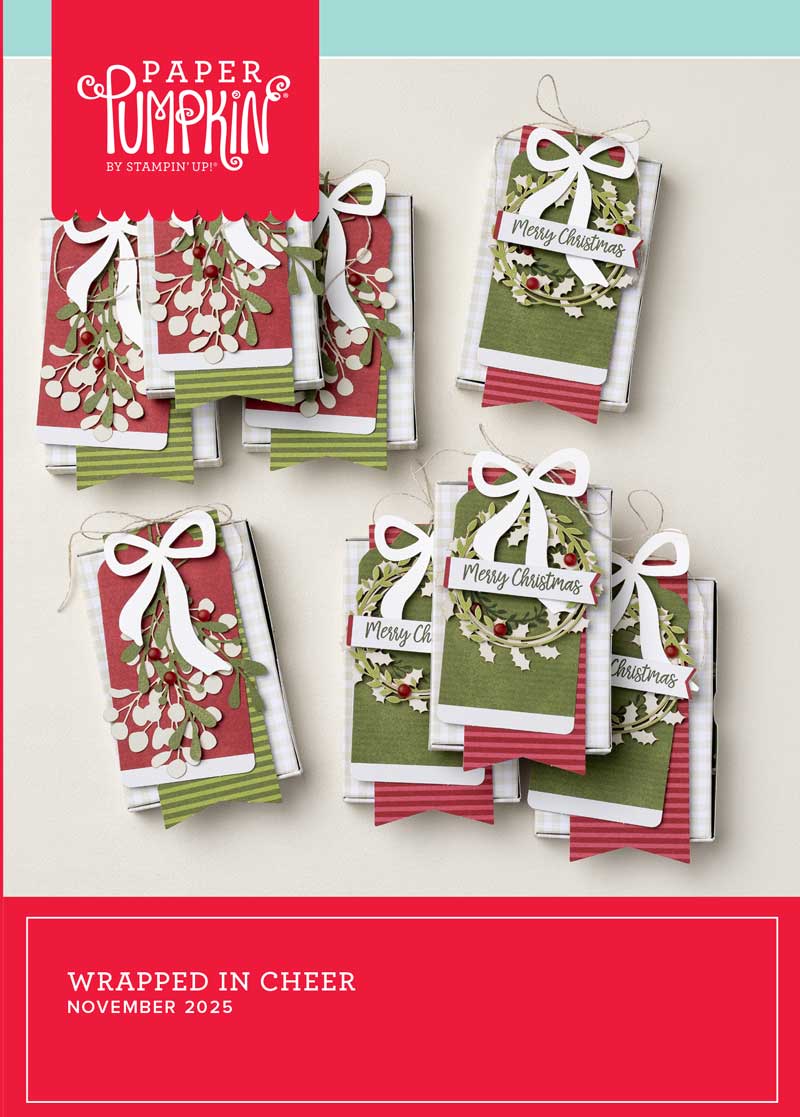
Nov-Wrapped in Cheer
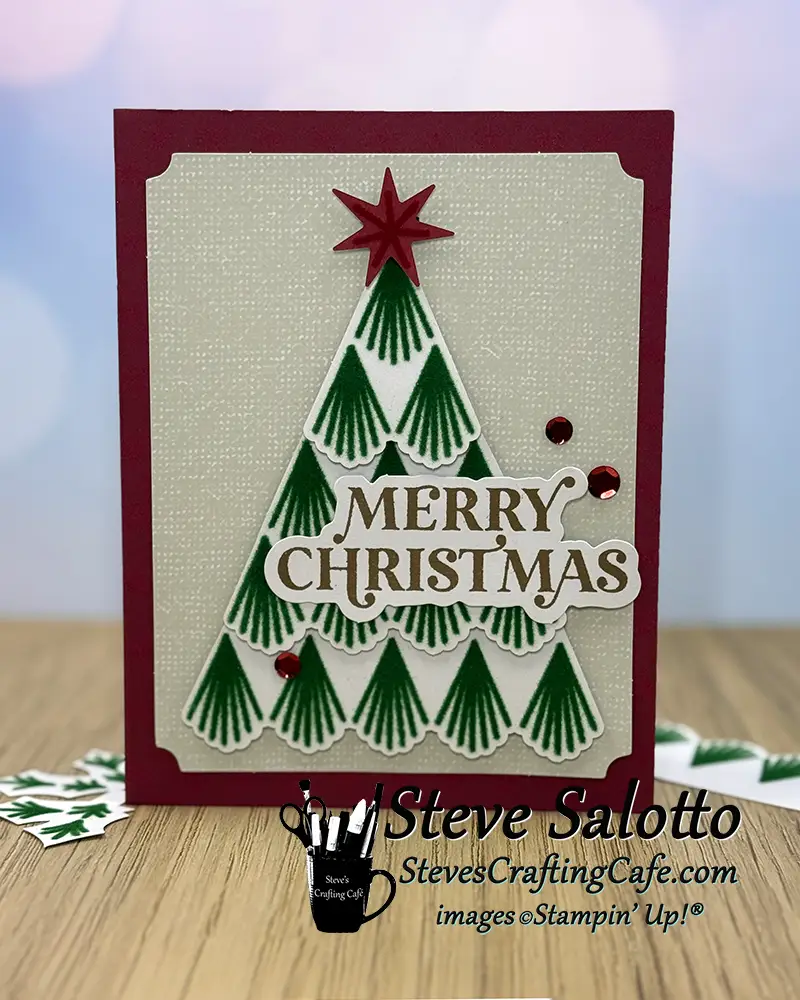
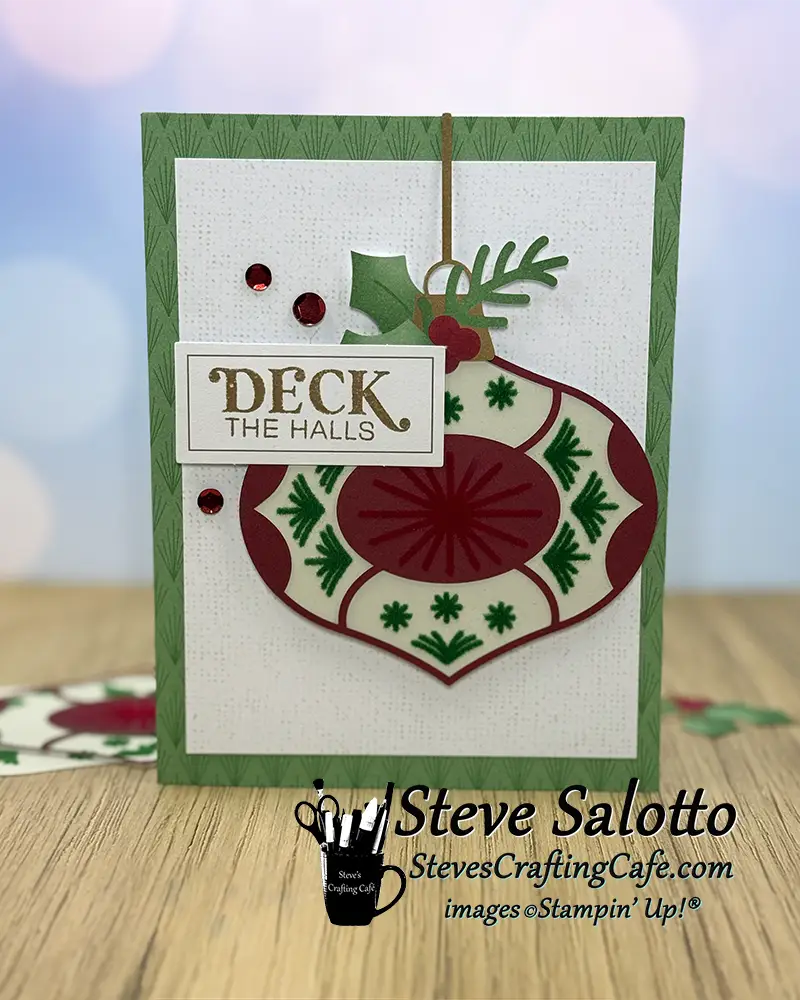
Oct-Cozy Christmas
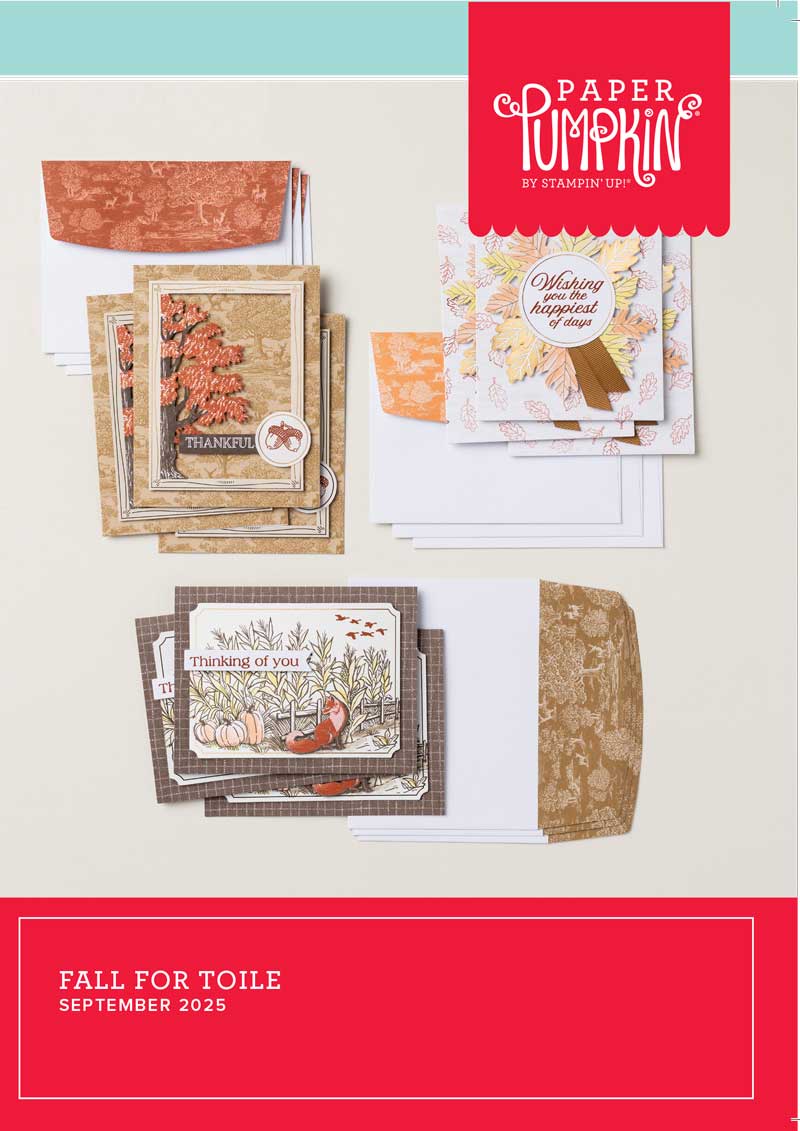
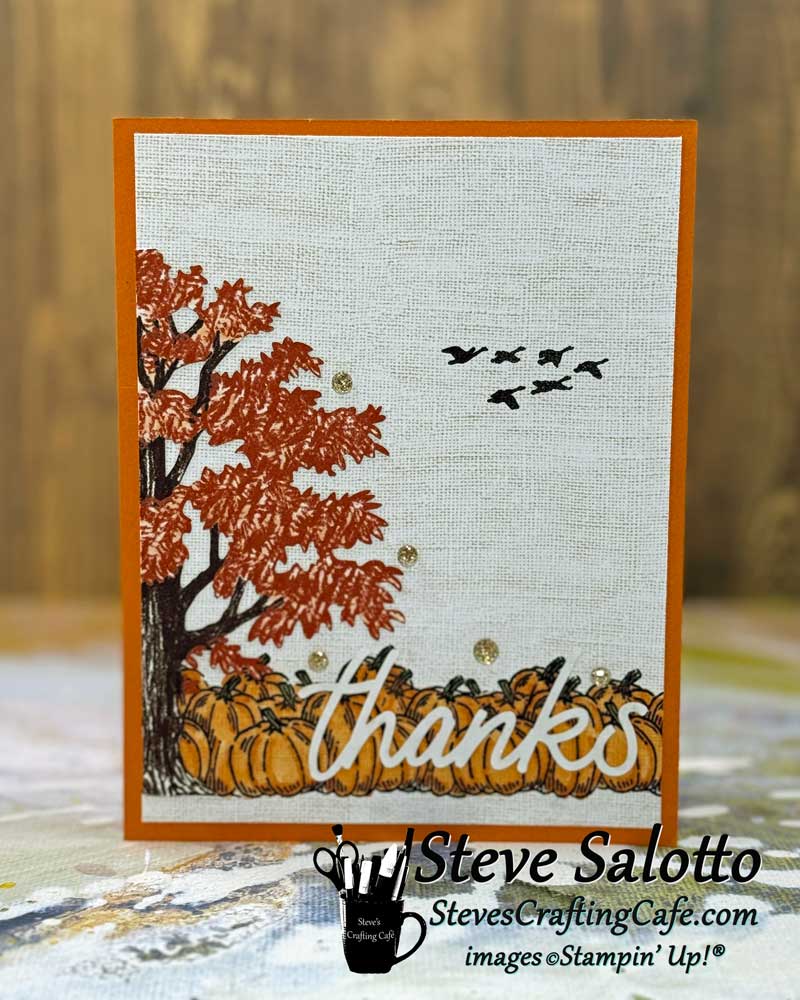
Sept-Fall for Toile
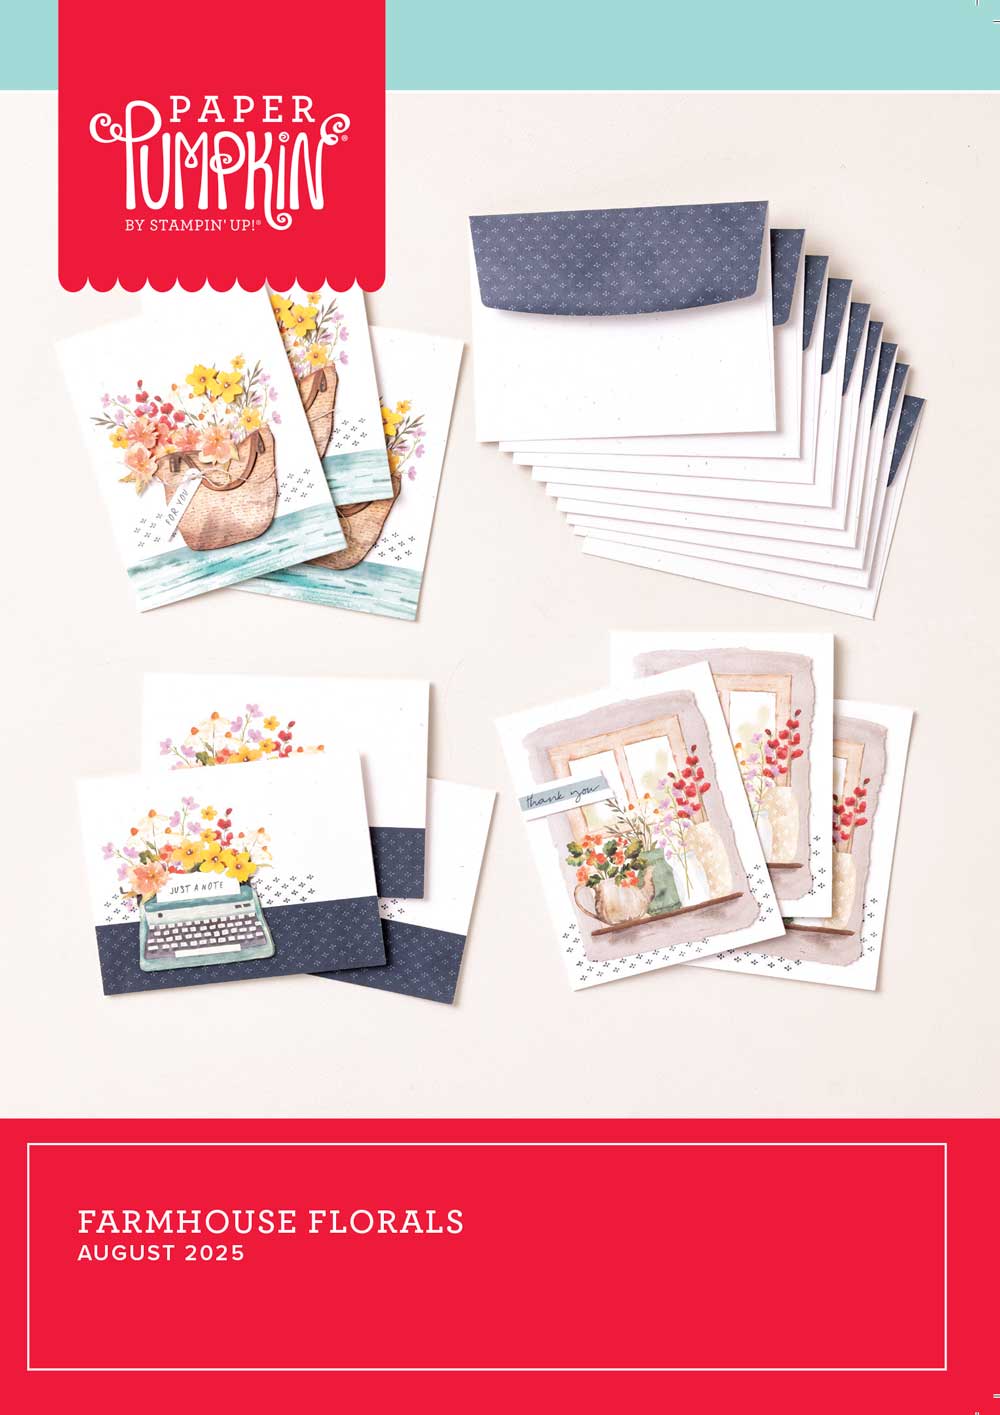
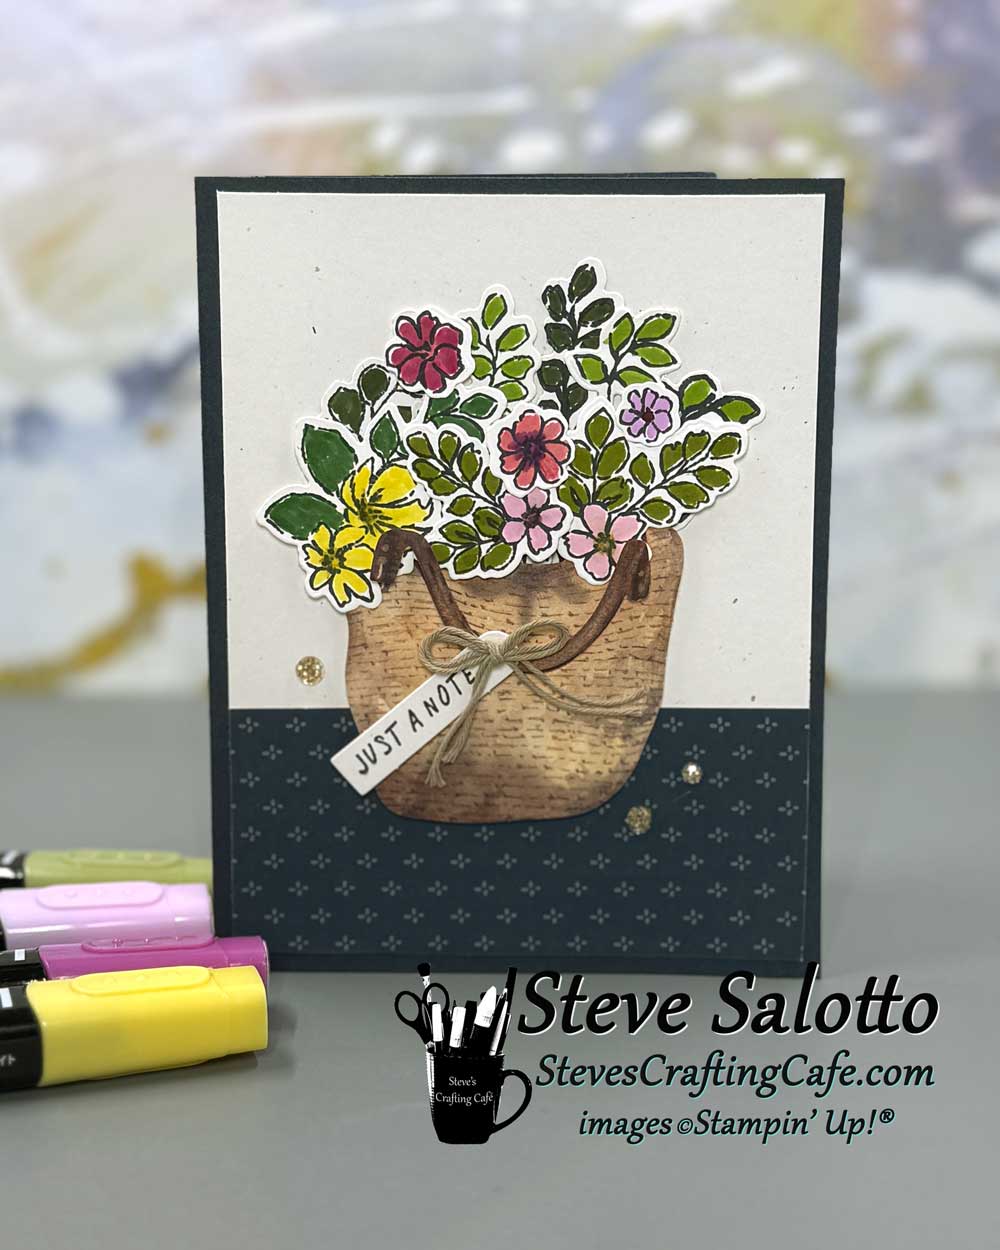
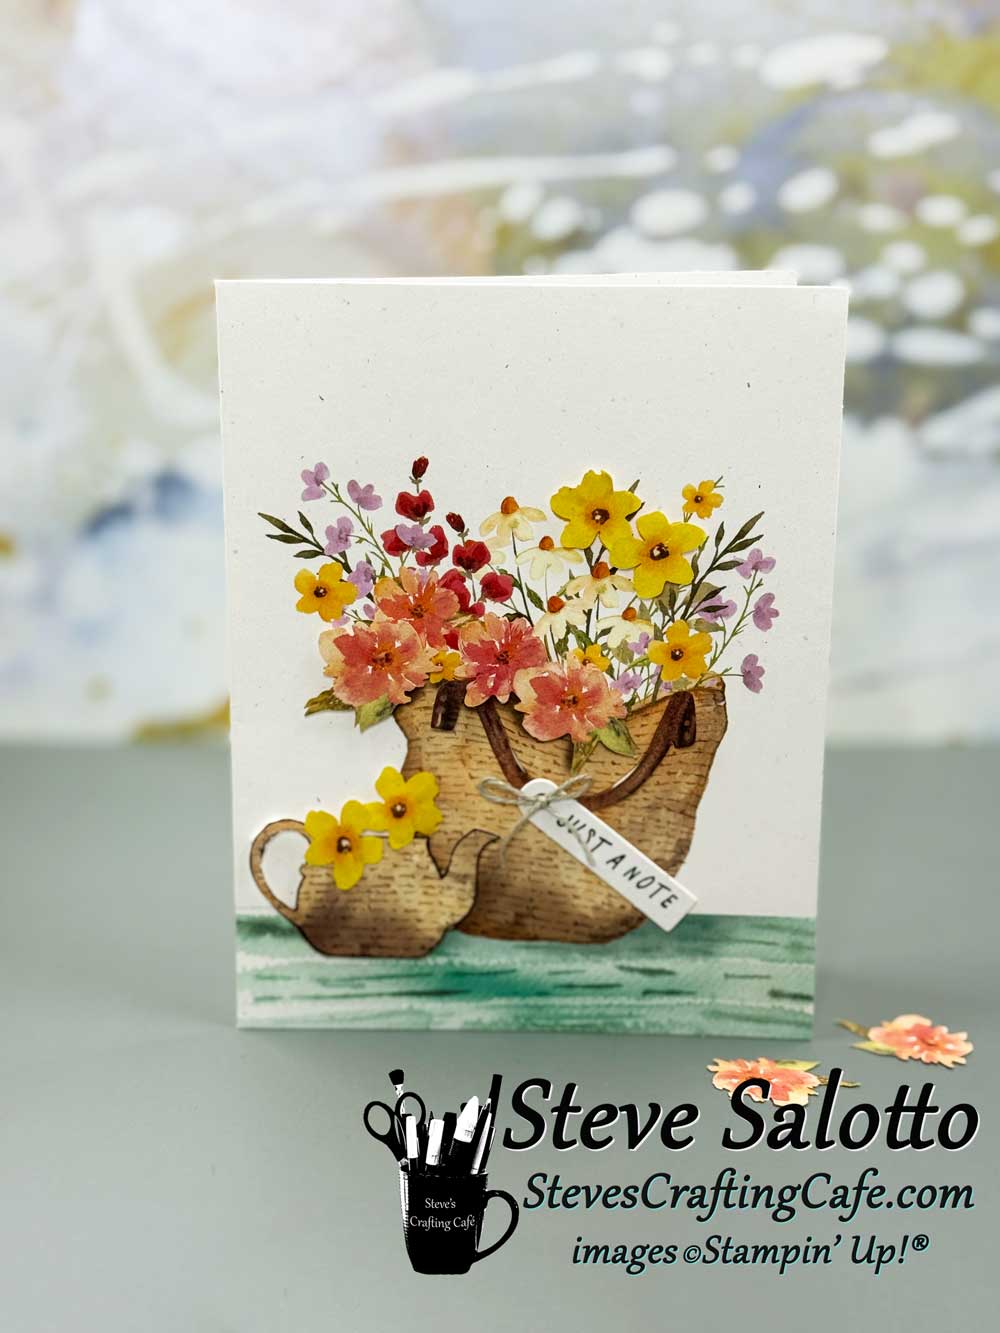
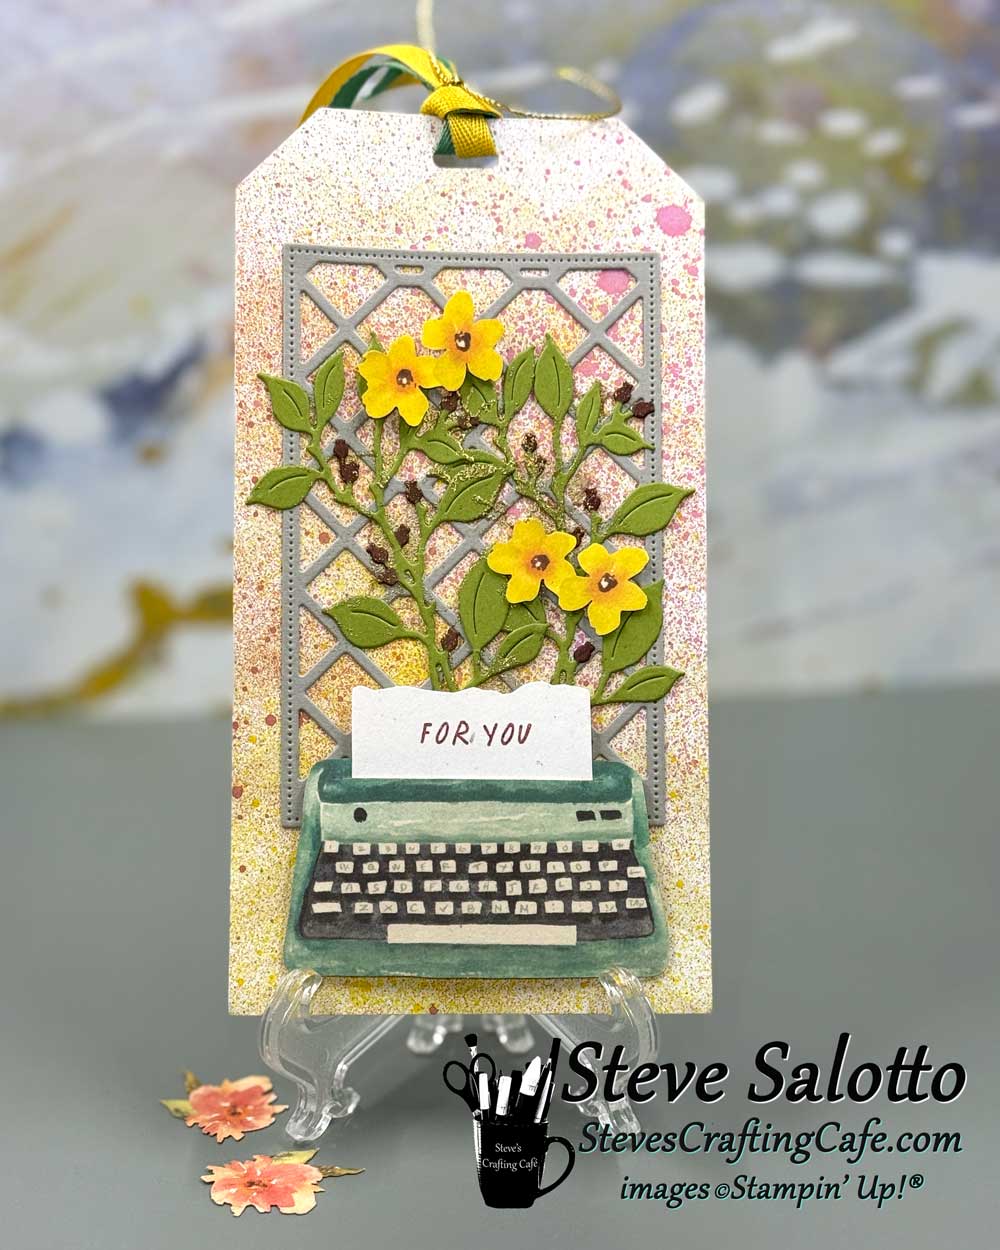
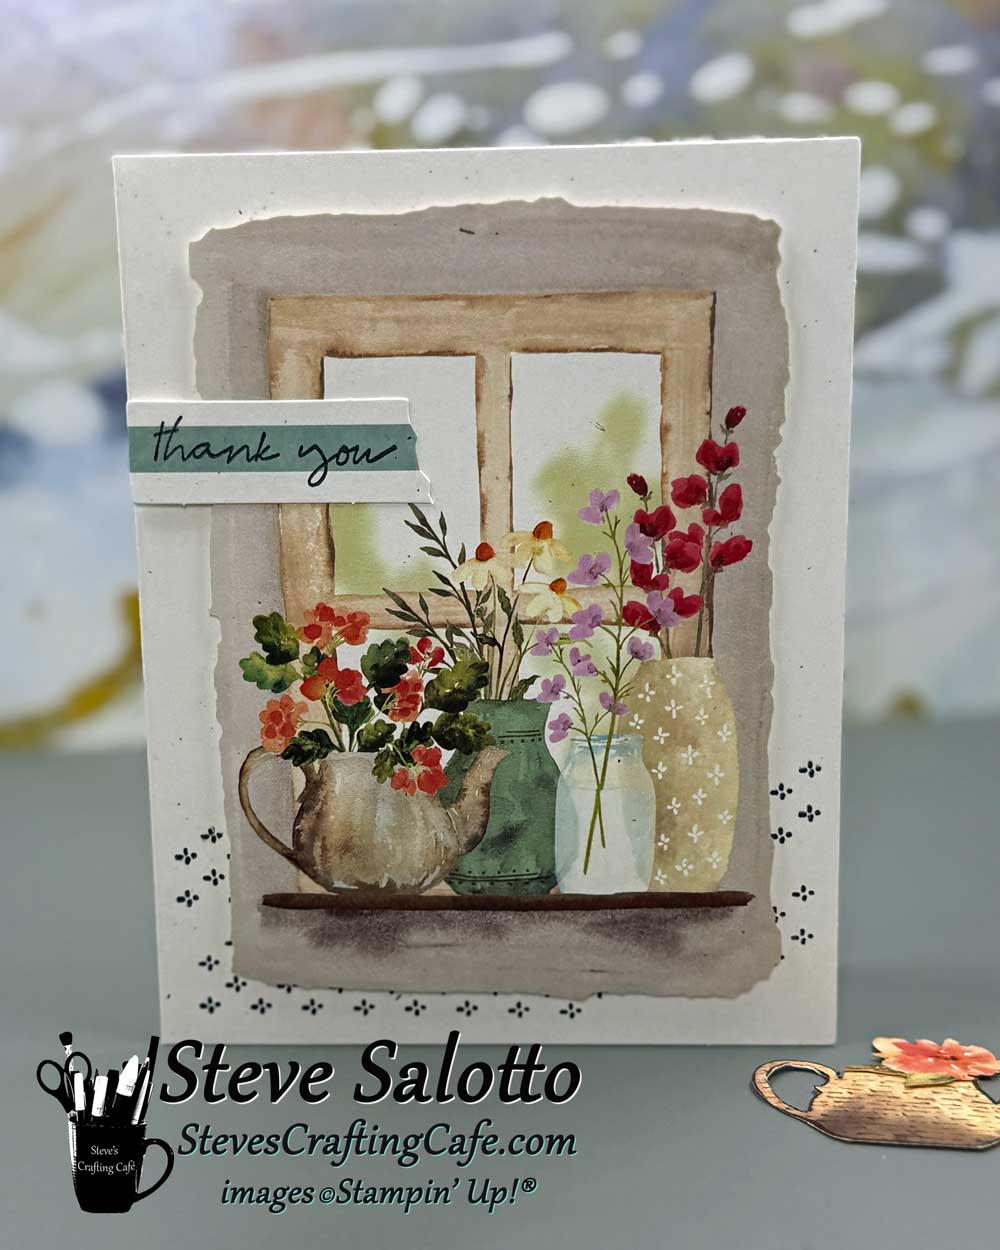
Aug-Farmhouse Florals
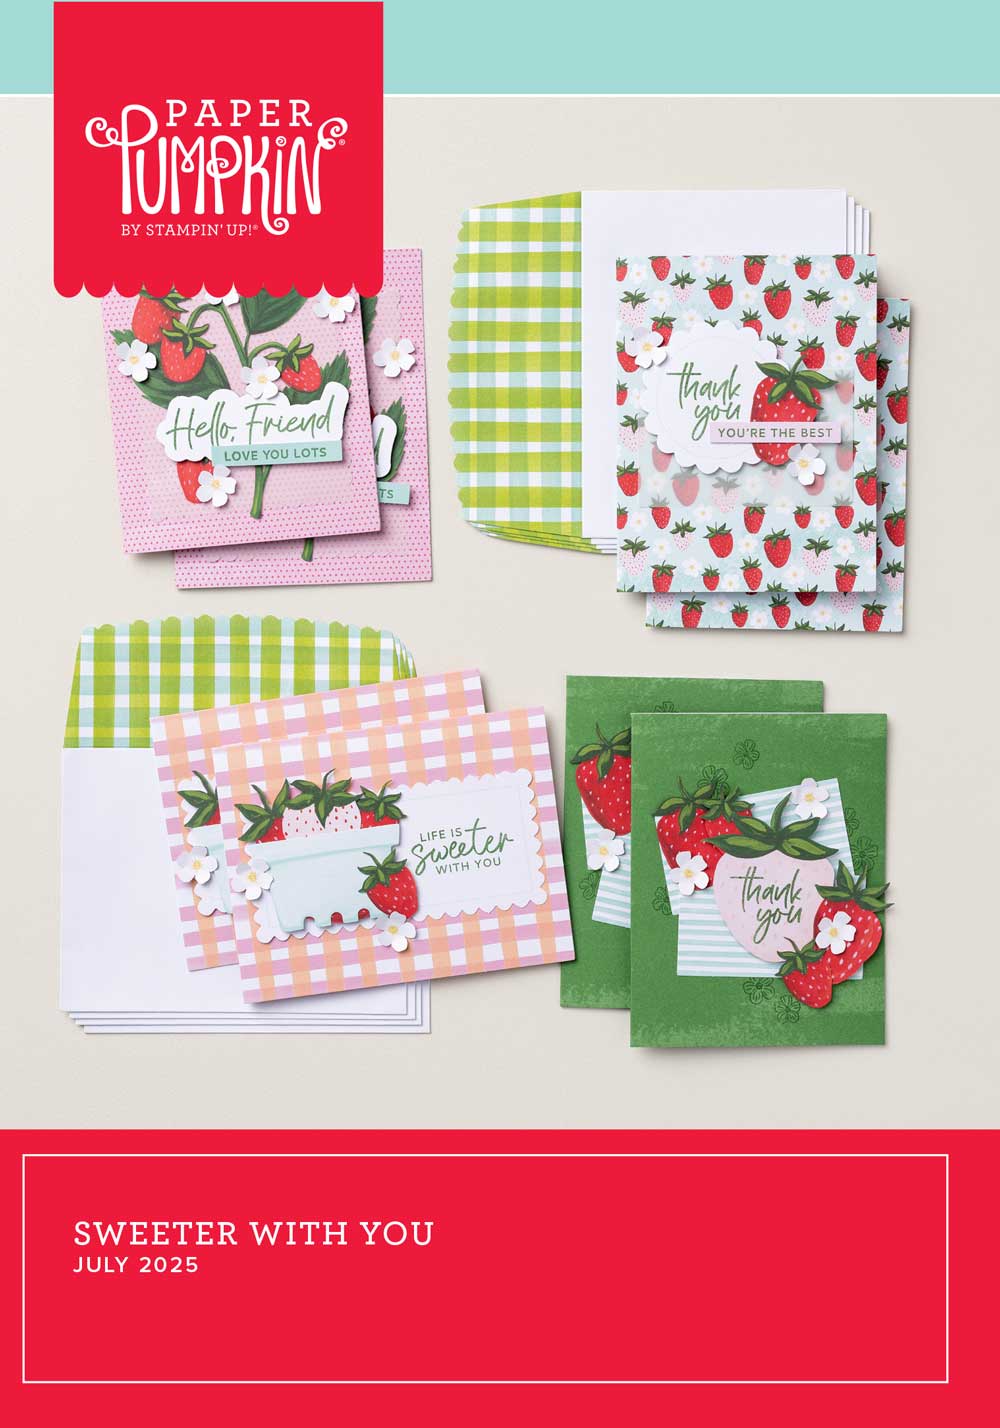
July-Sweeter With You
June-Full of Charm
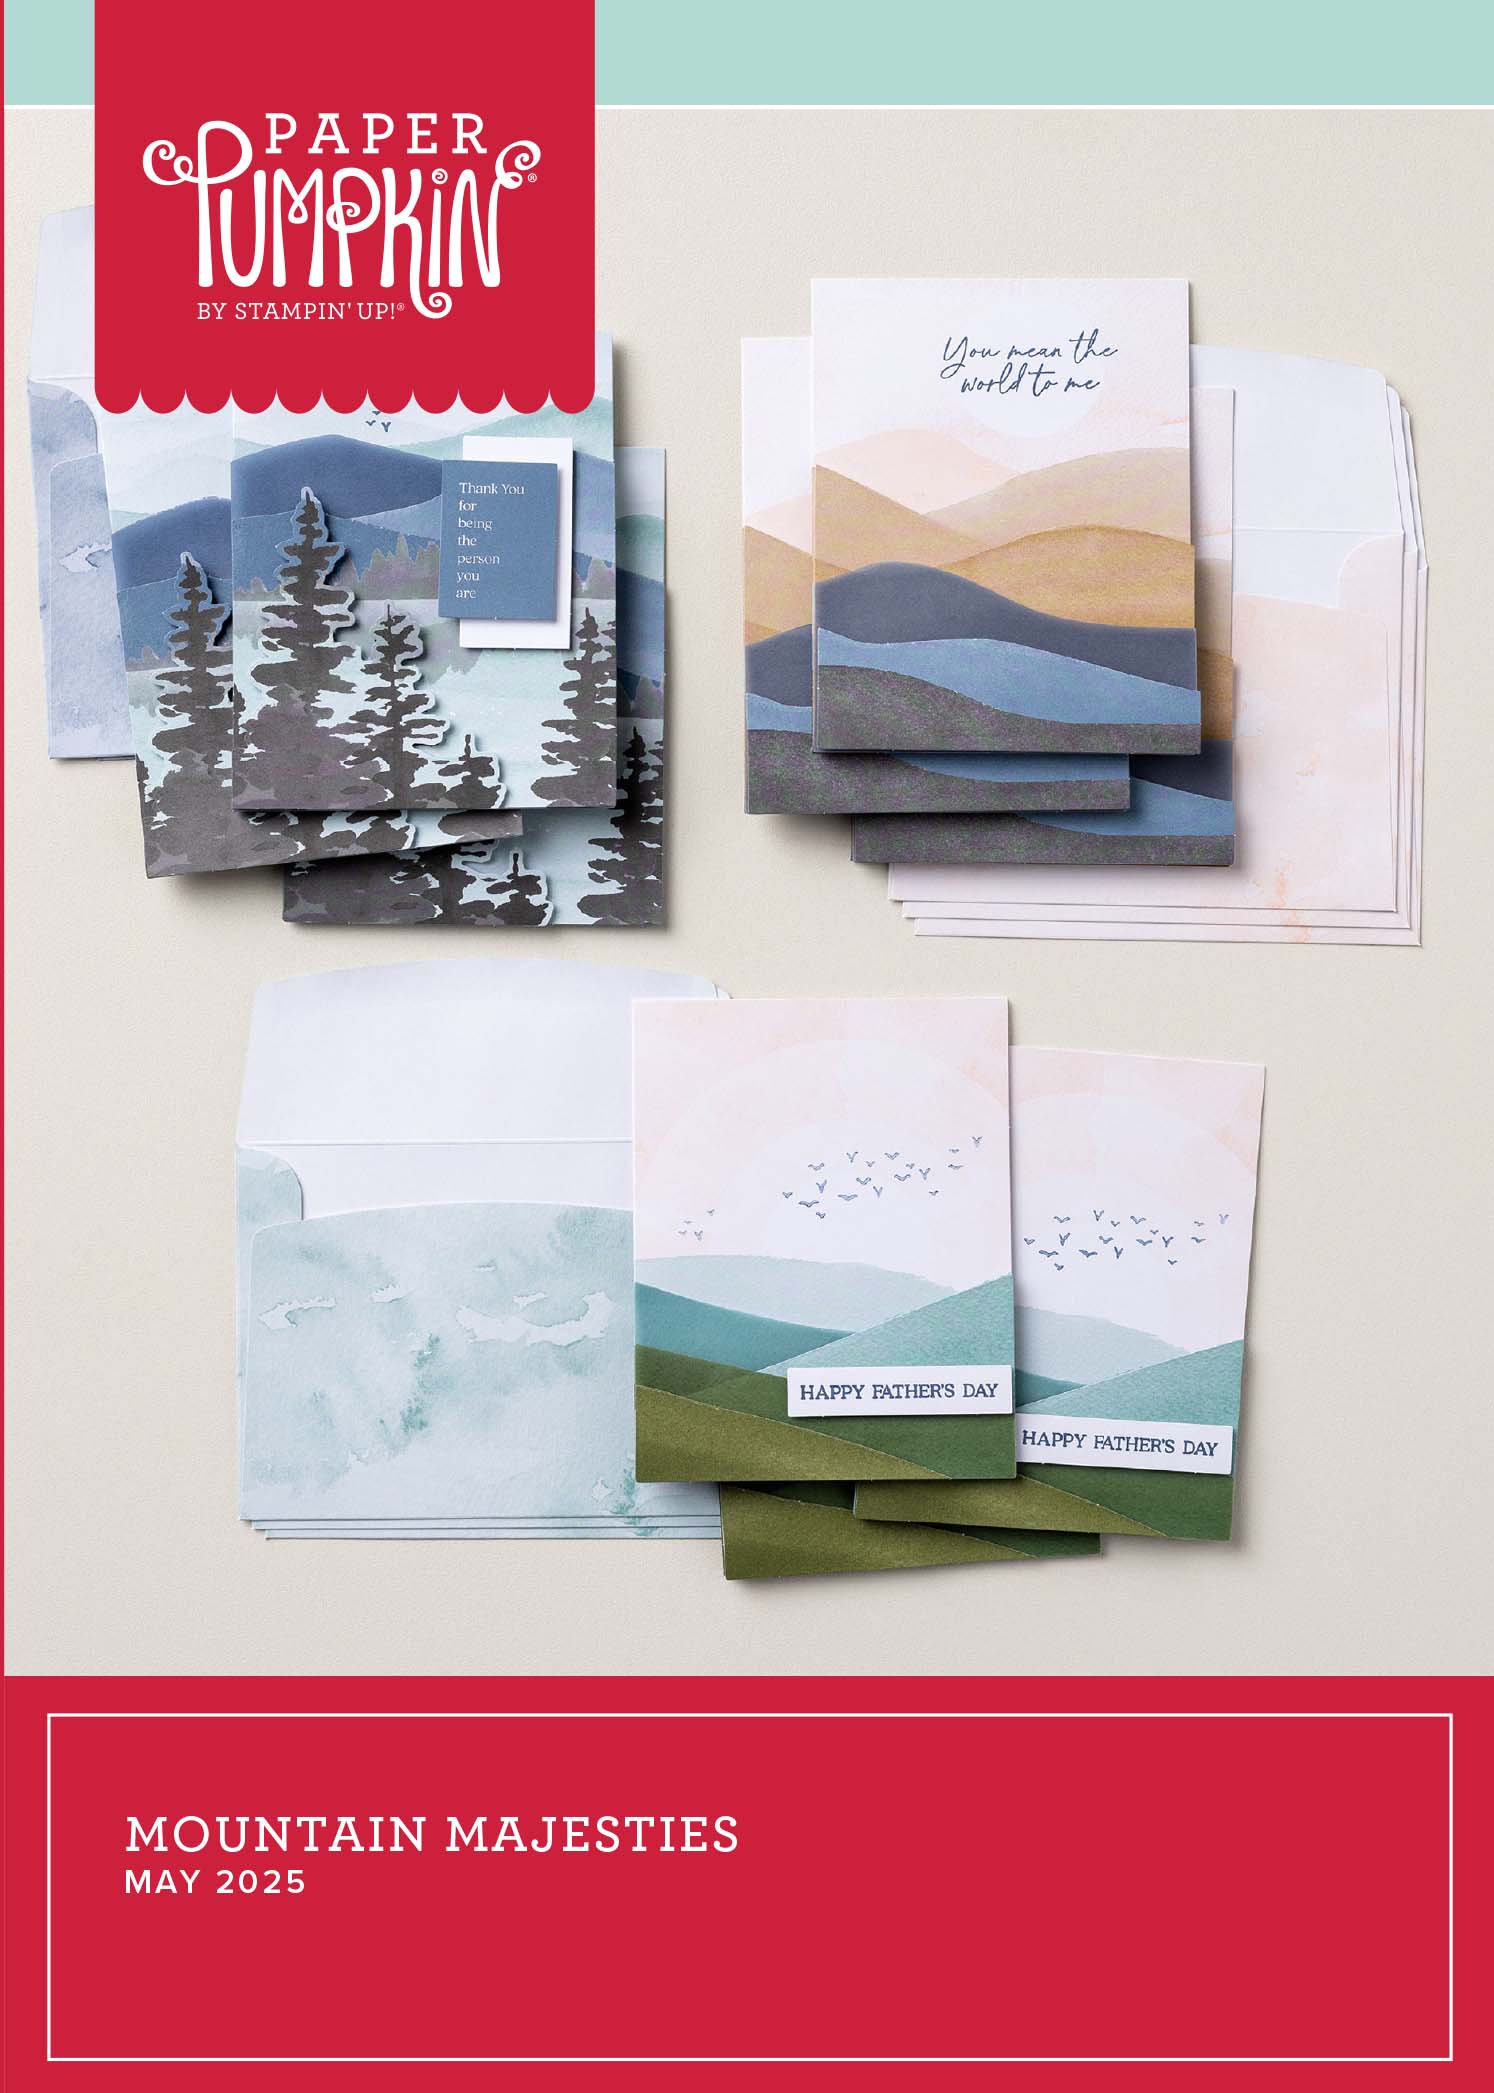
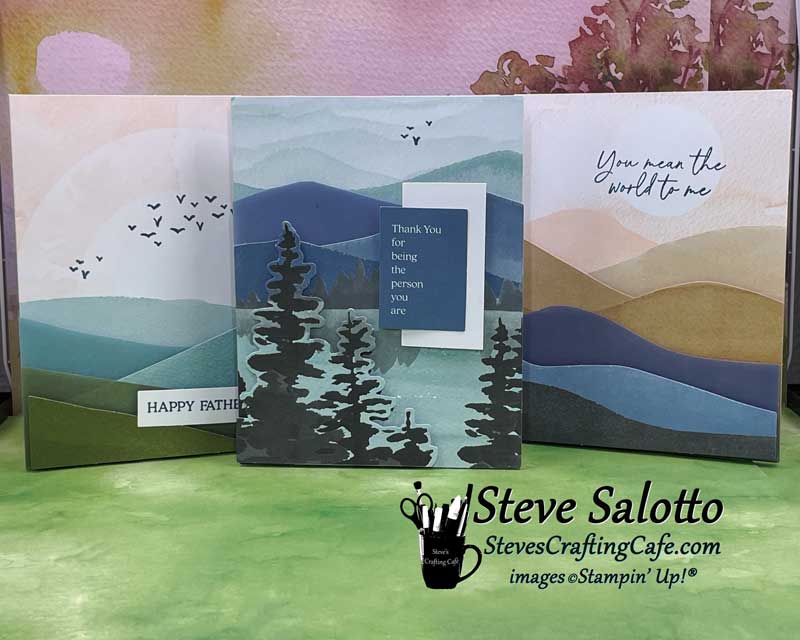
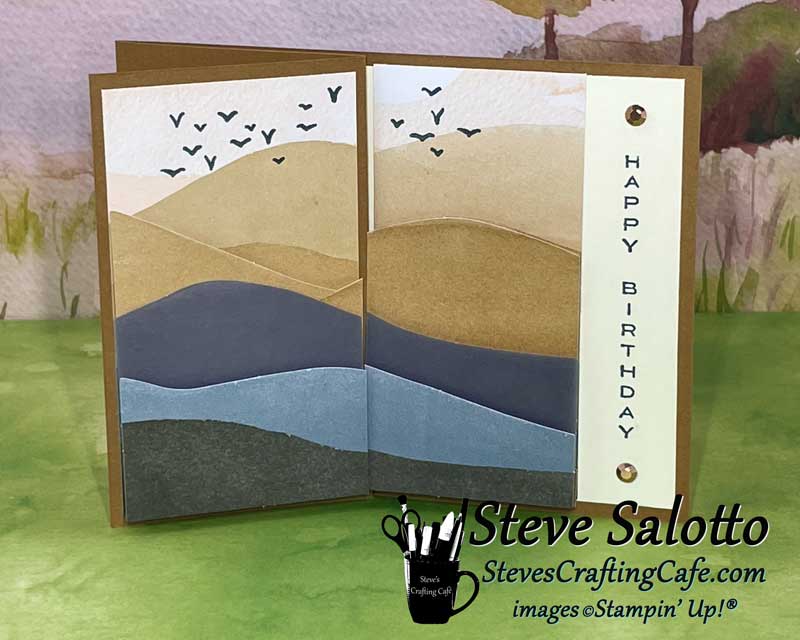
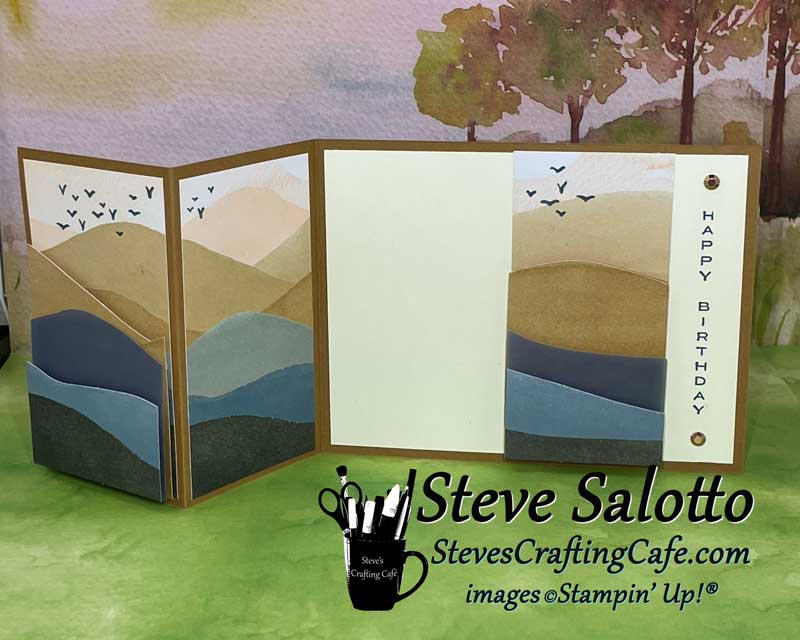
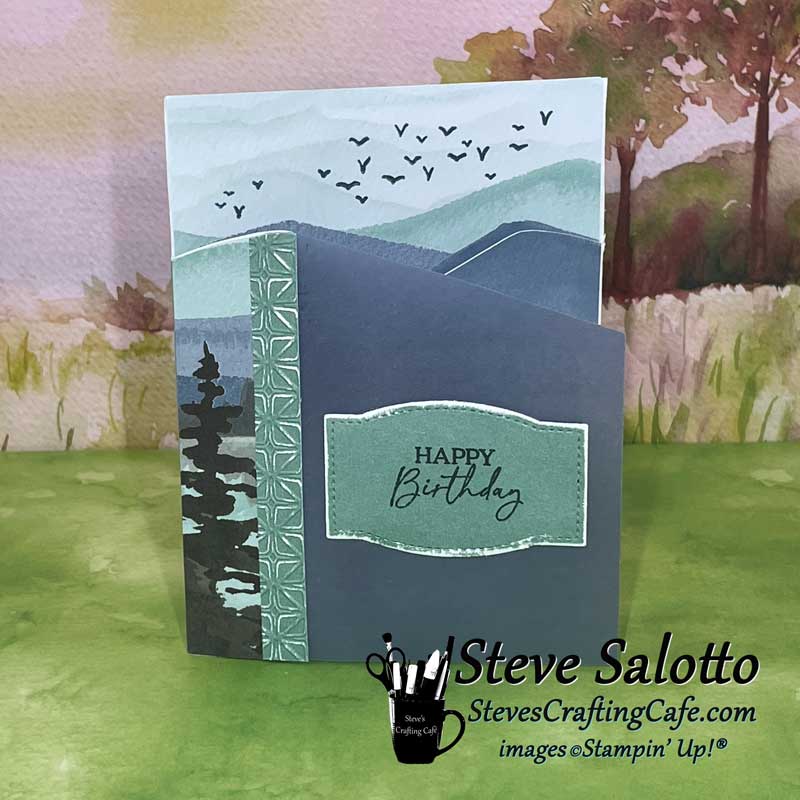
May-Mountain Majesties
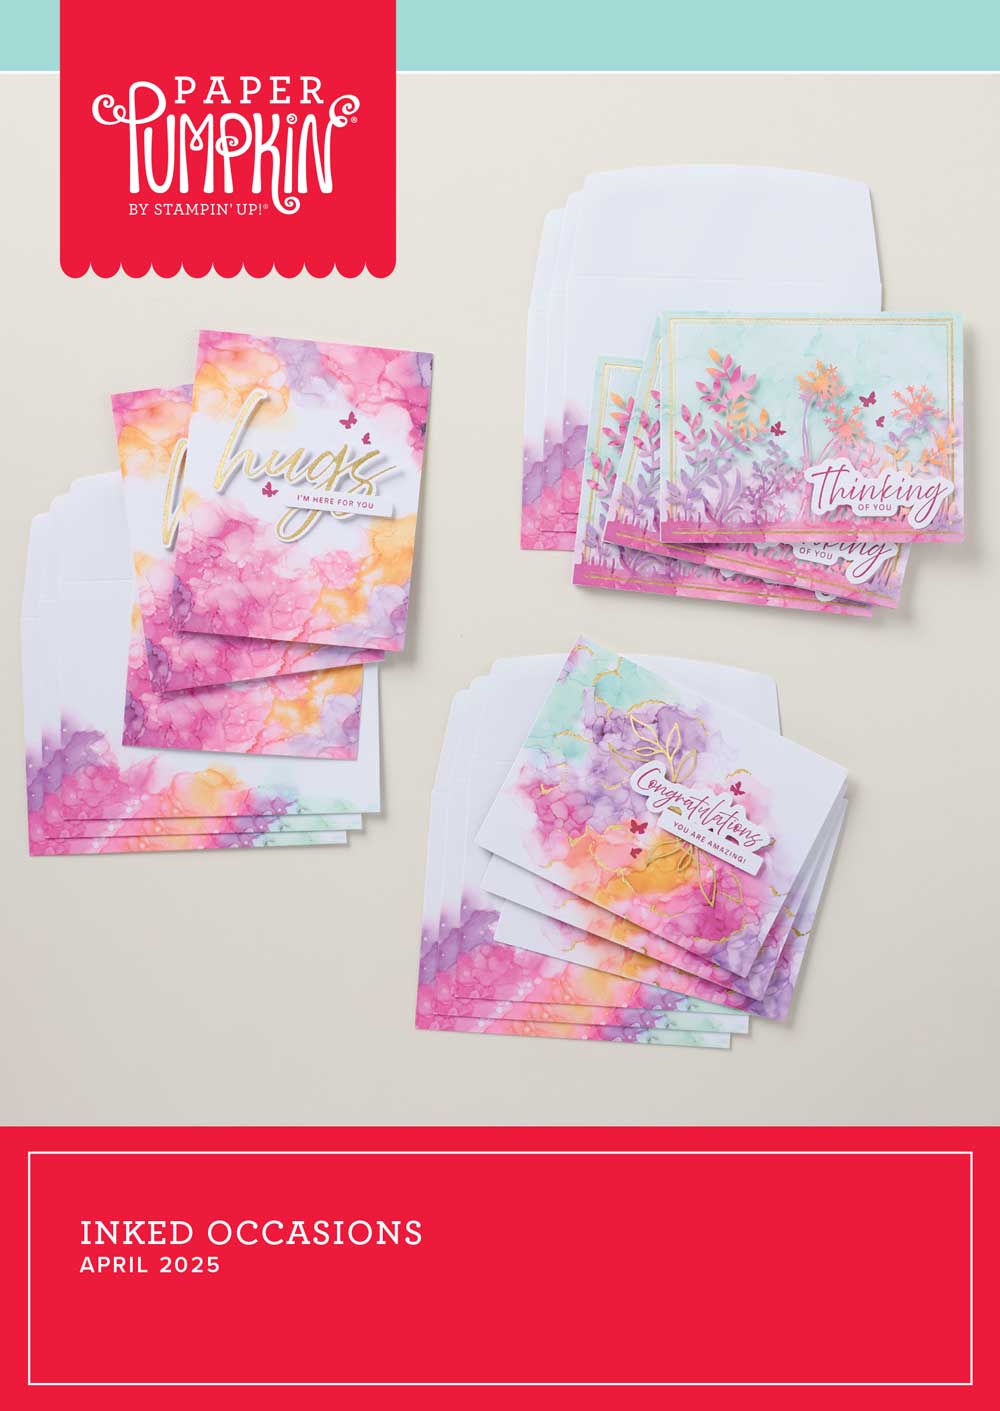
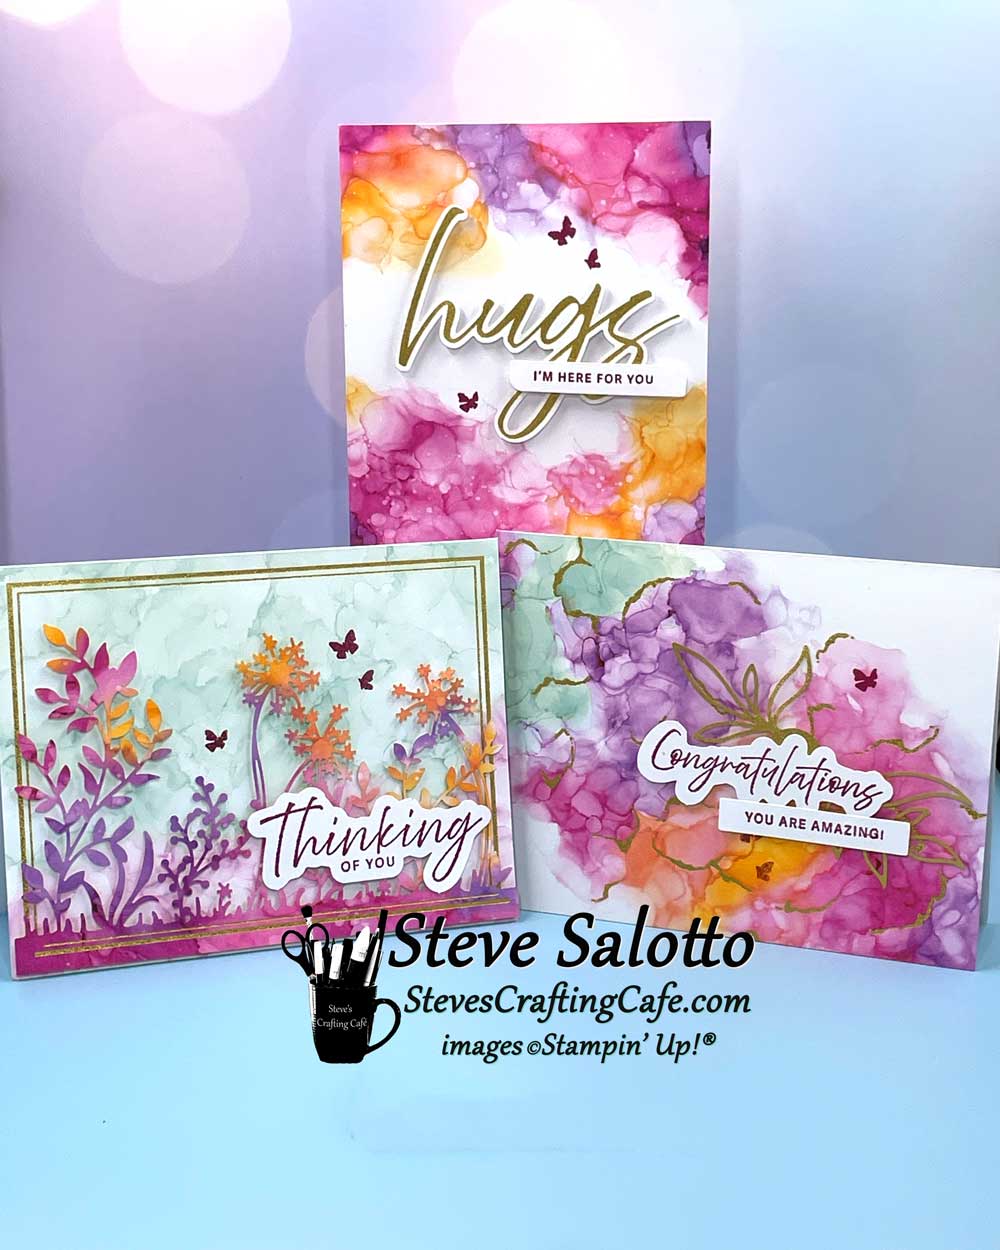
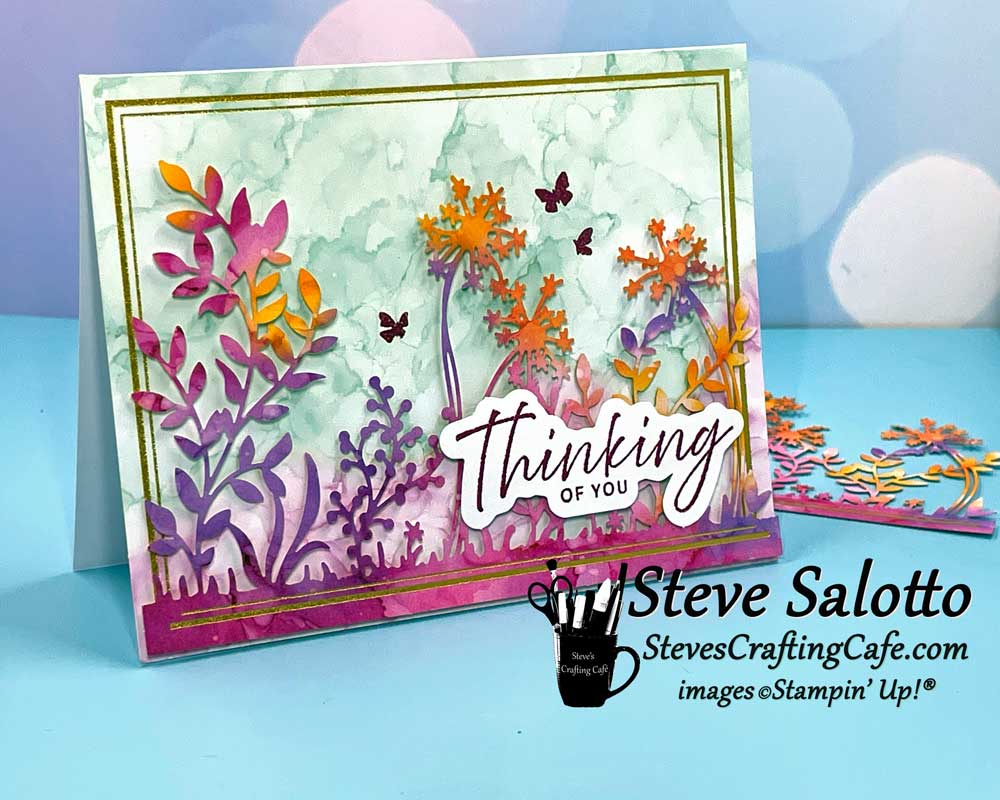
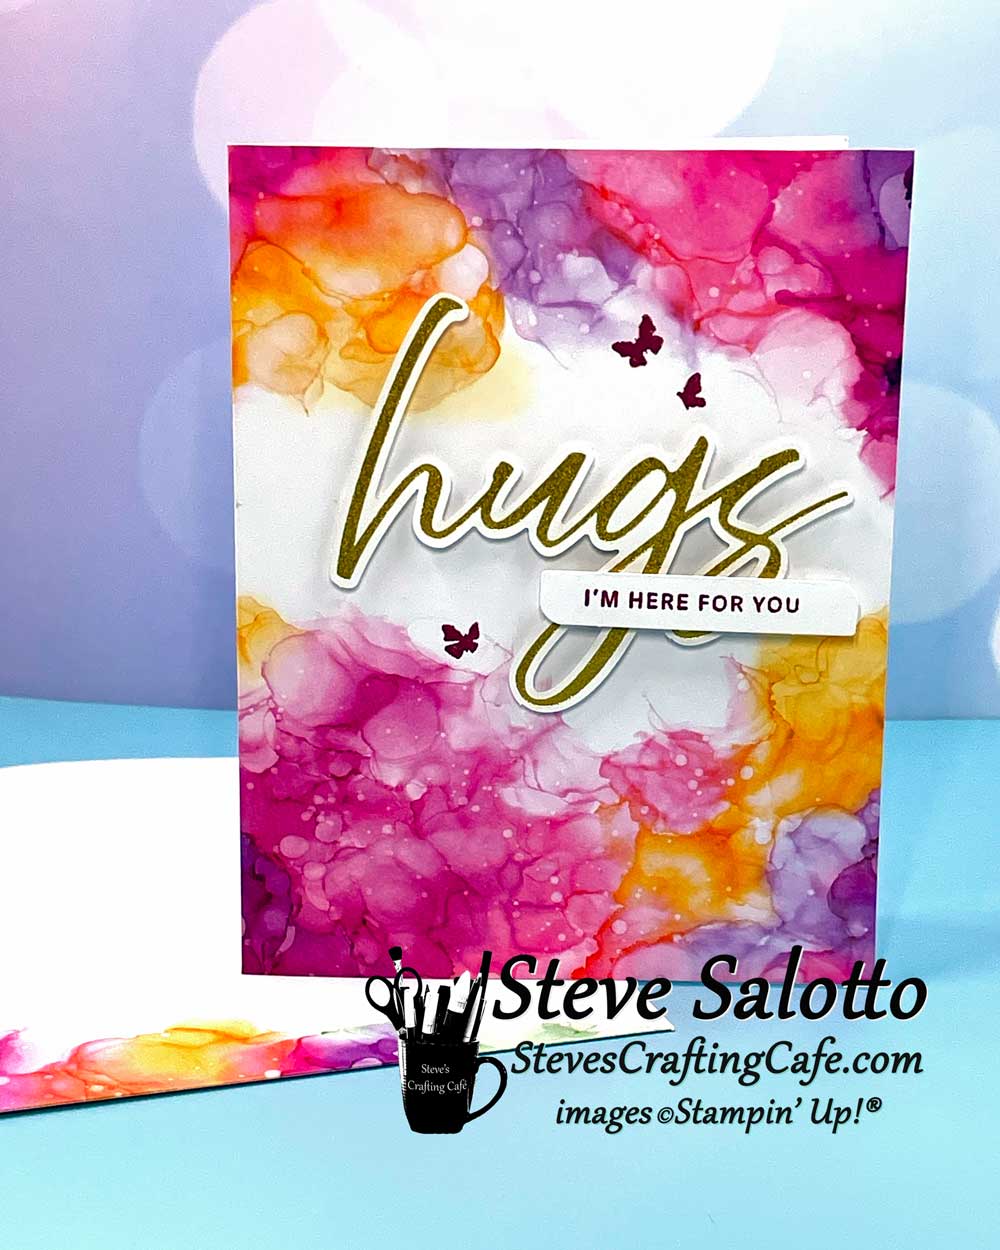
Apr-Inked Occasions
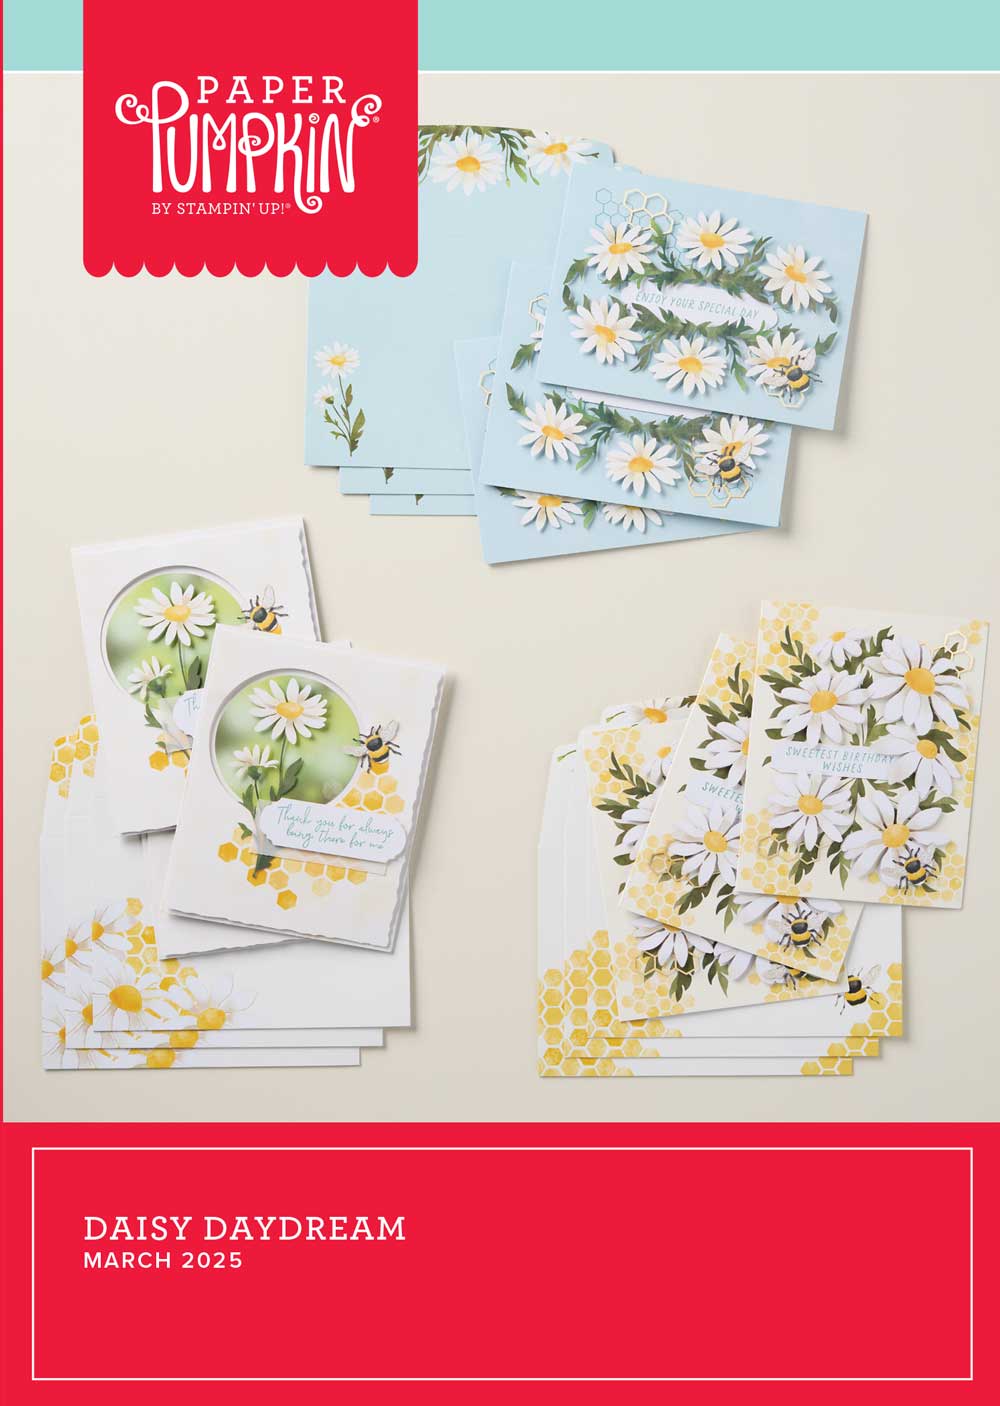
Mar-Daisy Daydreams
Feb-Hello Spring
Jan-Hearts For You
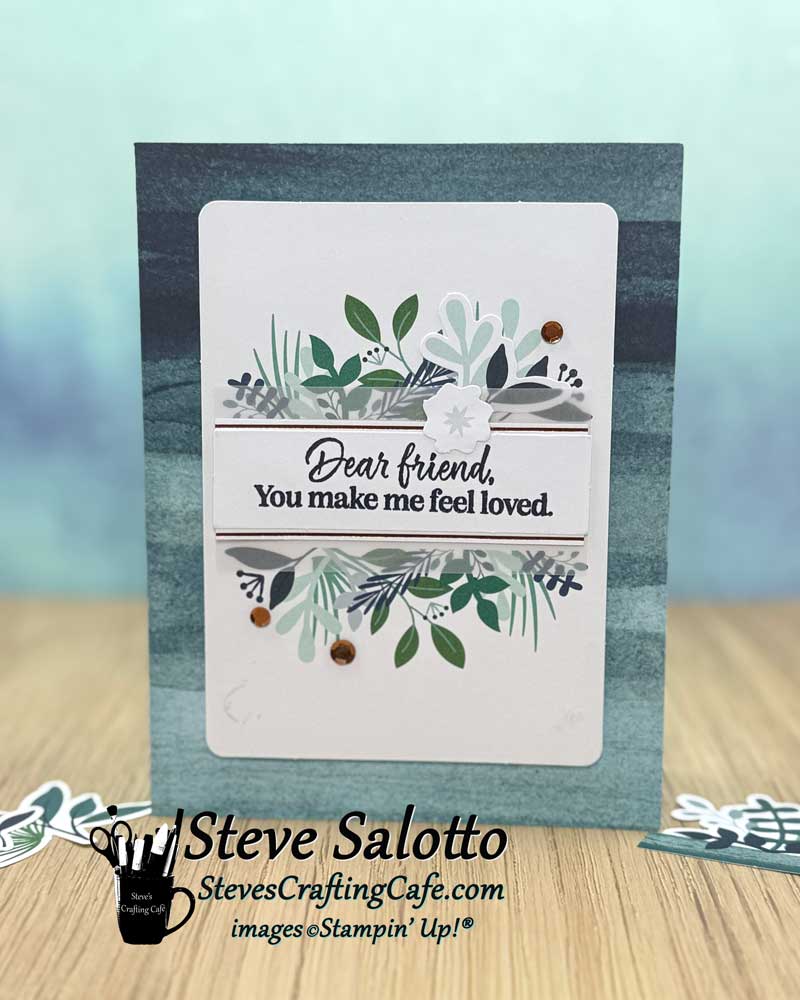
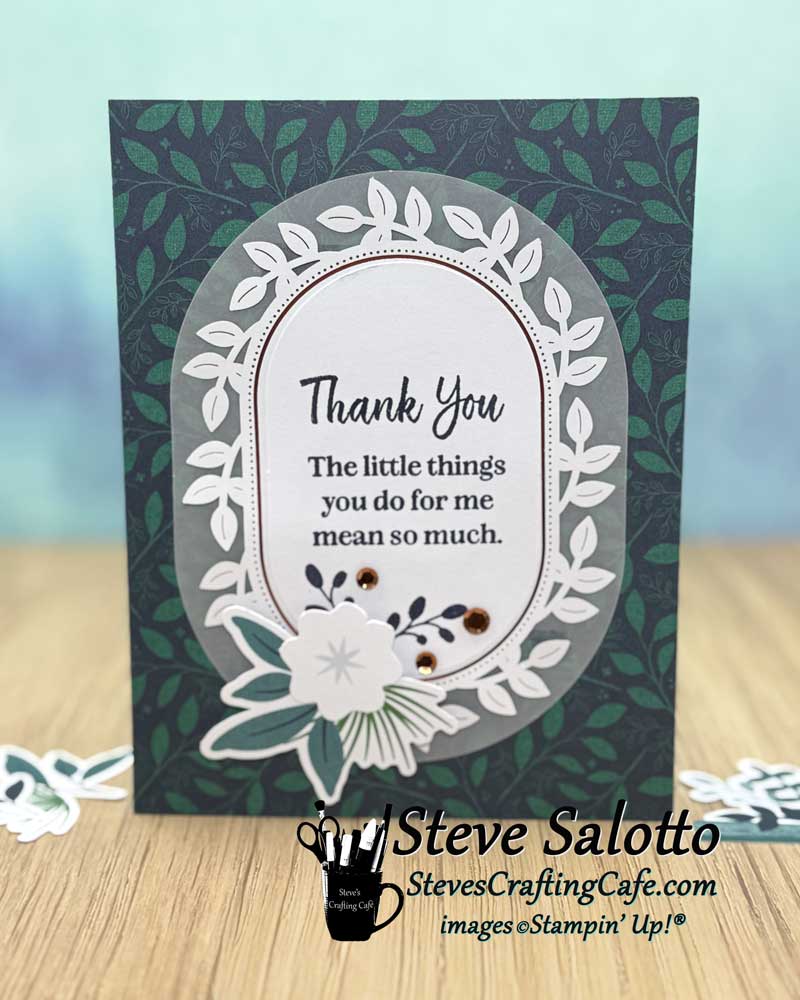
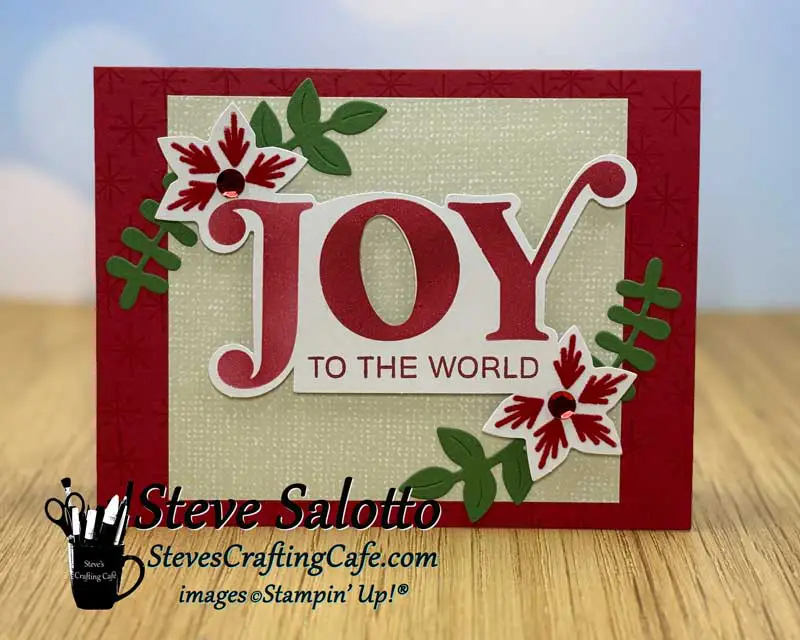
Kit card #1
Kit card #2
Kit card #3
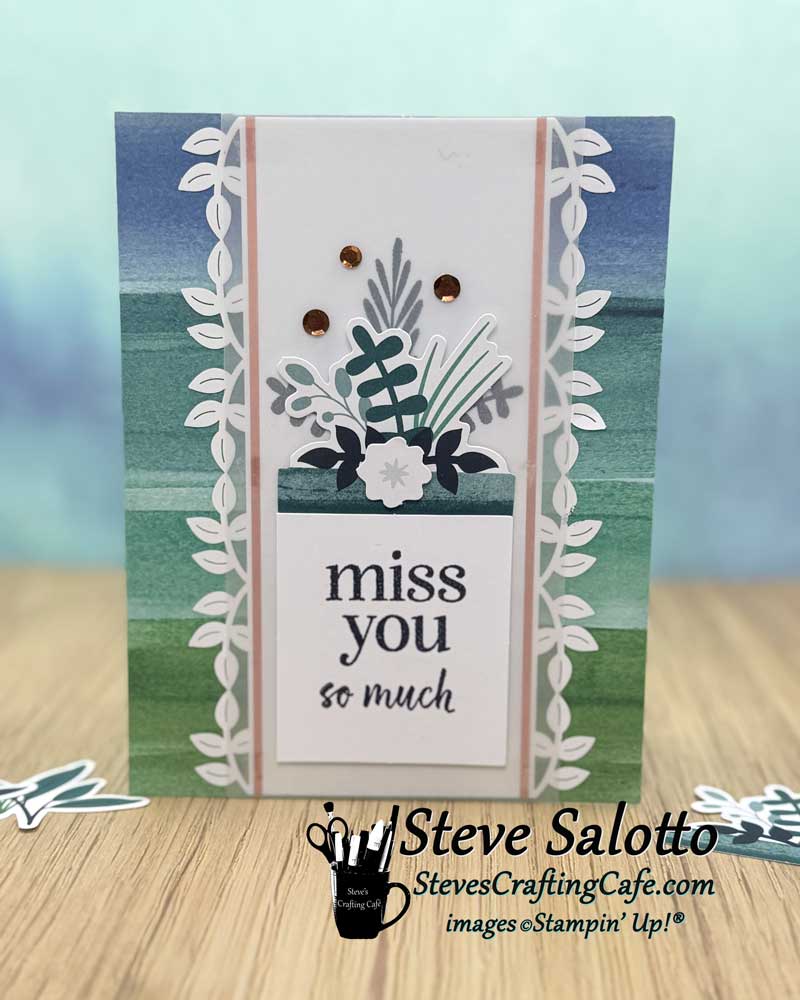
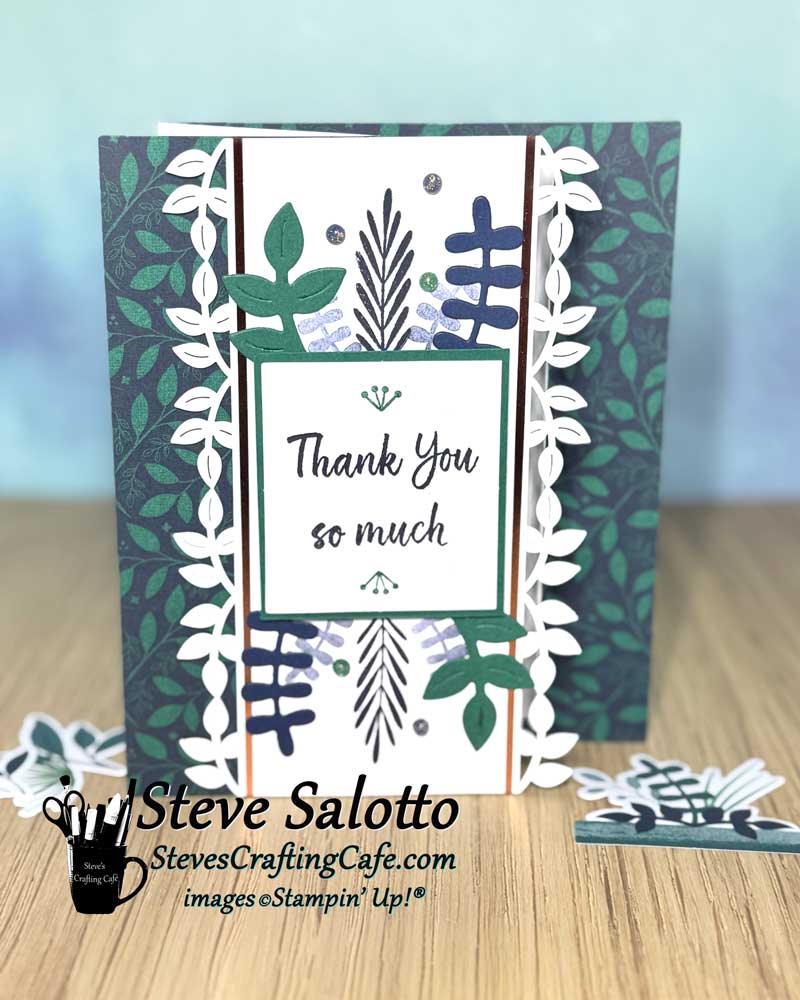
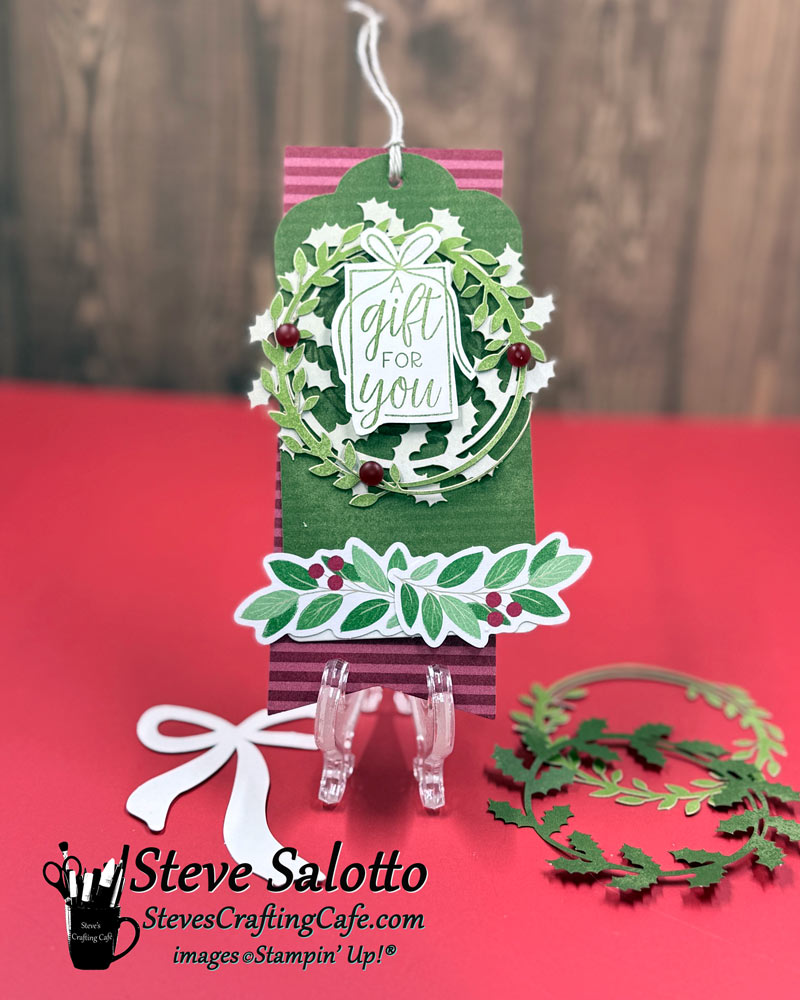
I made a z-fold card for my first alternate here. I love the white vines as a border. And I used the leaves from the "Abundant Joy" dies add-on.
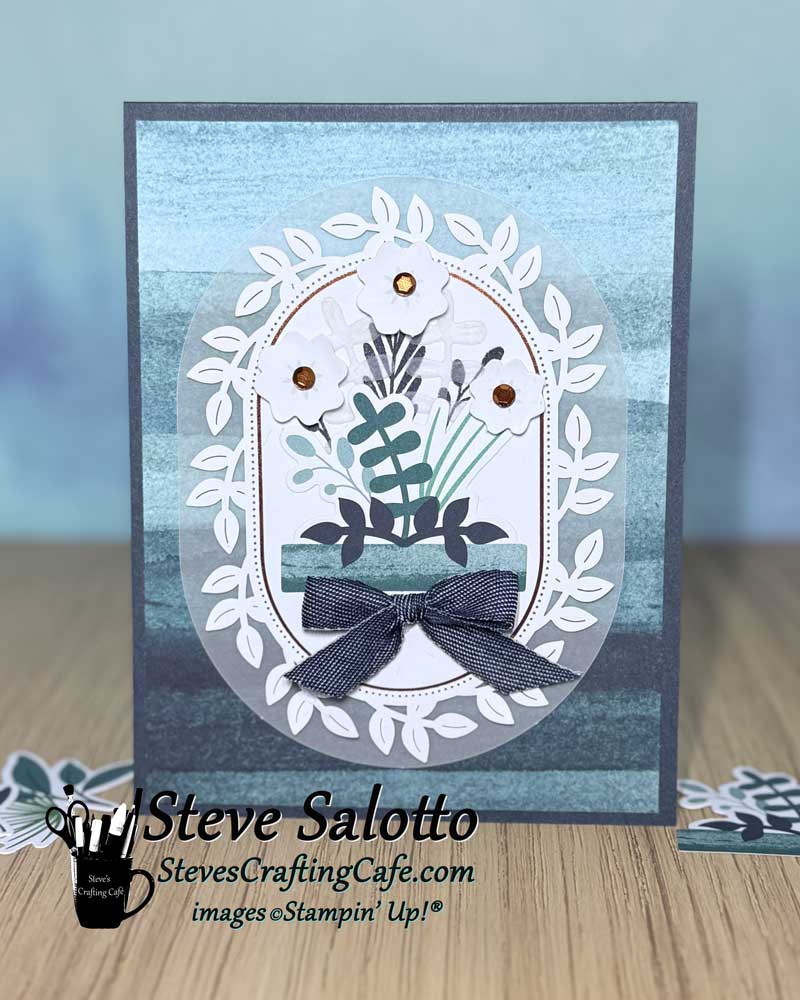
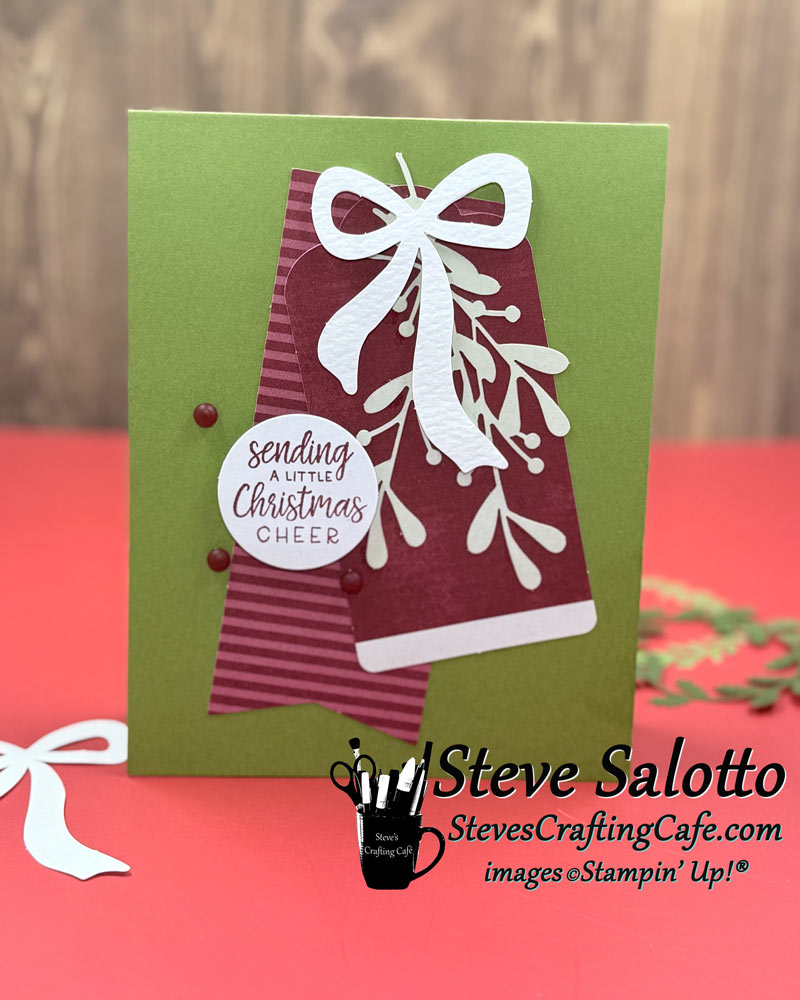
This alternate turned out so pretty that I decided a sentiment wasn't needed.
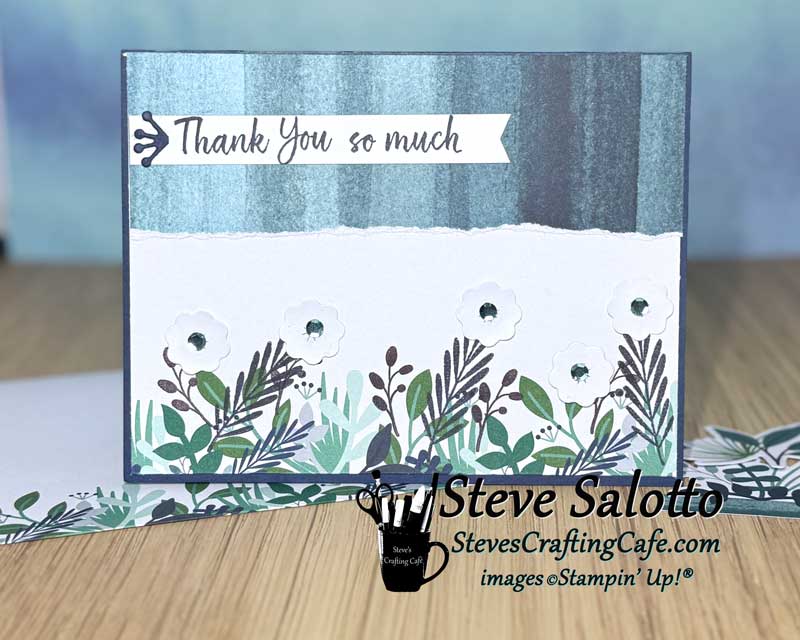
For this alternate, I cut off the bottom of an envelope, added die cut flowers from the add-
My first alternate was just a redesign of the box.
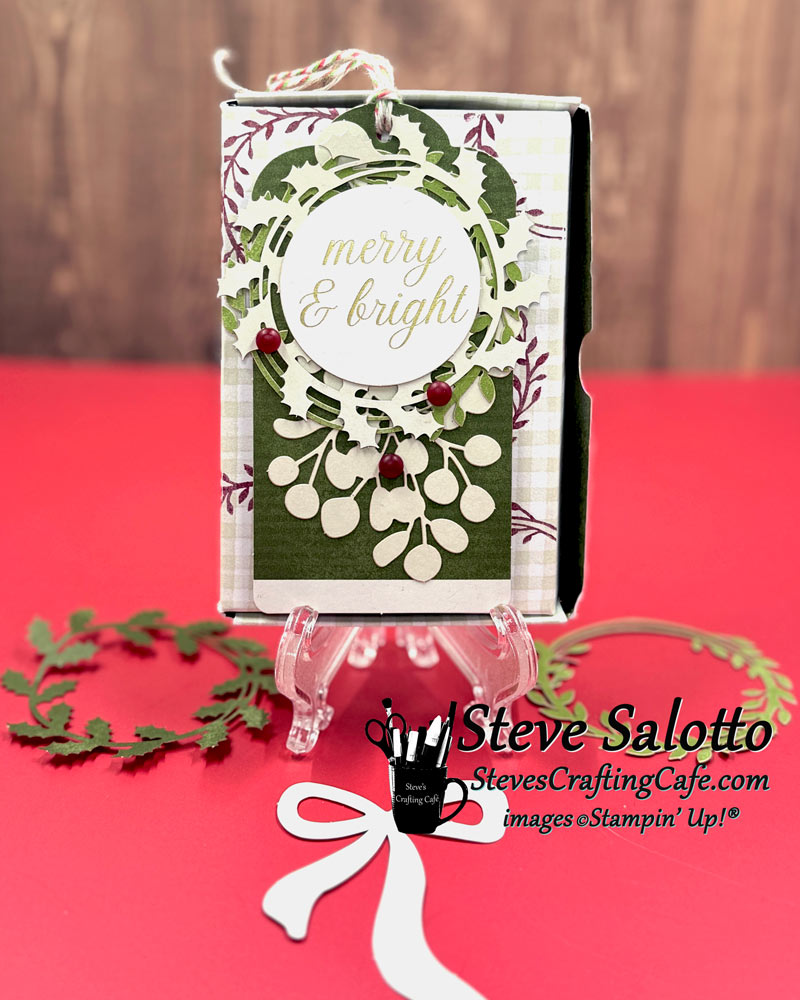
Another alternate box with a sentiment from the "Greetings for You Ephemera Pack"
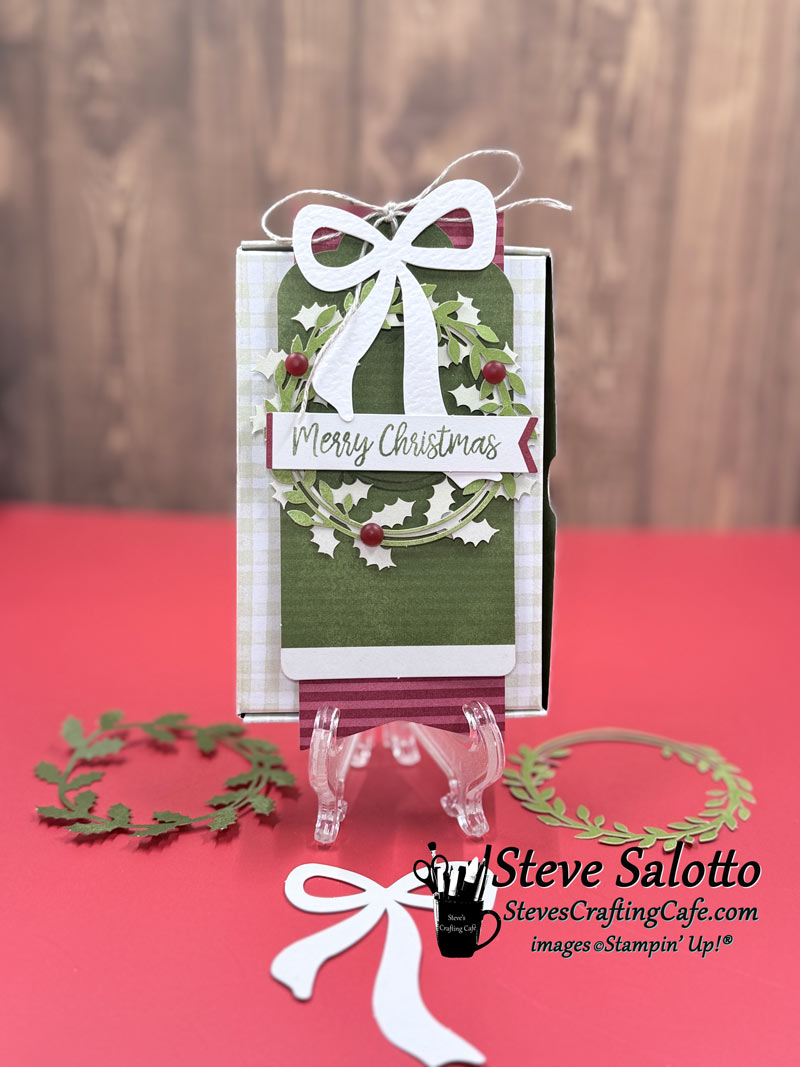
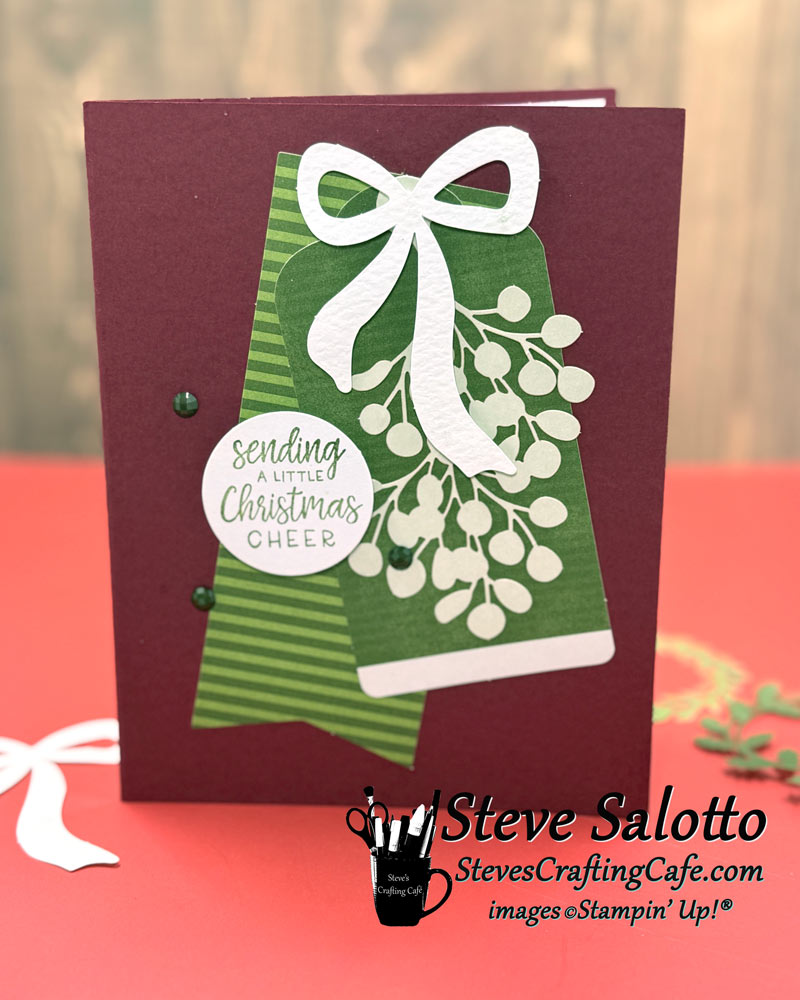
I created a tag without the box for this alternate.
The classic "tag on a card" card design. It looks a little "flat" for my tastes, but it's a nice, neat, clean design for those who like it. I made it in two color schemes. This one is green card with red tags.
The classic "tag on a card" card design. It looks a little "flat" for my tastes, but it's a nice, neat, clean design for those who like it. I made it in two color schemes. This one is red card with green tags.
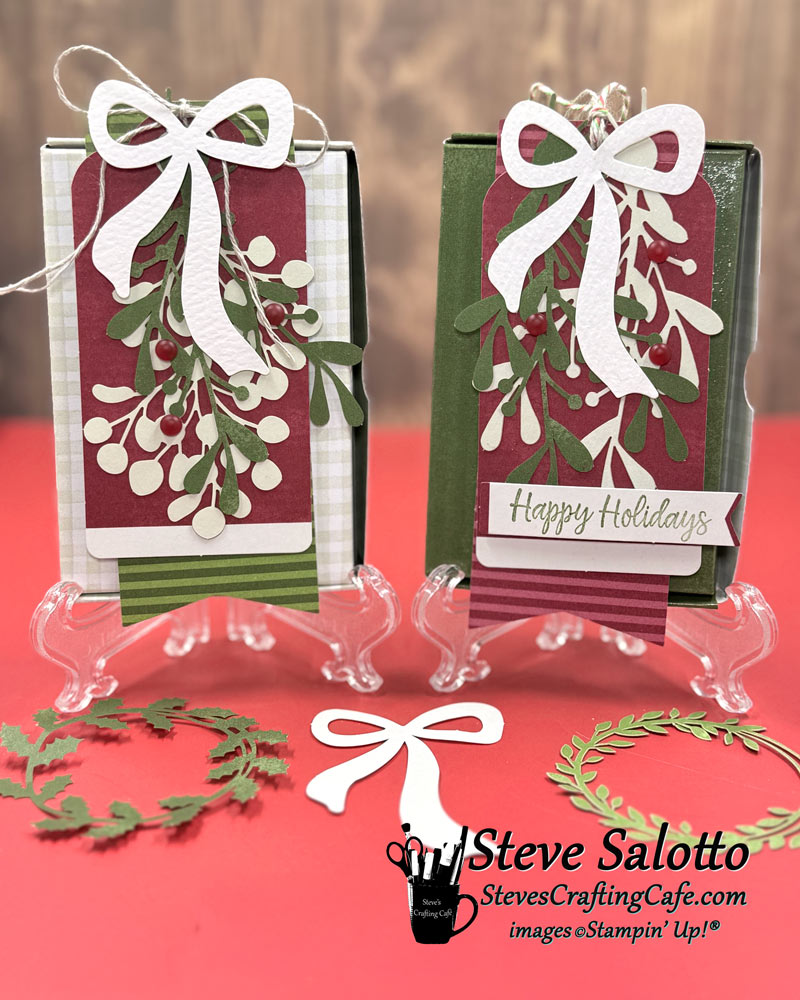
The two box designs from this month's kit.
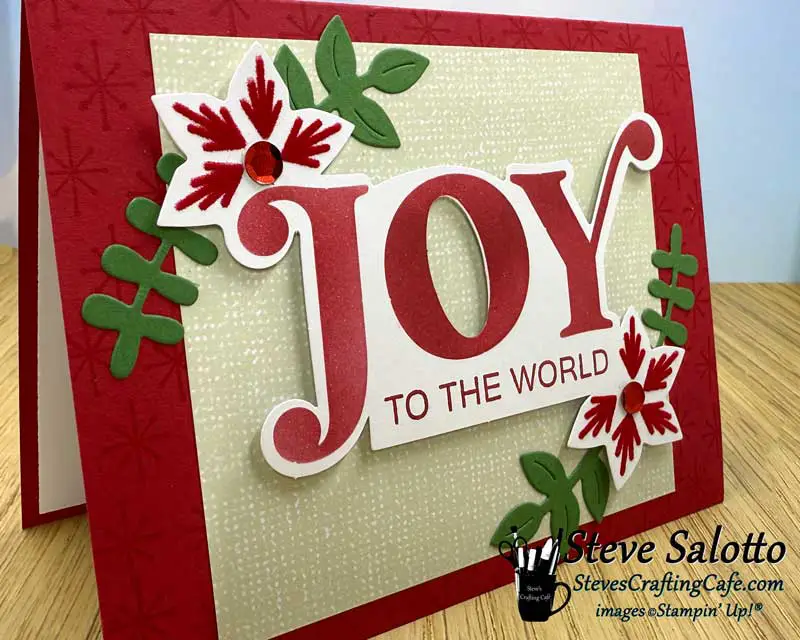
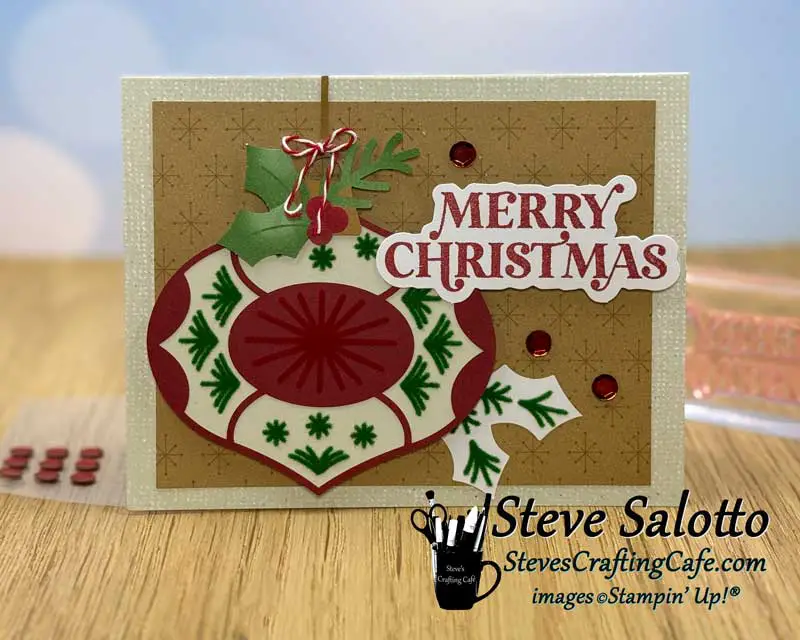
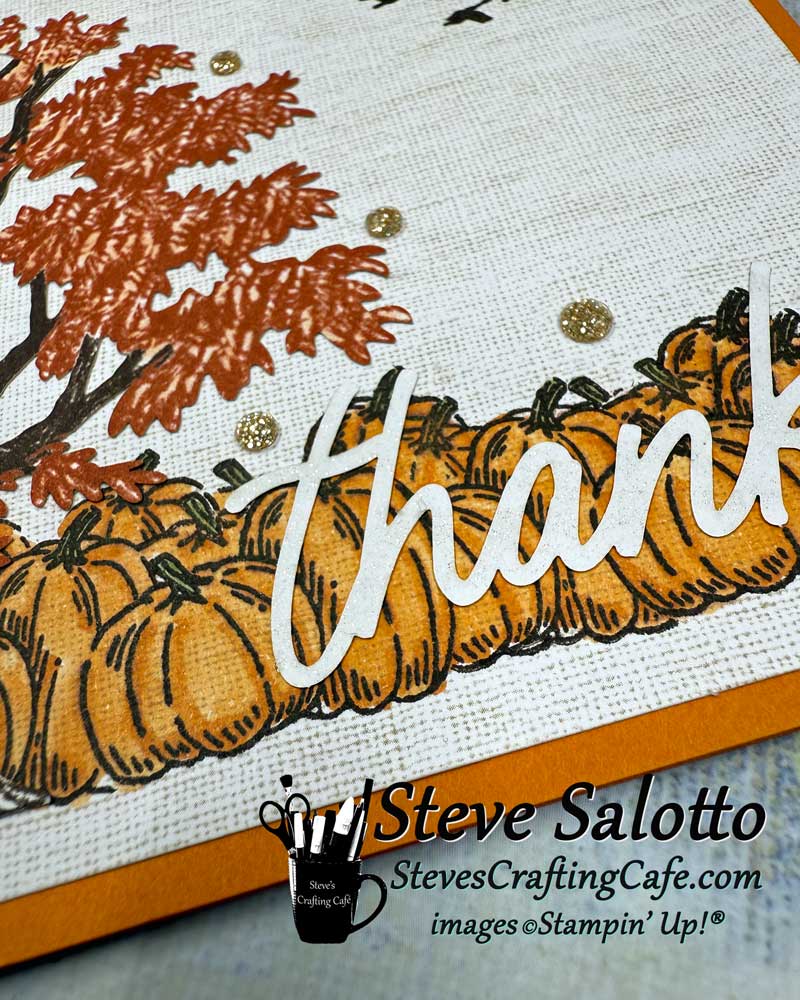
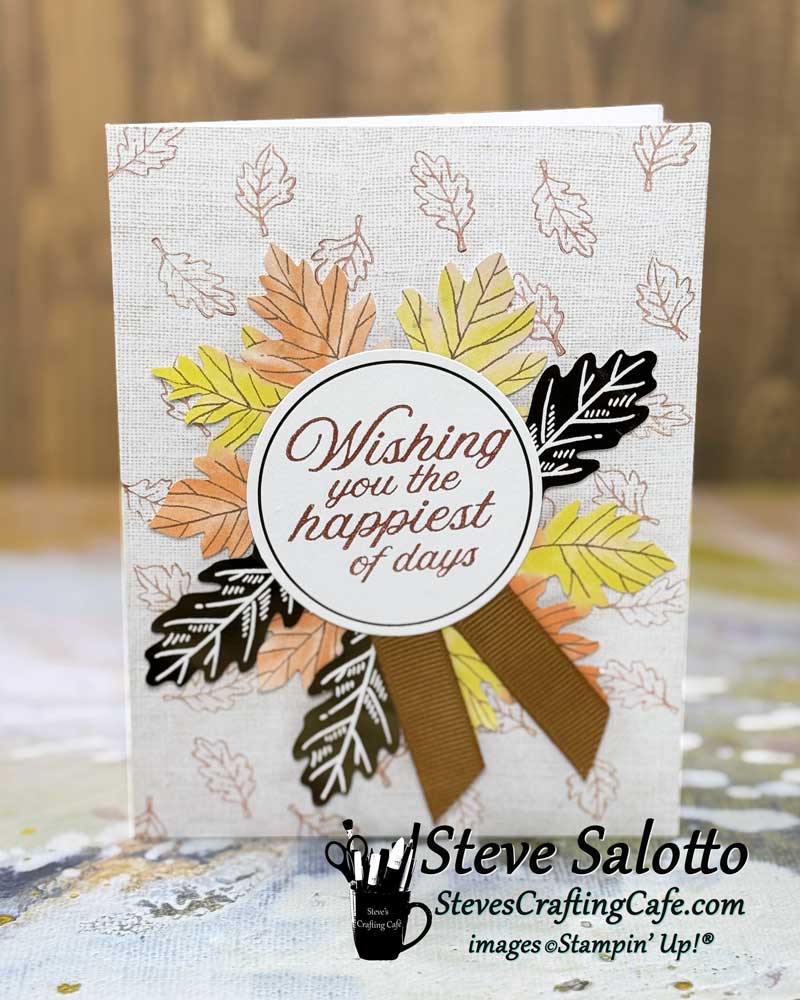
Okay, I'm proud of this one. I used the masking technique to stamp the pumpkins so that they look like they're behind each other. The stamp is only 2 pumpkins, so it was a lot of masking! 😴 But the result is just super cool as far as I'm concerned. The tree die cut came with the kit, but I cut the frame part away and used it on another card.
The title is from Stampin' Up!'s "Saying Something" Ephemera pack with Wink of Stella brushed over it. (Naturally.)
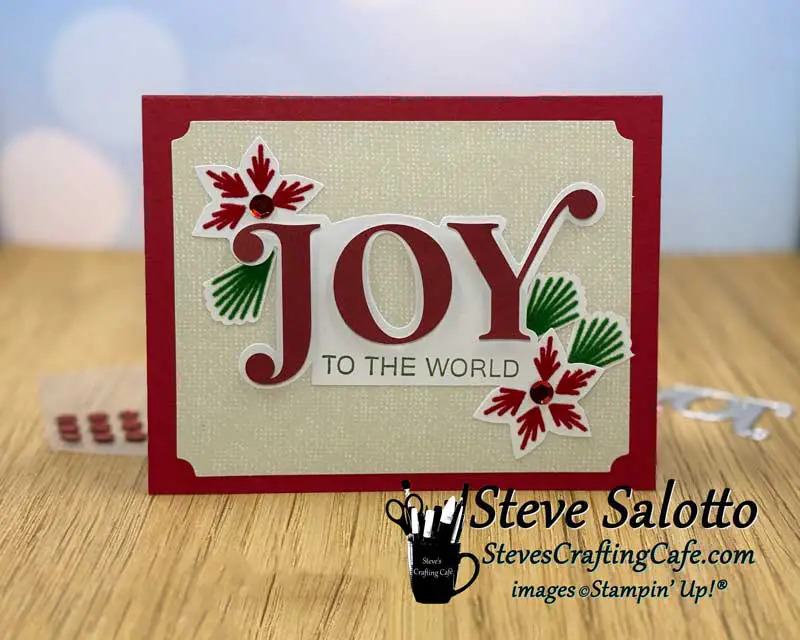
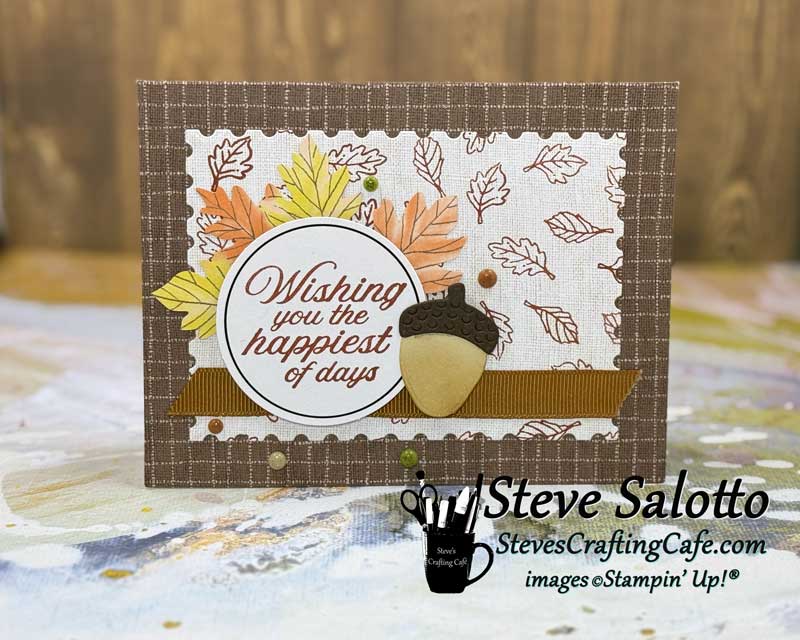
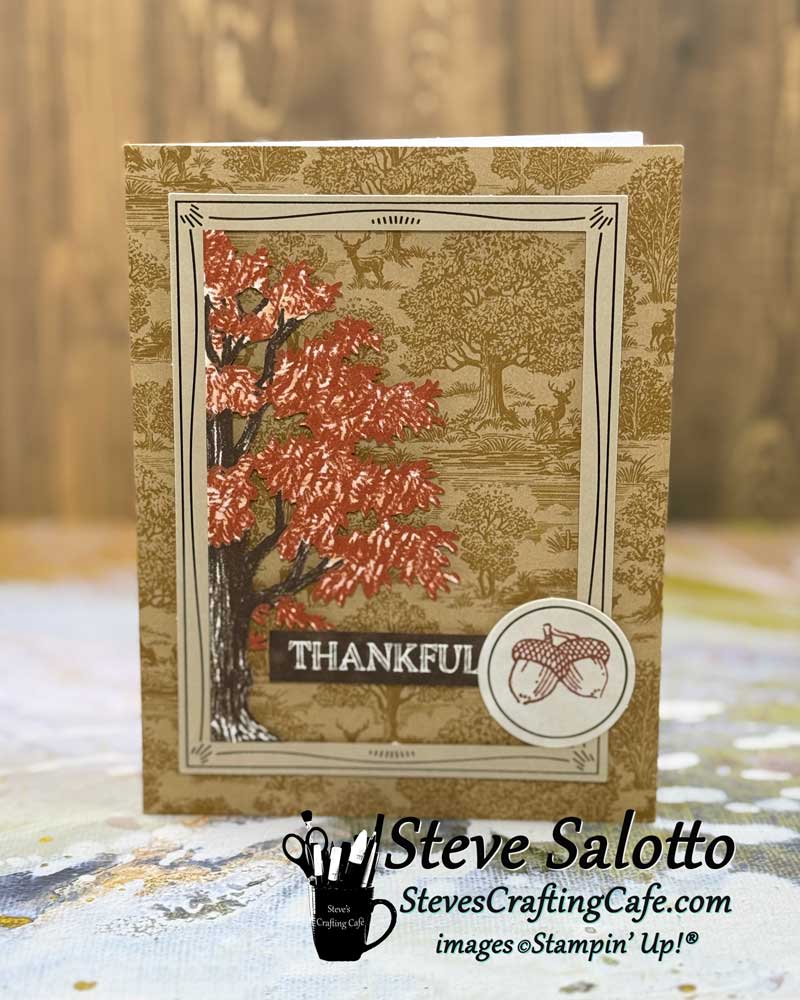
I die cut a panel using the "Perennial Postage" dies, stamped it with leaves, and added a die cut acorn from the add on.
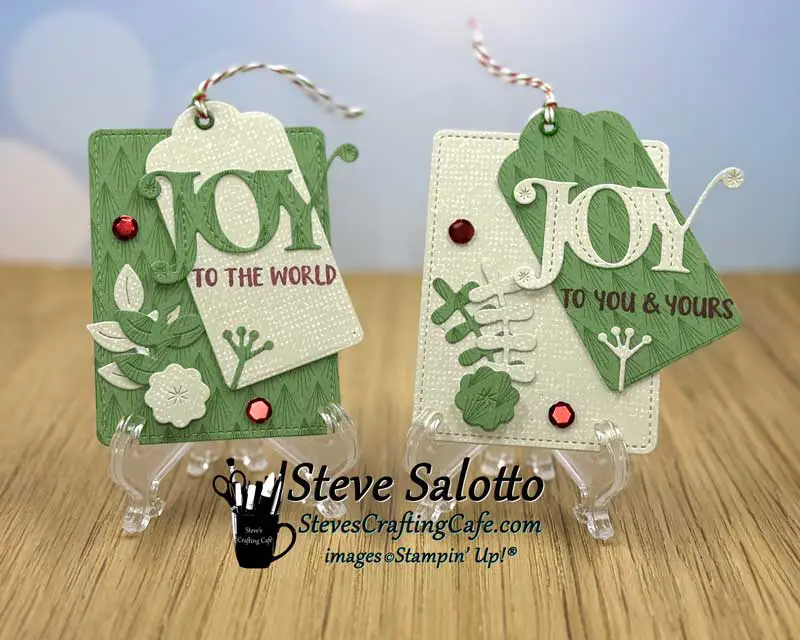
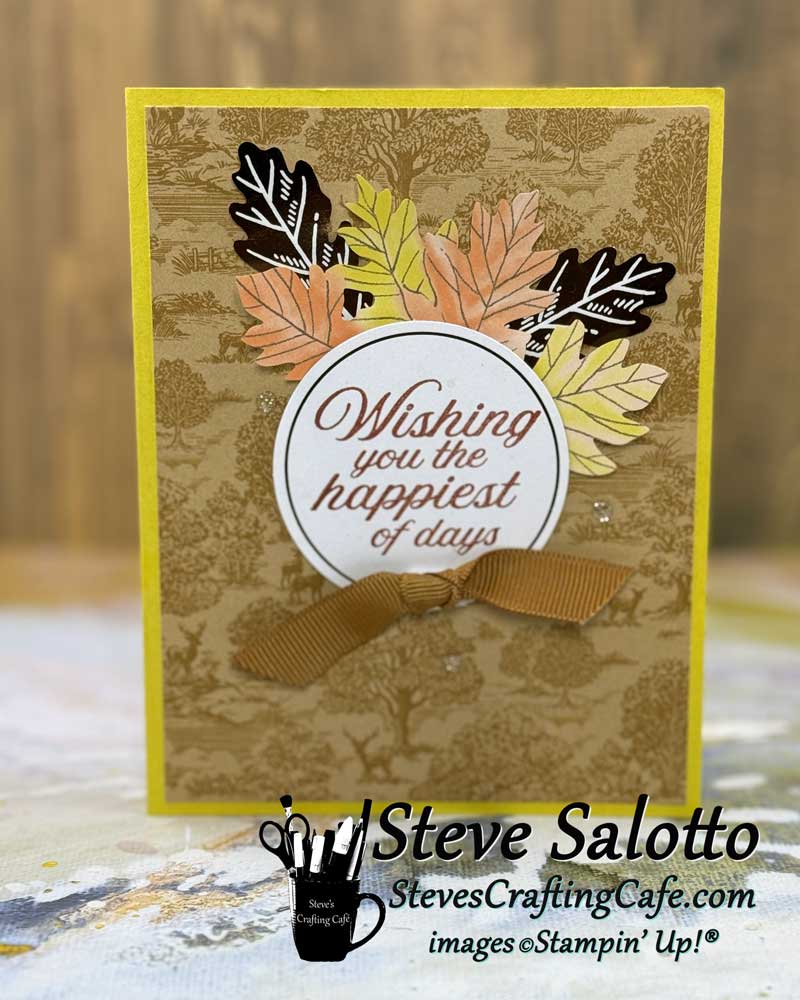
A variation of the kit card, but with the frame I cut from the tree for the previous alternate.
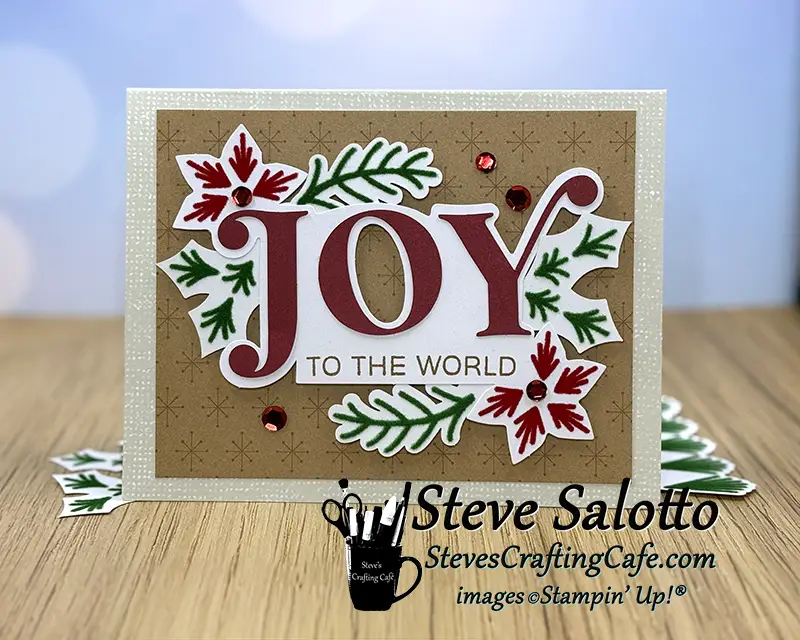
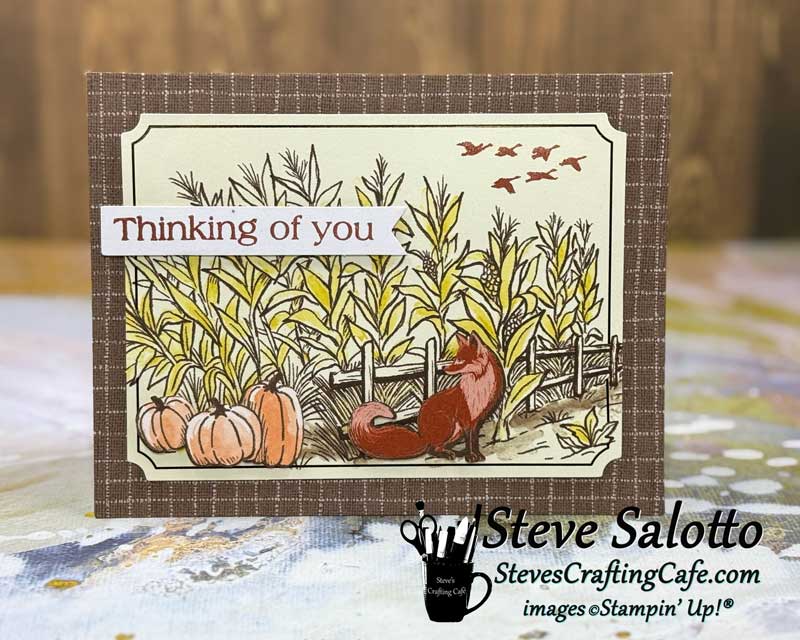
I used the background from another card for this one and made the ribbon into a bow.
Kit Card #1
Kit Card #2
Here is my first alternate. I made it a z-fold card and used ink and water painters to do the background.
The inside of my first alternative.
For this one, I added the "hello" sentiment from the add on "Circle of Season" dies. I die cut it with adhesive foam on the back so it has some awesome dimension!
This one took HOURS to make. 🤣 Okay, not really. And I had planned to do more with this card, but when I started laying it out, I just thought it looked so good keeping it this simple. Sometimes less is more.
My tag for this month. I did some splattering on the background and added a trellis for fun.
Kit Card #2
Kit Card #3
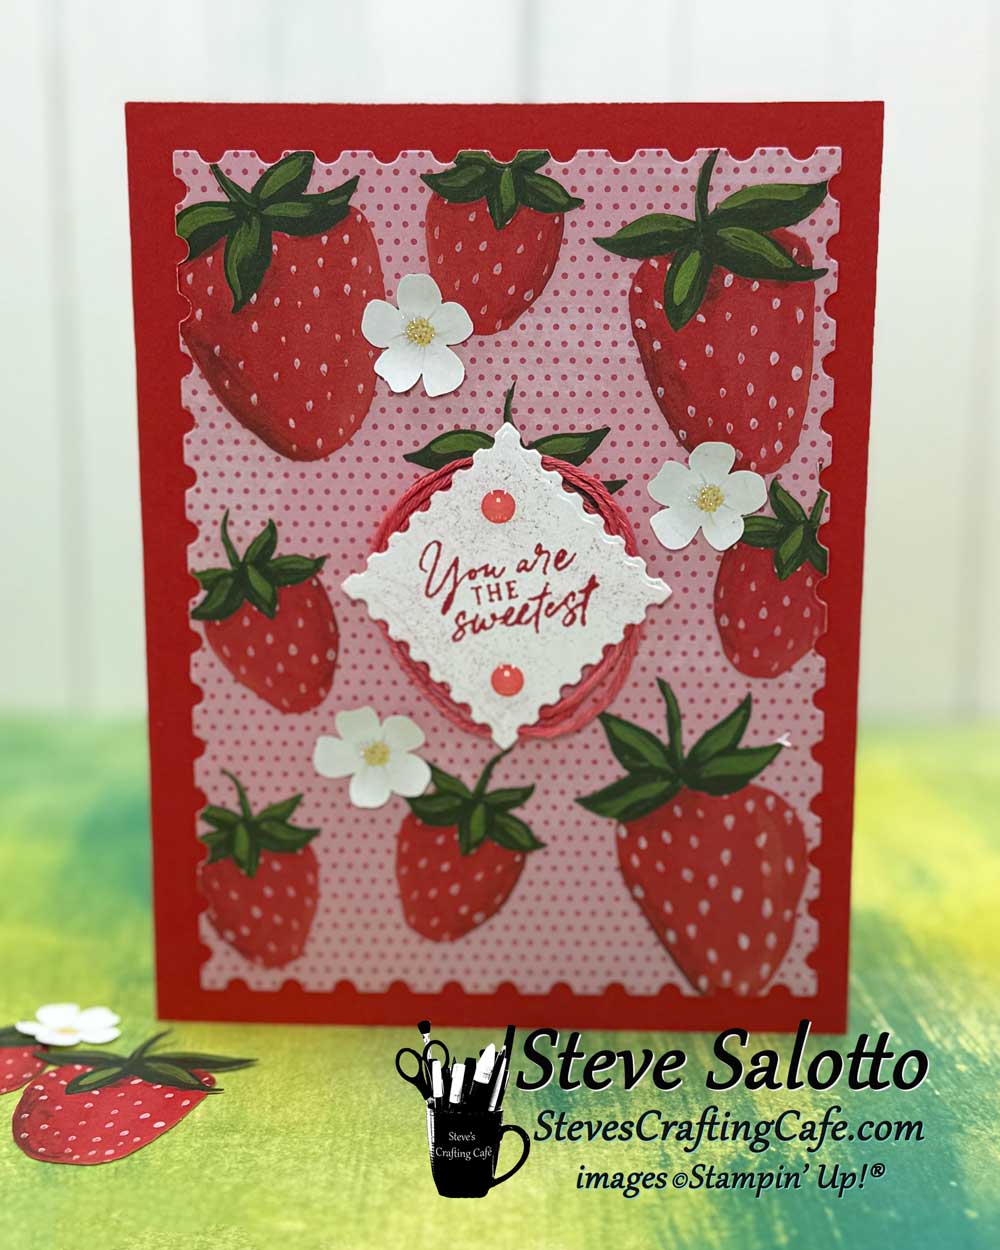
Here is my first alternative. I used the die cut strawberries from the kit and half of a card base. Once all the strawberries were glued on, I ran it through the Stampin' Cut & Emboss Machine with a Perennial Postage Die and then glued it to a Poppy Parade base. (Wish I hadn’t wasted that middle strawberry since I ended up covering the whole thing. 😊)
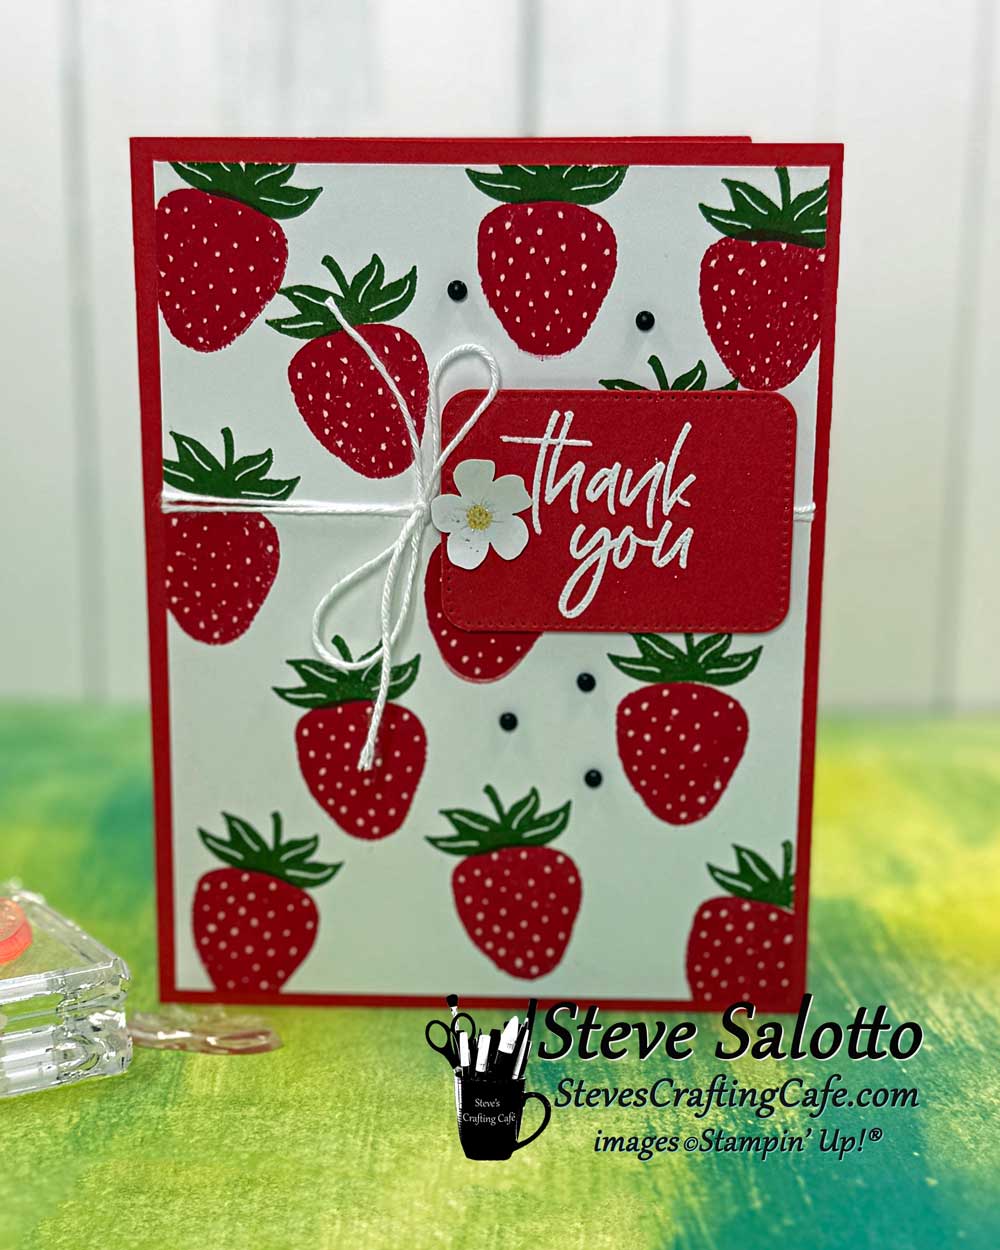
For this alternative, I stamped the white card stock with strawberries in Poppy Parade ink, then matted it to a matching card base and embossed the sentiment with white embossing powder.
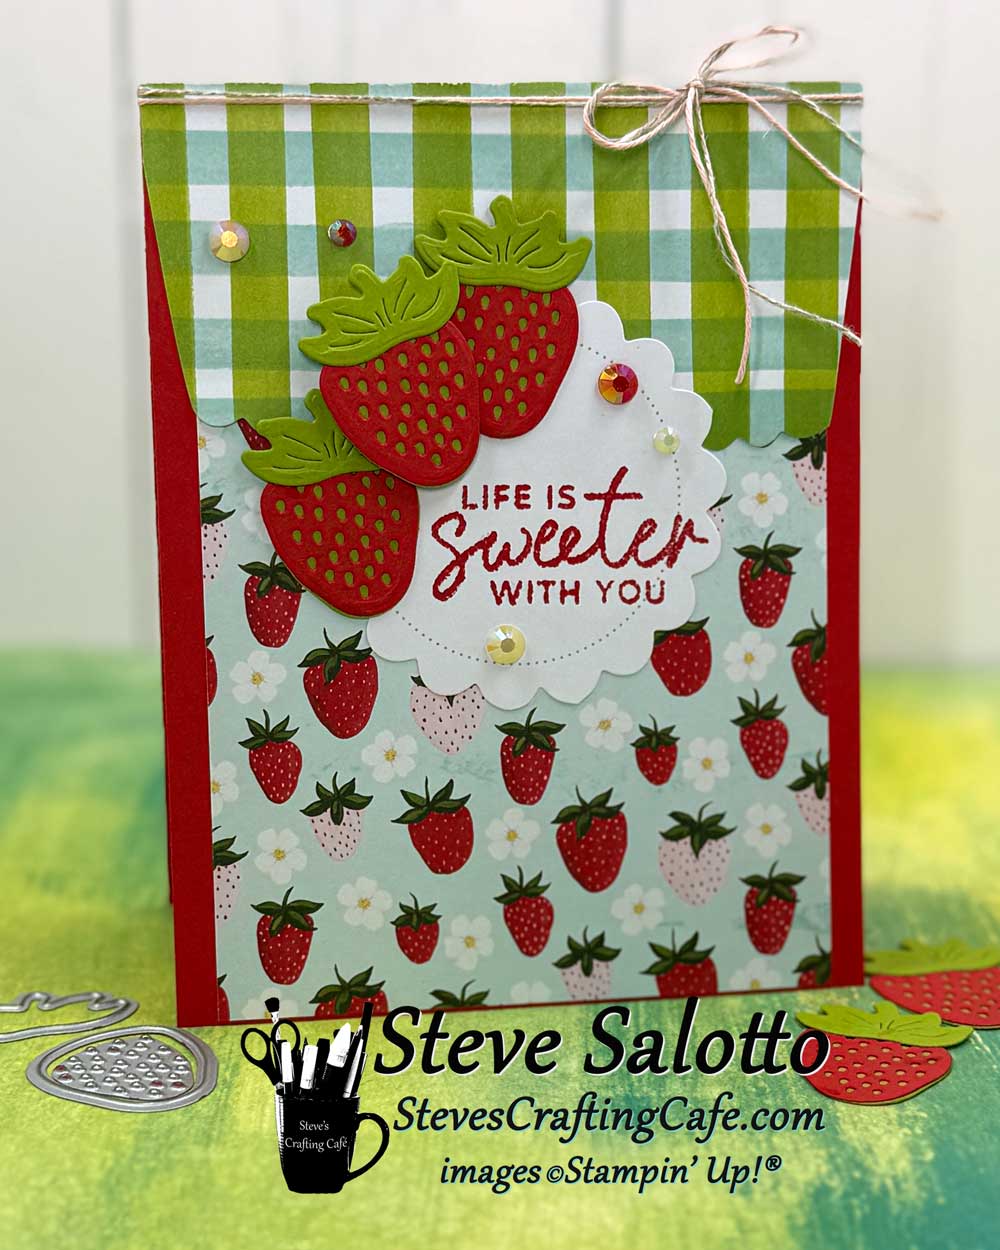
Part of an envelope became the top green plaid piece on this alternate, and the strawberries were cut with dies from the add-on, "Circle of Season." I've fallen in love with this red. (Poppy Parade) I'll probably be using it a lot in the near future. (And then get sick of it and not use it again for a while. 🤣)
For this alternate, I added a trellis using the recently retired "Linked Together Dies." I turned the strawberry container into a pot and cut up one of the card fronts to use as a backing for my embossed sentiment.
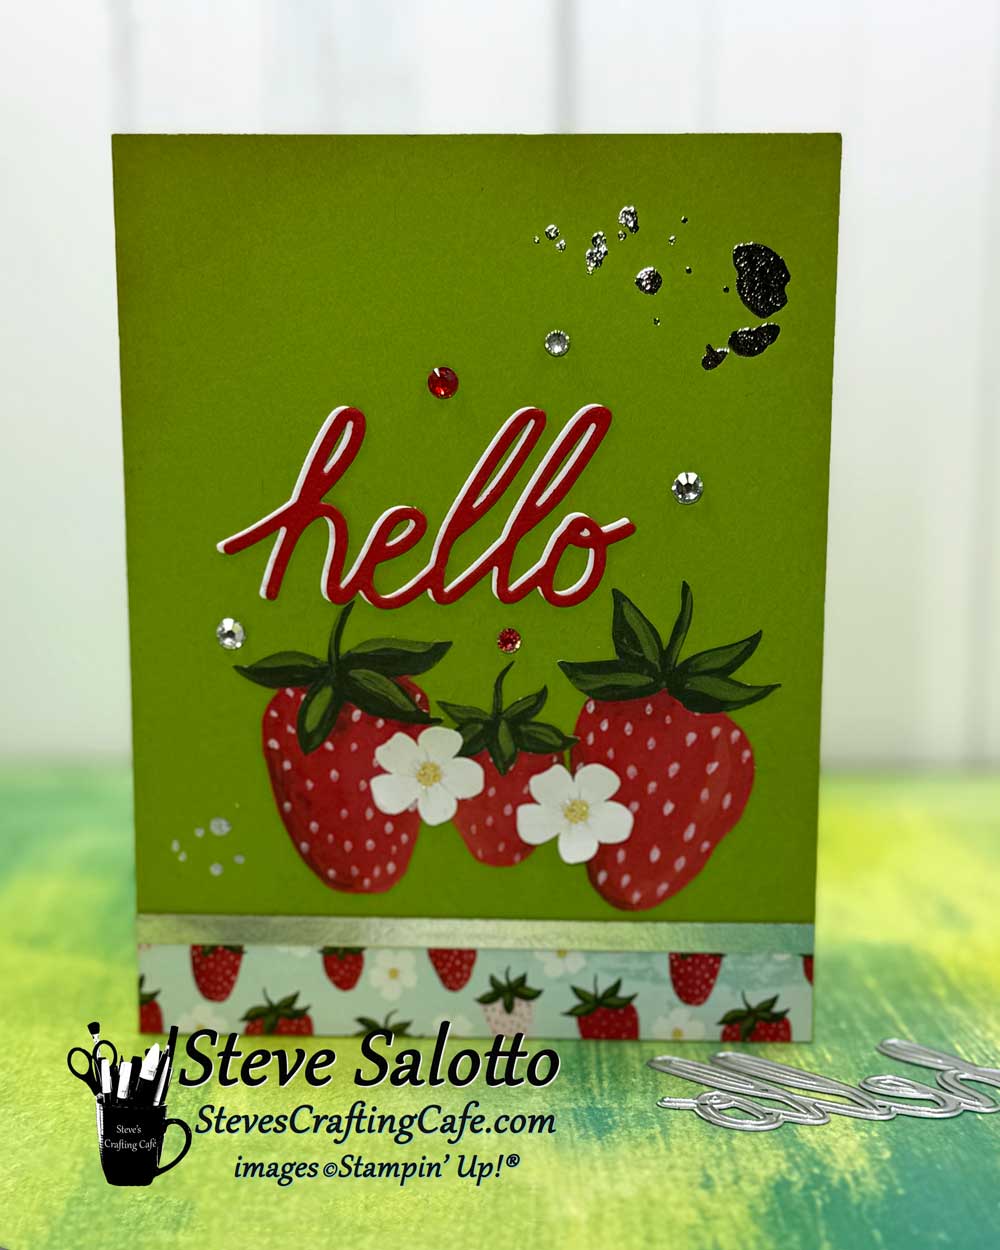
White space always intimidates me, but I tried to keep this card as sparse as possible. I used the new Metallic Textures Rub-ons from Stampin' Up!
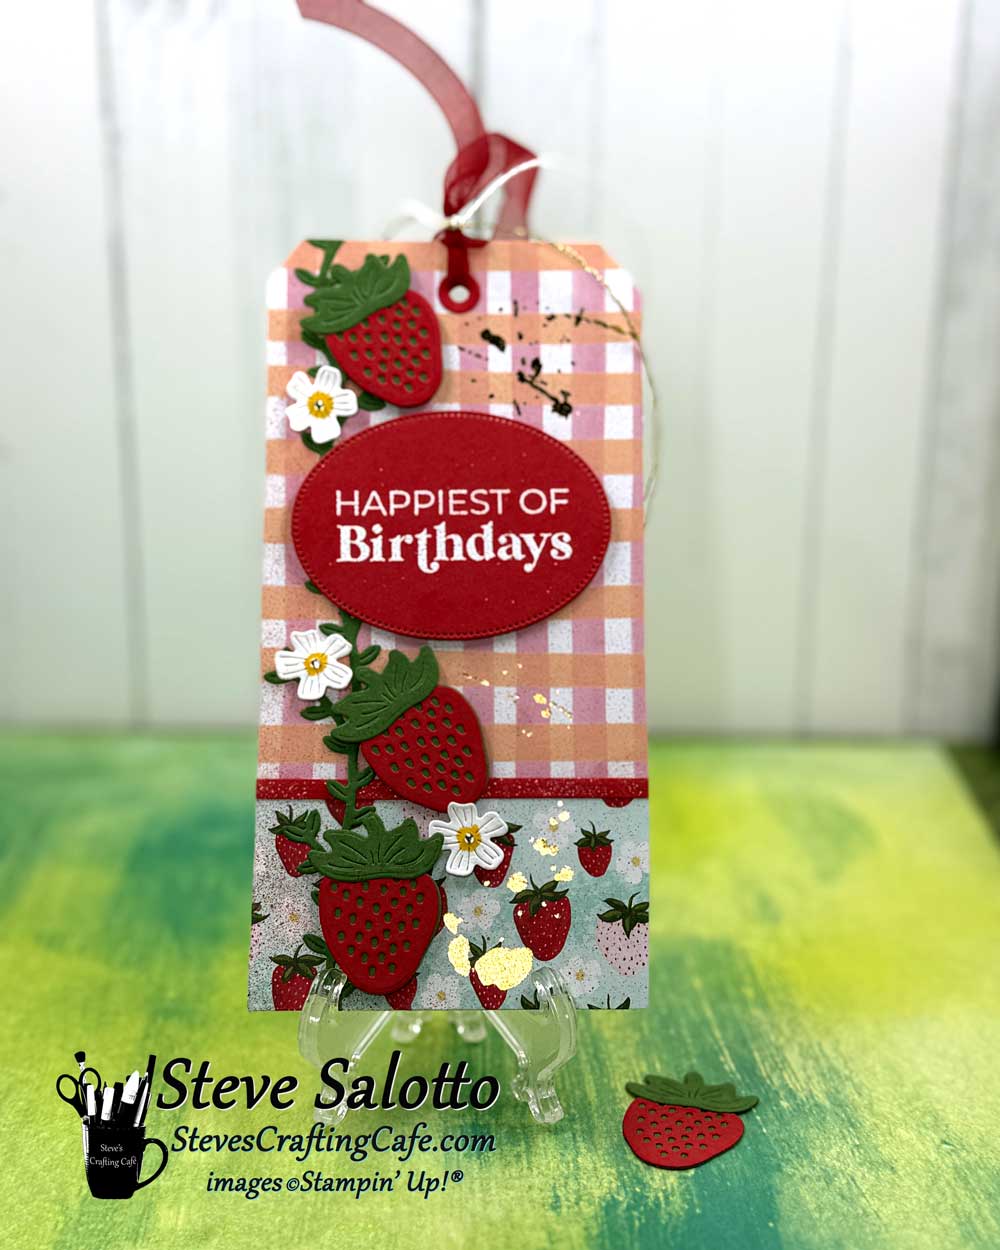
A tag I made with this month's Paper Pumpkin. I also used the Metallic Textures Rub-ons and the result is subtle but pretty cool.
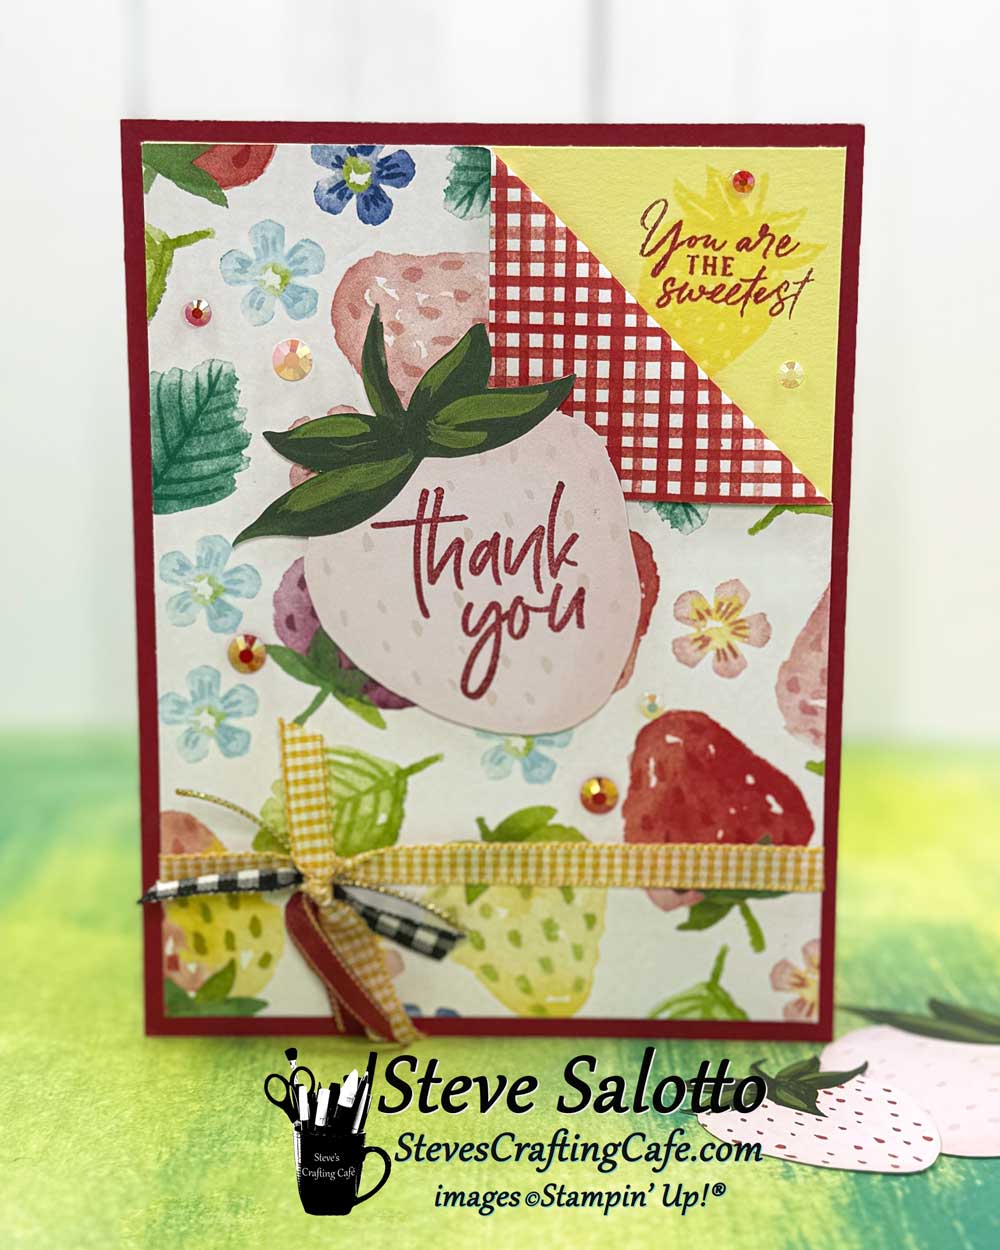
I pulled out some old paper to use on this card and I folded the corner down to show off both sides. I thought the various colored strawberries would go well with the bizarre pink ones that came with the kit. Ha, ha.
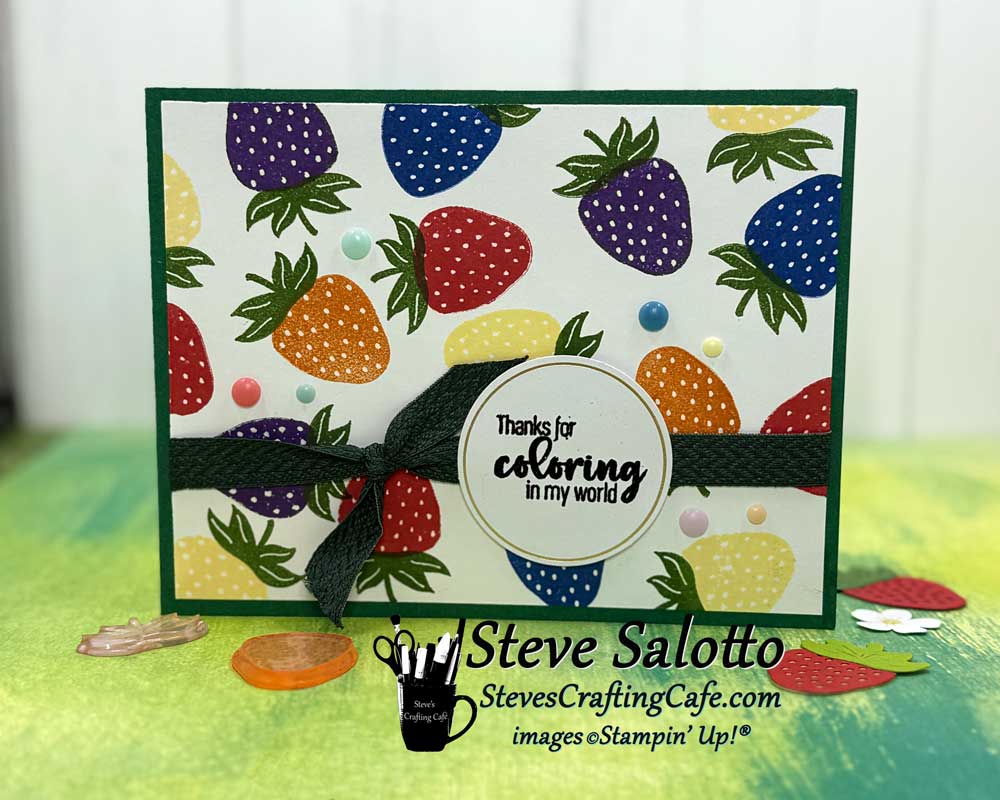
This card (and matching tag) were born from the question, "Who says strawberries have to be red?" I thought it would be fun to stamp them in assorted colors and see what happened. Well, it was fun, and I just love how they turned out. Colorful and quirky.
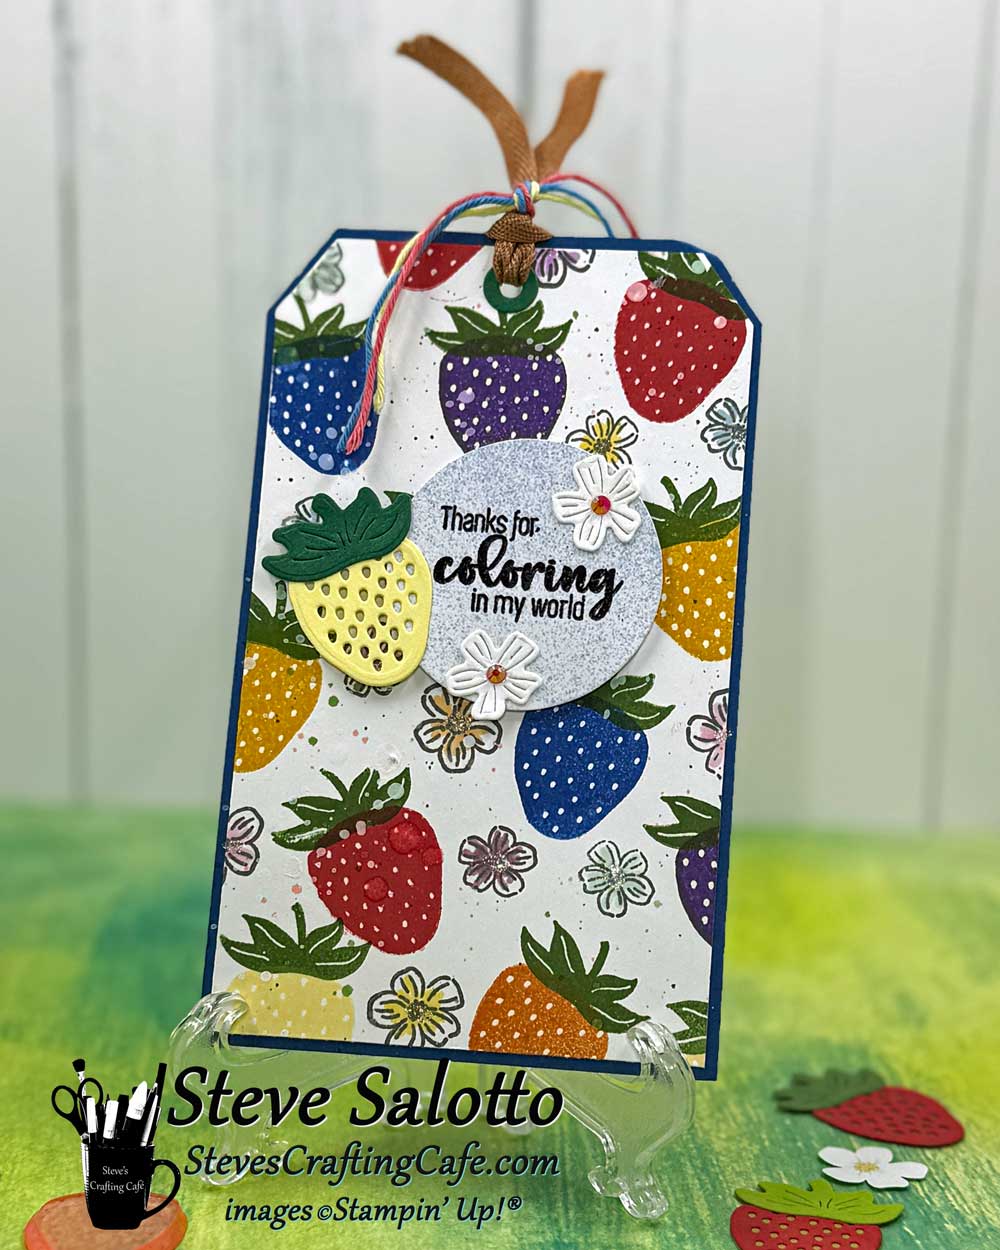
Look at the matching card for where the idea for this tag came from.
The three kit cards.
My first alternate was made using only supplies from the kit. I wanted to make a card that goes well with the original three so I could box four cards up as a gift set.
For this alternate, I matted the front of one of the base cards onto Secret Sea card stock and added some twine under the sentiment. Before I put the overlay on top of the flowers, I covered it with Wink of Stella so it sparkles like crazy.
My mascuine card for June. I used the piece after punching out the vines to ink-blend vines on the card, then stamped over it with vines and added two die cuts. I love how the border on this turned out. (The sentiment was made with the "Layered Thoughts" stamp set.)
I love my tag for this month! I ink blended the background with Berry Burst and Night of Navy inks, then stamped the leaves from the kit in white ink, and splattered some too. I love this style.
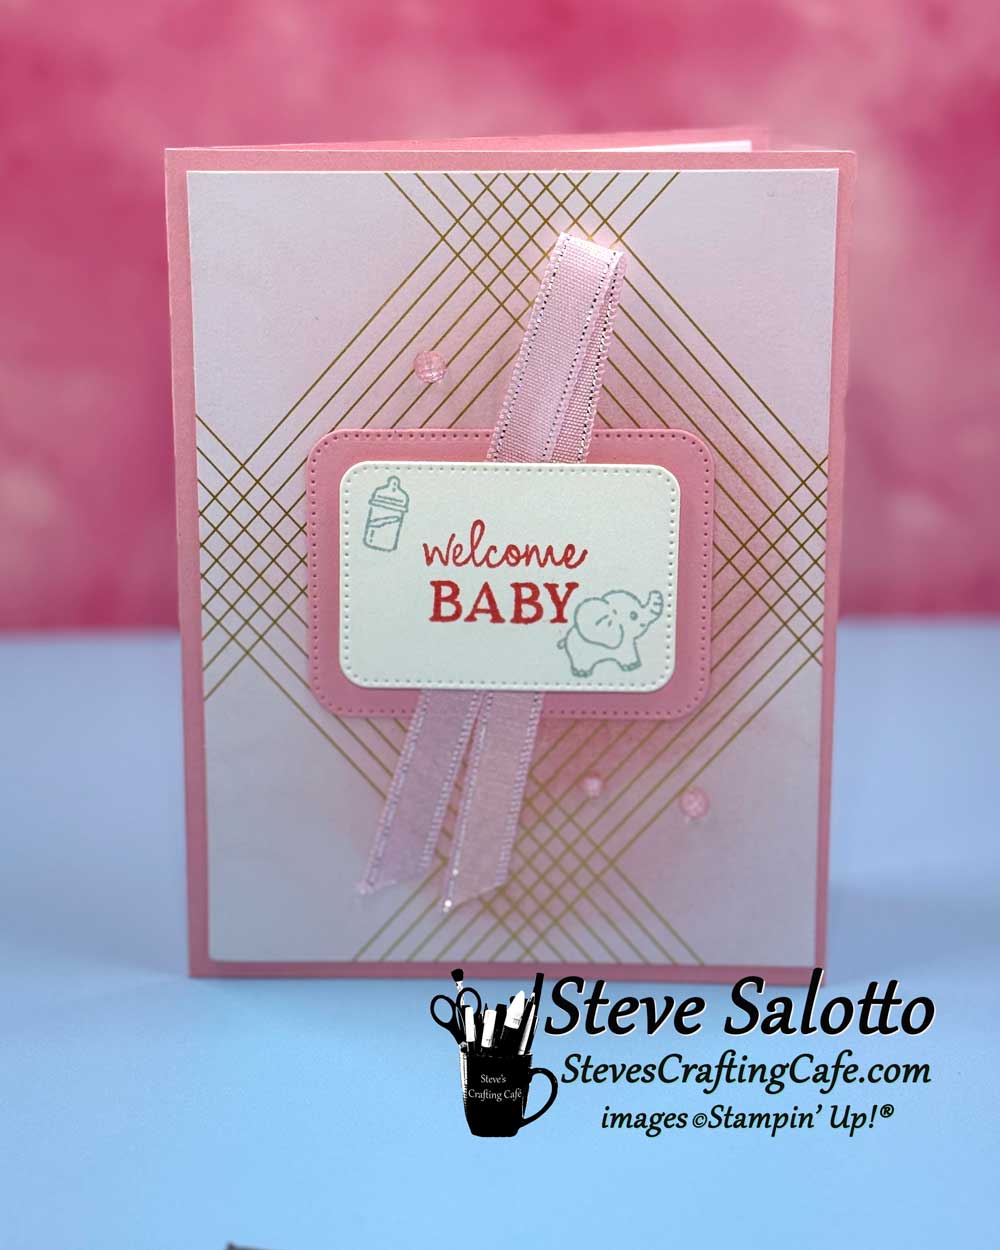
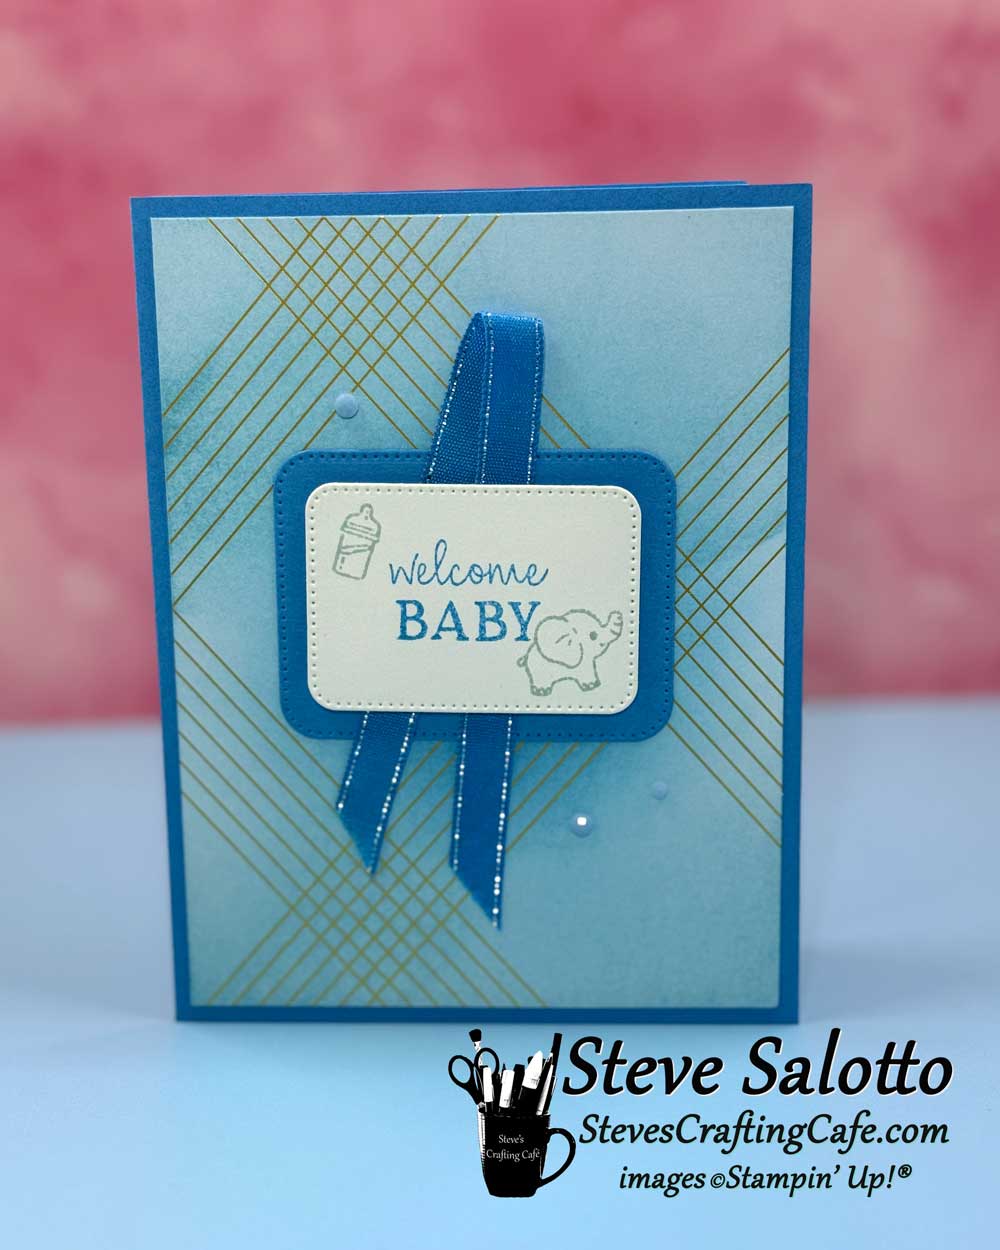
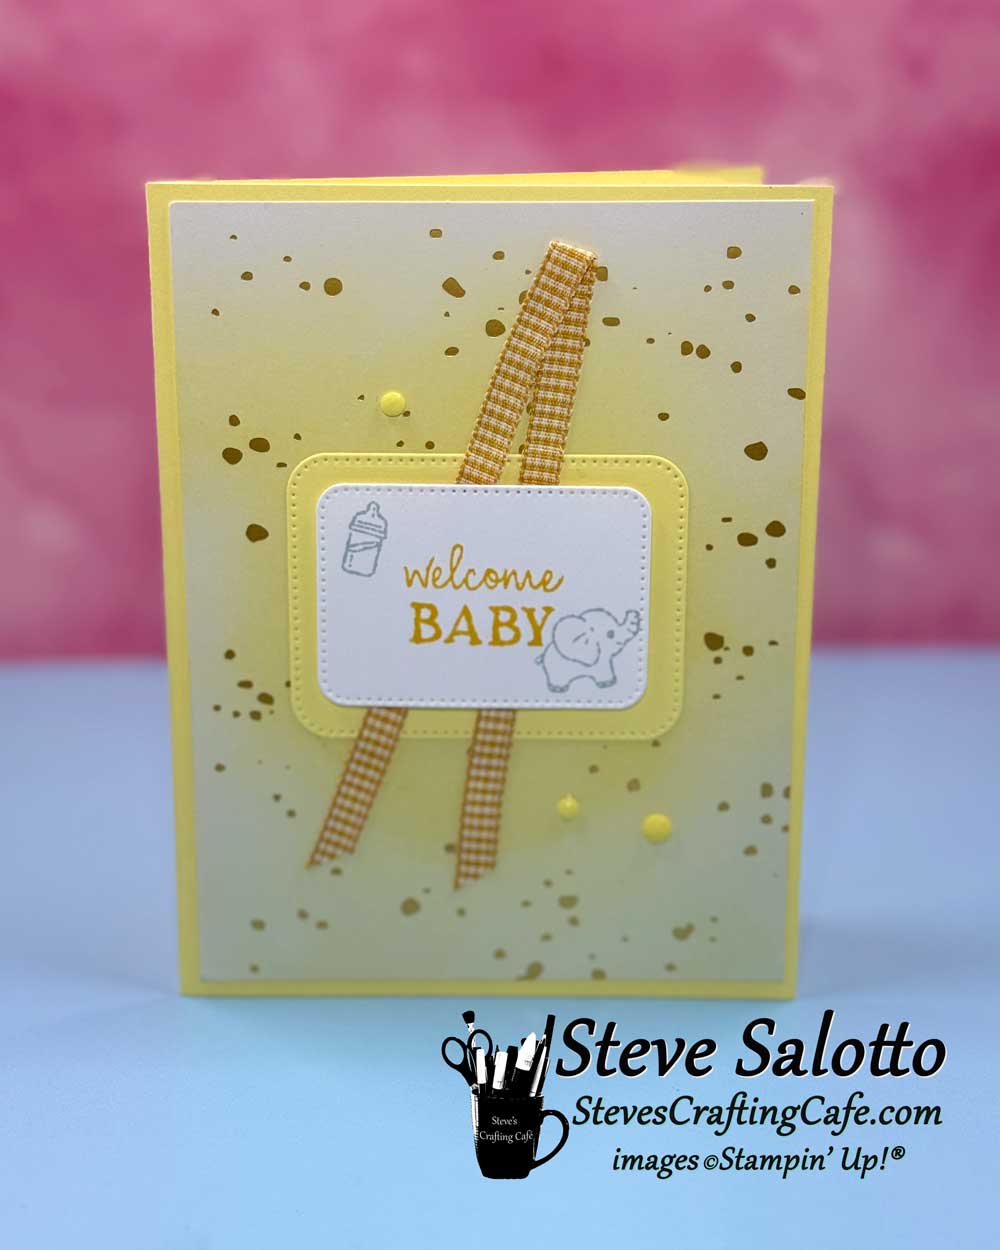
I know this is really out there, but I needed to make a baby card, so I figured I might as well make three. (Like we all do.) And I had those white backgrounds and thought it would be fun to ink blend the three colors and voila! Here are my baby cards! The original pink...
... the blue to match...
... and finally the yellow! These were fun to make and I'm really happy with how they turned out.
The three kit cards.
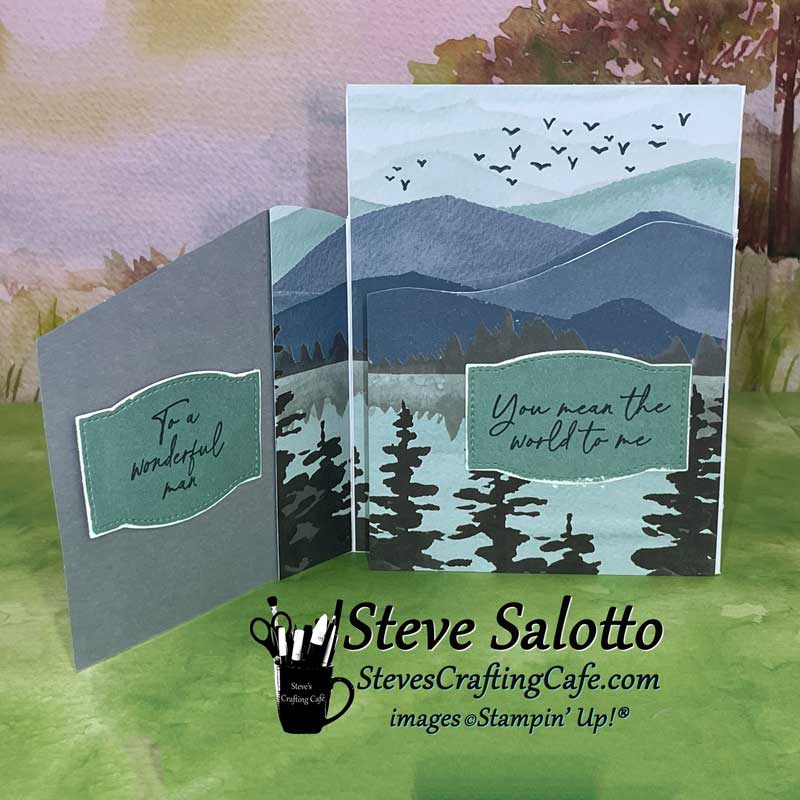
My first alternate is a fancy fold. I love the layers on these cards and kind of just expanded on it. Check out the second picture of this card opened up. 1/2
Here is my first alternate opened up. 2/2
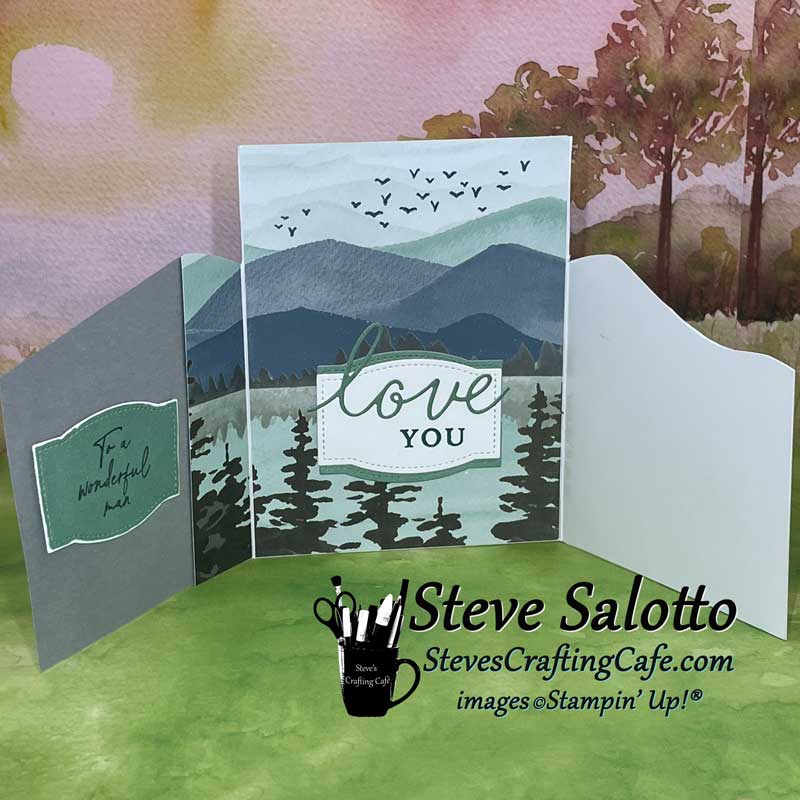
Okay, this card I'm kinda proud of. Again, a fancy fold and there are three pictures. Here is the card closed. 1/3
Here is the blue card partially opened. 2/3
And here is the blue card fully opened. 3/3
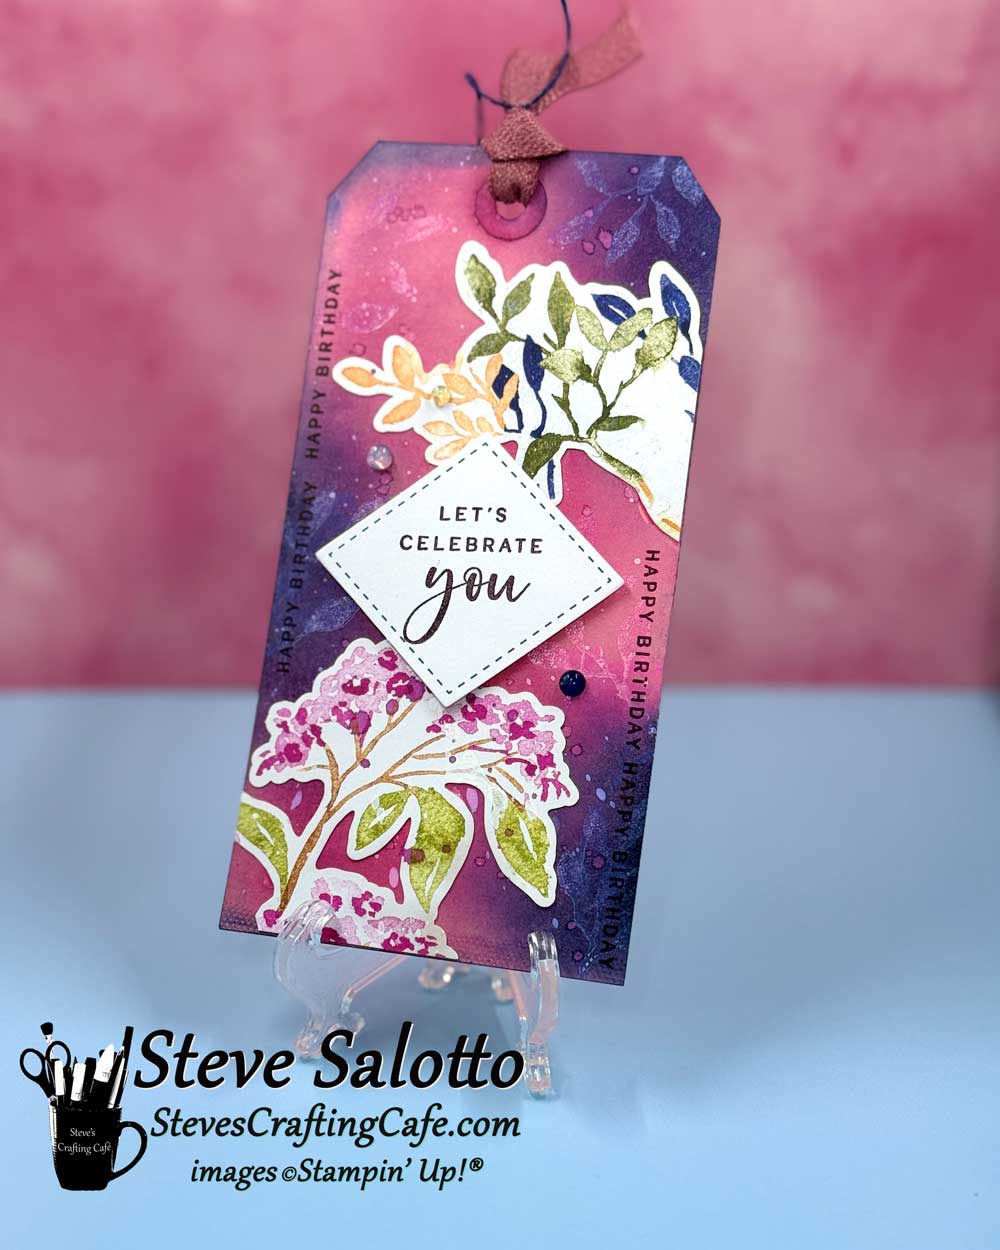
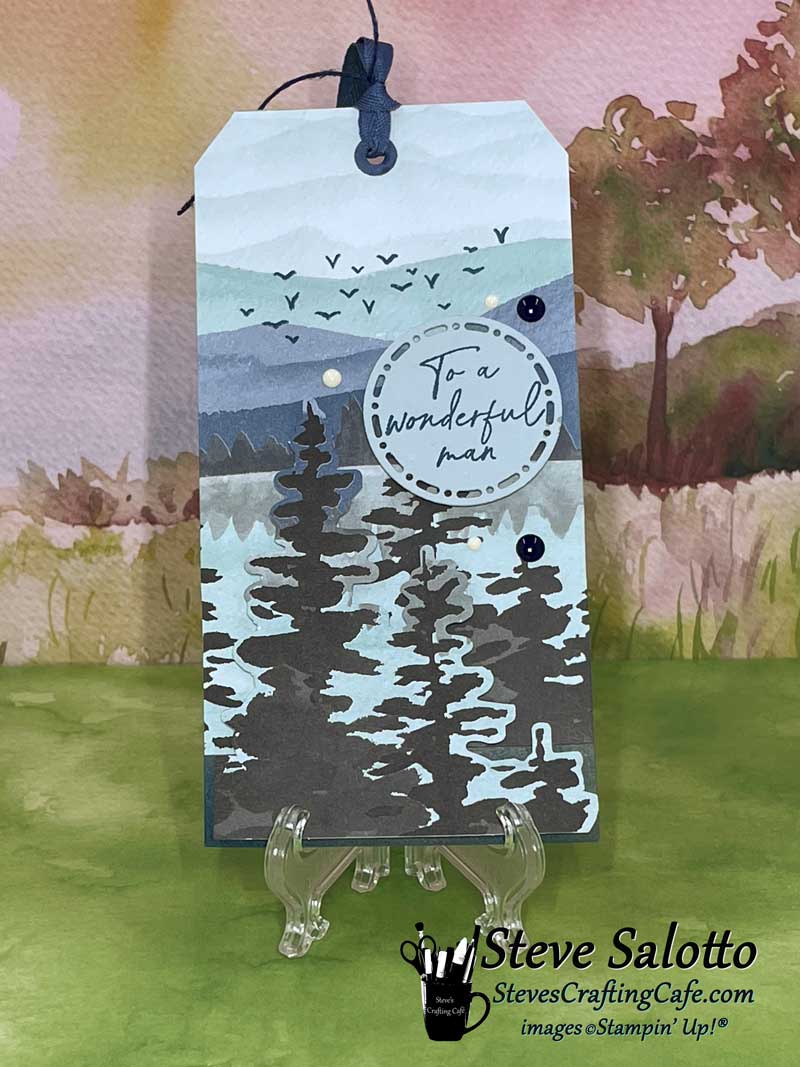
Continuing my personal tag challenge this year, here is one I made with this kit. I popped the trees up with Dimensionals. And it's a nice big tag for a nice big gift!
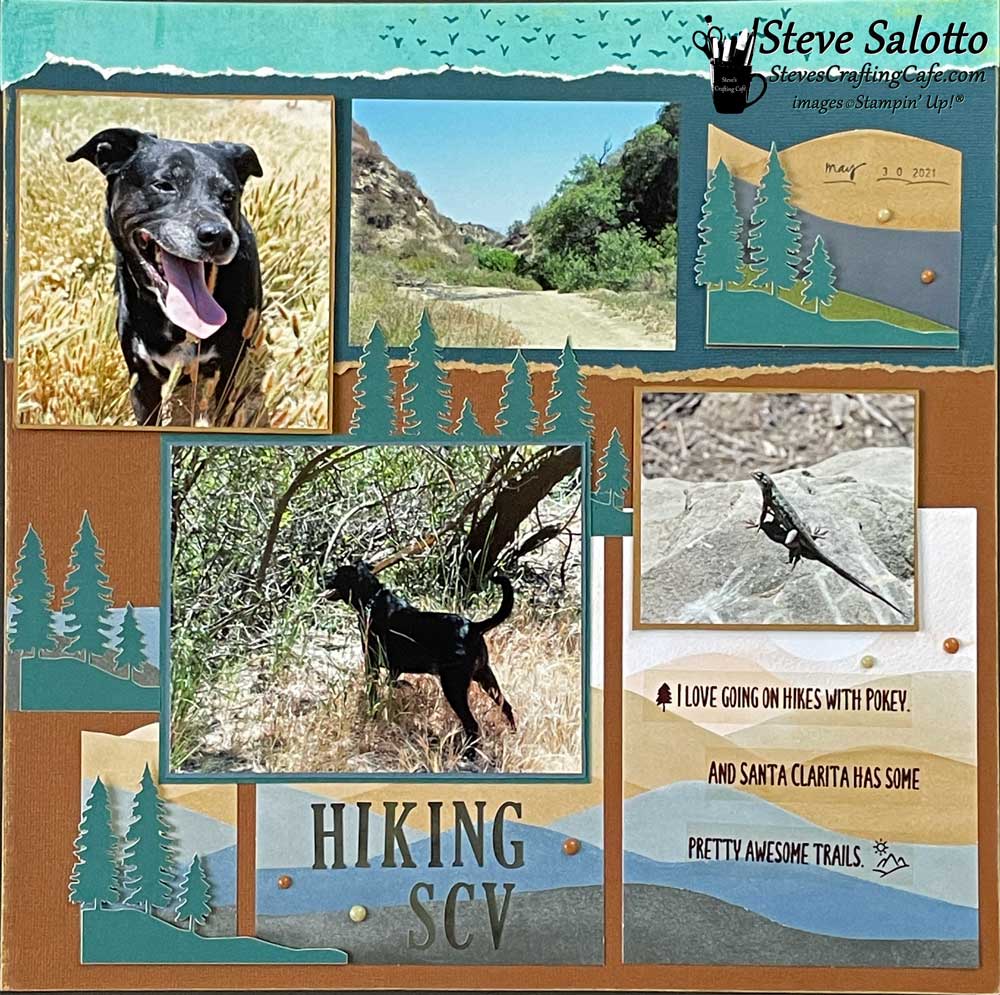
Another scrapbook page! I love going on hikes with my dog so this kit was perfect for that. I used some trees from an older kit. And I used the new Two-Tone 12x12 paper from Stampin' Up! to get that ripped piece with the white core at the top.
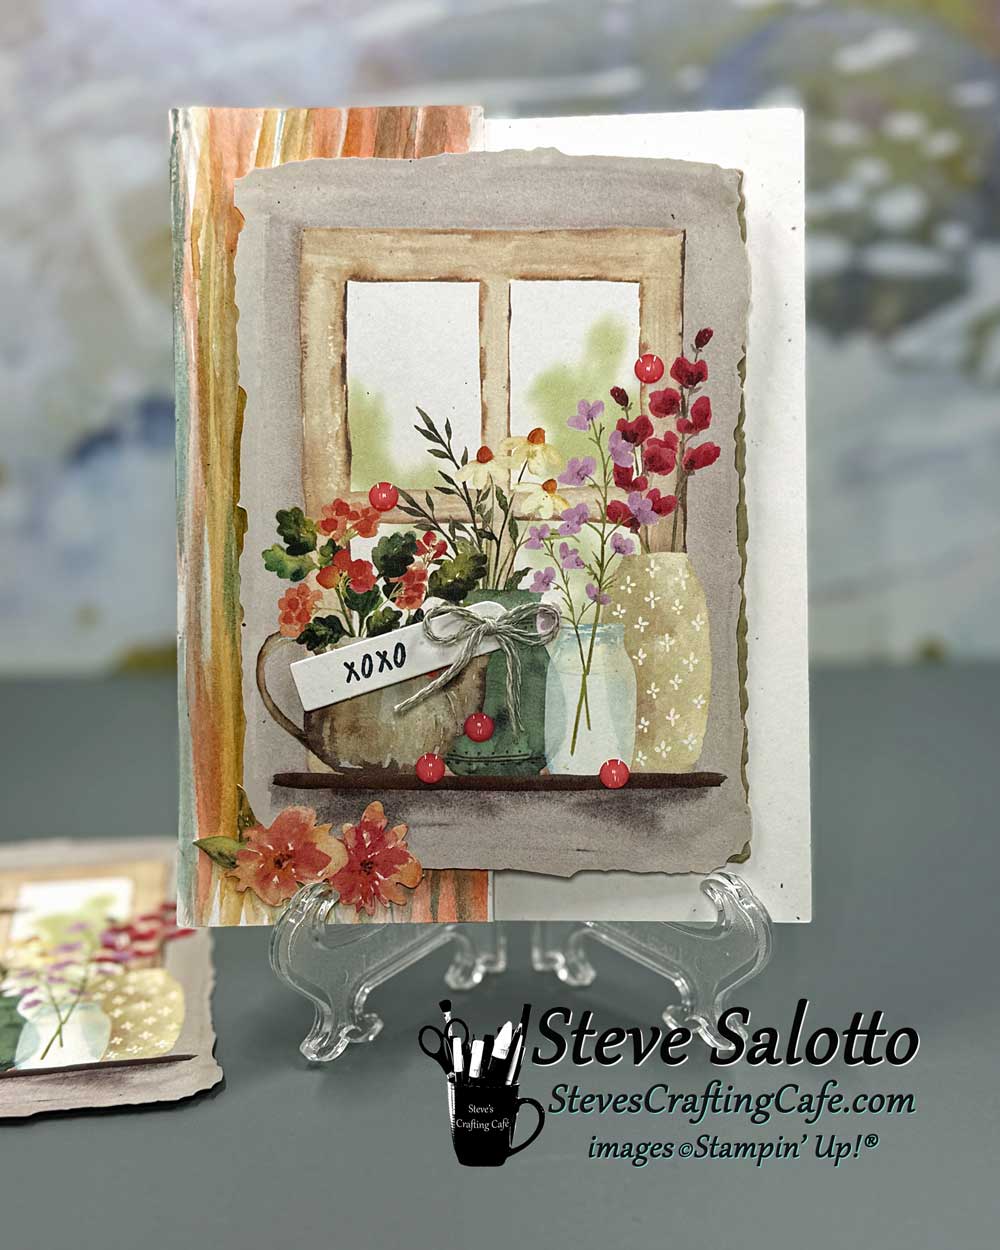
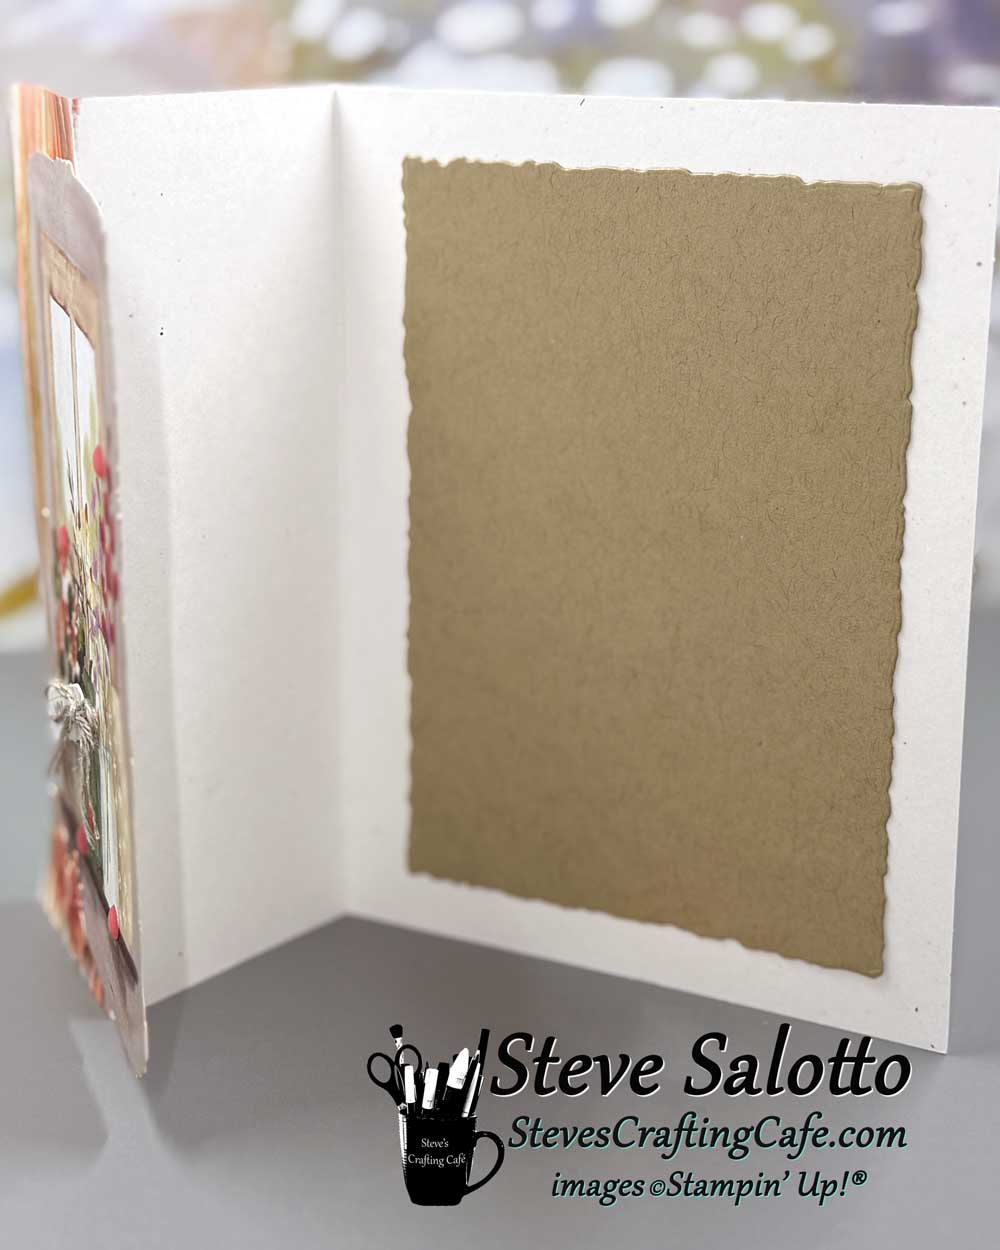
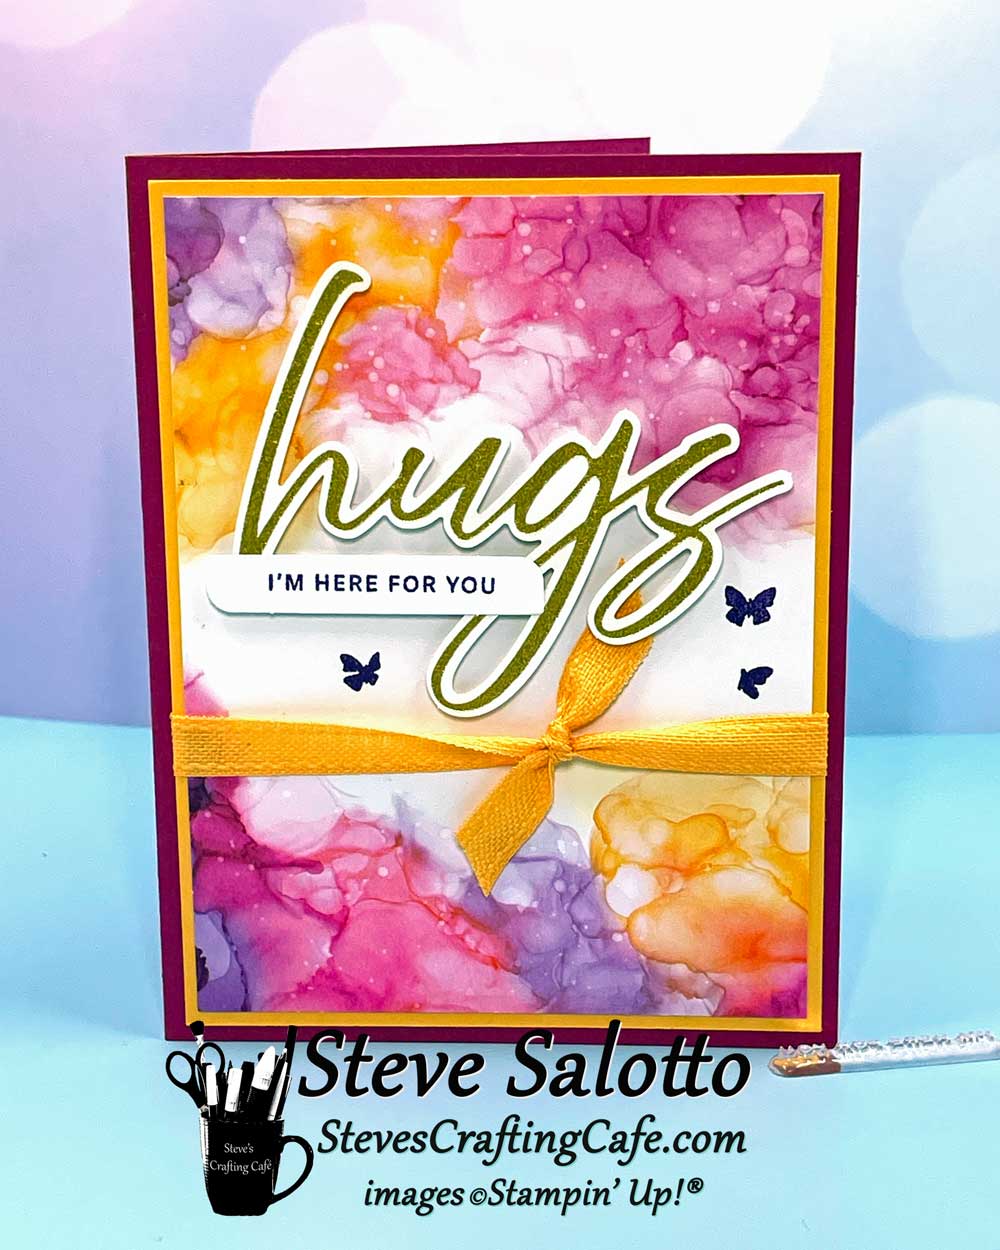
My first alternate is pretty simple, an upgrade of one of the kit card designs. I matted the front onto a piece of Peach Pie card stock, then onto a card base. (Berry Burst) I also tied a Peach Pie ribbon around it for some extra oomph!
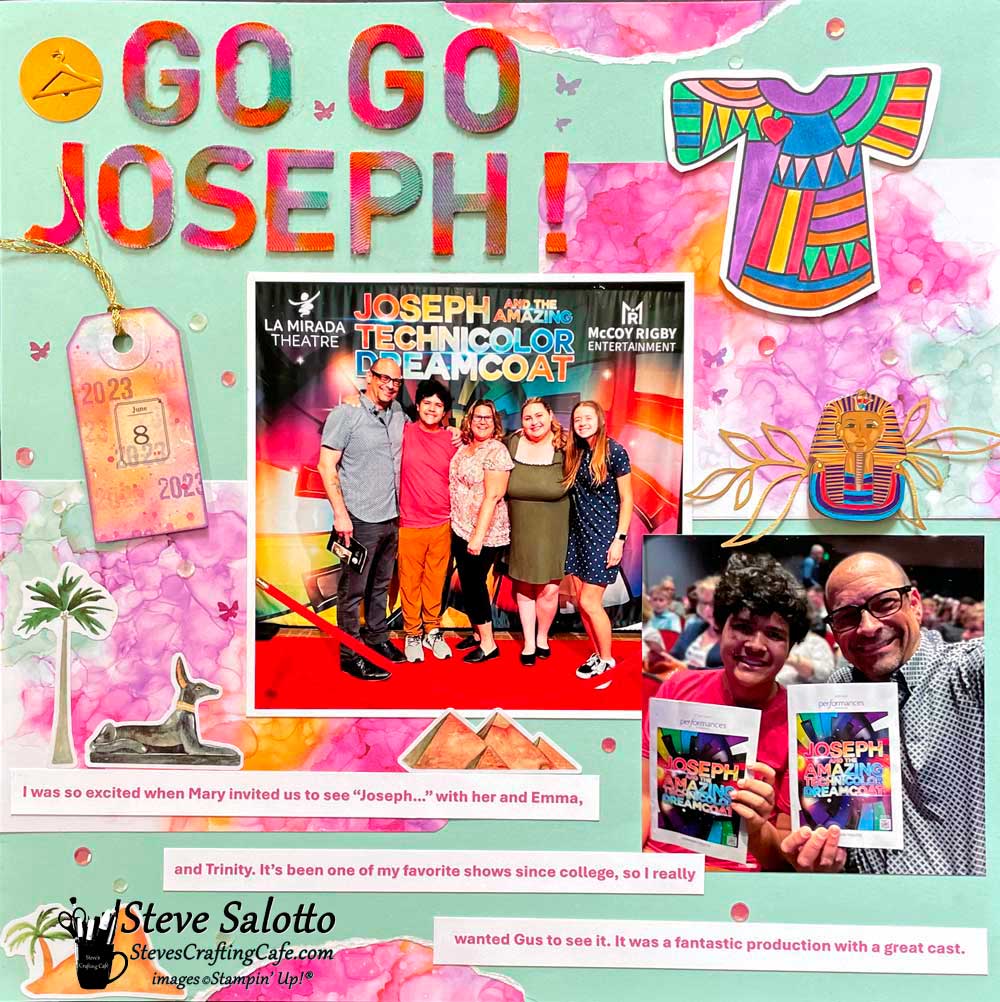
Here's my first scrapbook page made from a paper pumpkin kit. I cut a card in half and used it on the background. To highlight the new two-toned cardstock from Stampin' Up! with the white core, I ripped a section off the top and bottom, and I backed each with another of the kit's card fronts. Then I used re-inkers of the same colors to color the tag and title. Lastly, I printed out Joseph's coat and colored it with Stampin' Blends alcohol markers. 😁
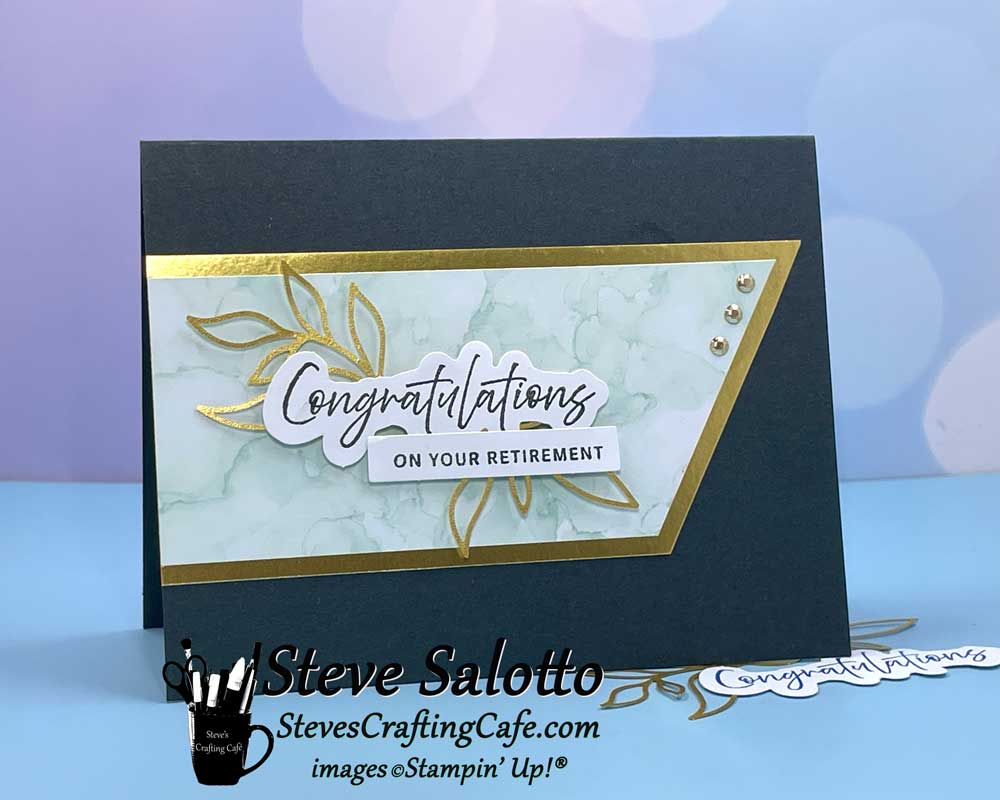
My masculine alternate card from this kit. Not easy to do with all the pinks, oranges, and flowers. 🙂 But I think it came out sort of "sophisticated" and perfect for a gentleman's retirement.
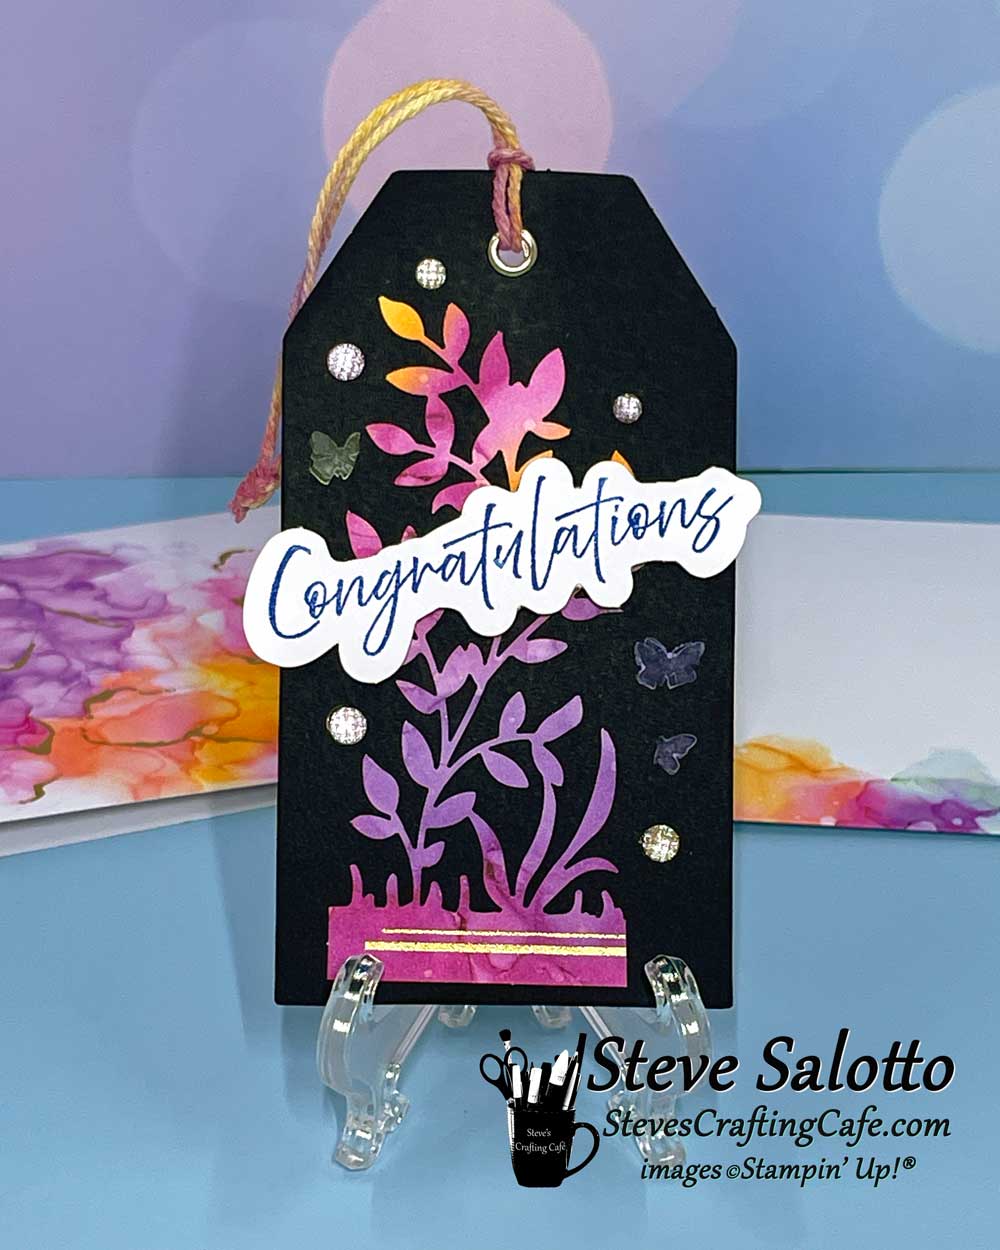
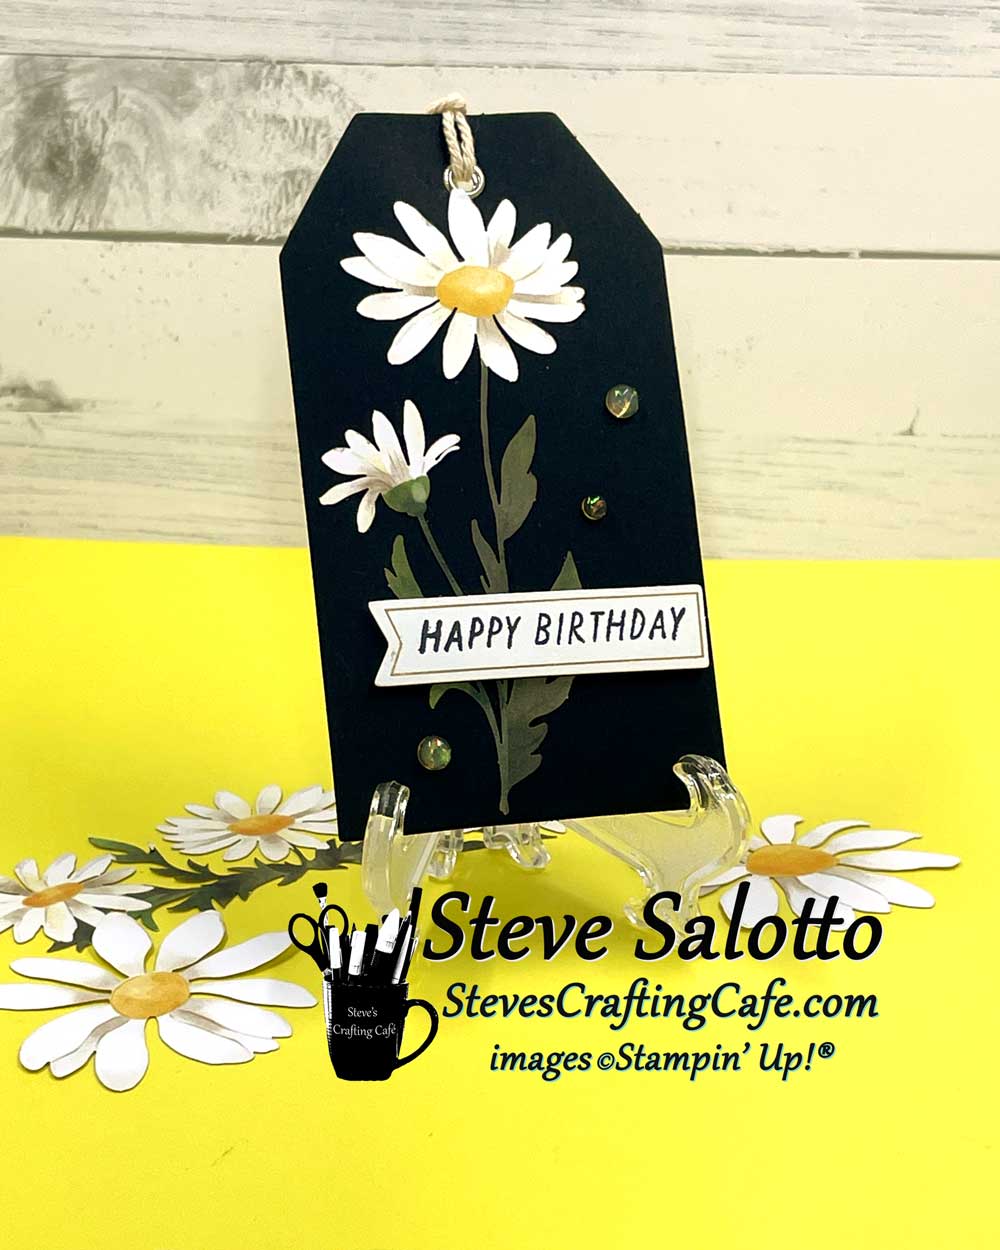
Another month's kit means another tag! (My 2025 goal is to make tags for every month.) I used black again because it goes so well with the multi-colored flower die cut. The string was beige, so I used the ink on that too and got it to match. And I added some gems for shimmer. So easy and so striking.
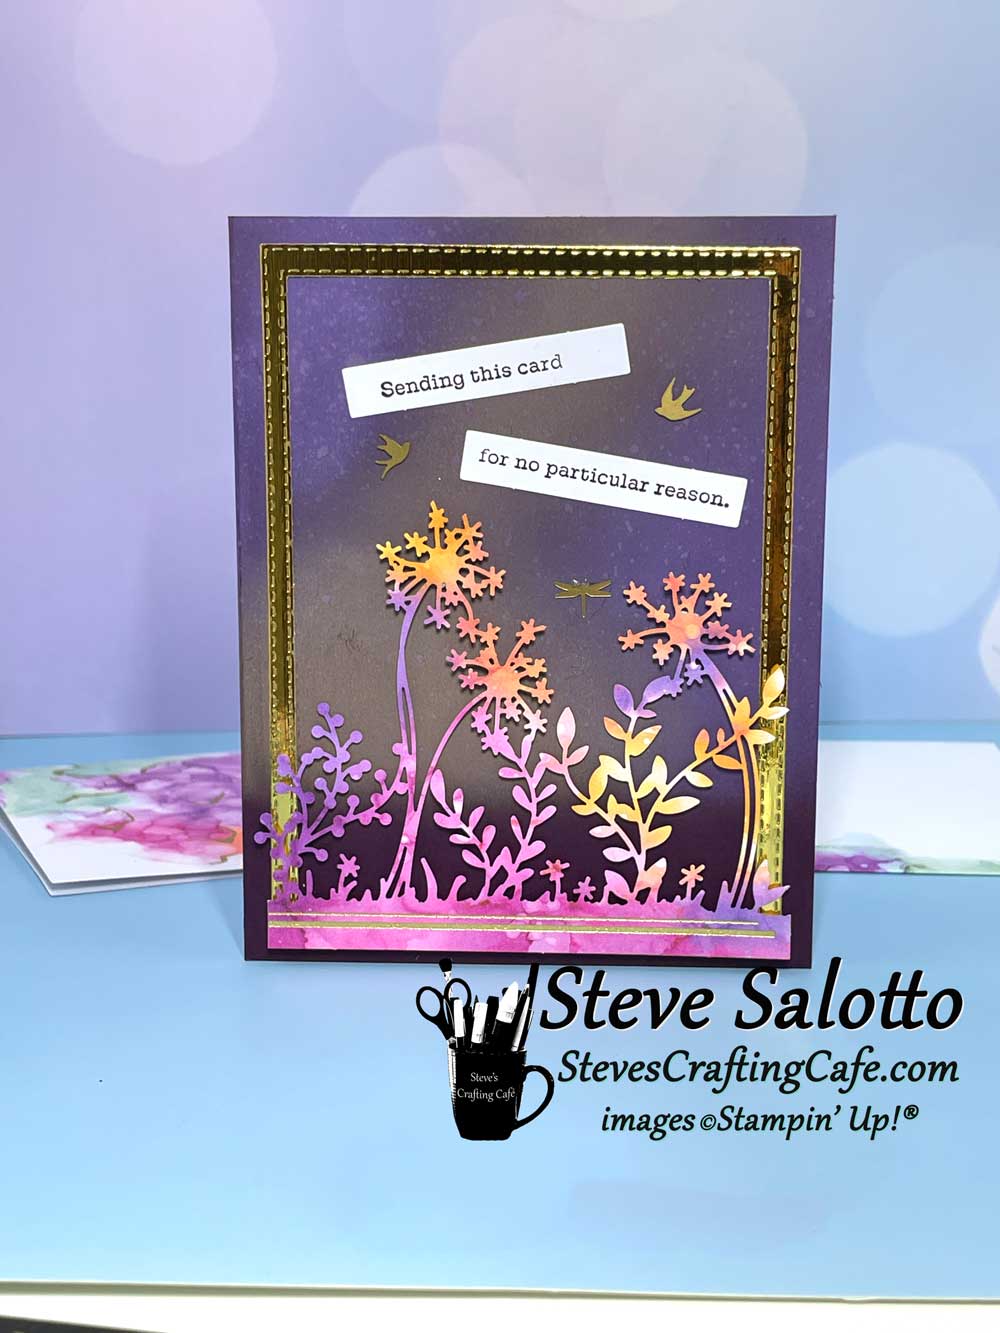
This card came out so cool! First, I blended Oxide ink (Tim Holtz, Distress Ink) on the Blackberry Bliss background, then added a gold frame that I die cut with nested dies. The flower die cut was long, so I cut it and used only a portion. And I stamped the sentiment onto strips of card stock and cut them out by hand.
For this alternate, I cut the flowers and used only a portion of them. I also added a gold dragonfly and bird, as well as some gold sequins.
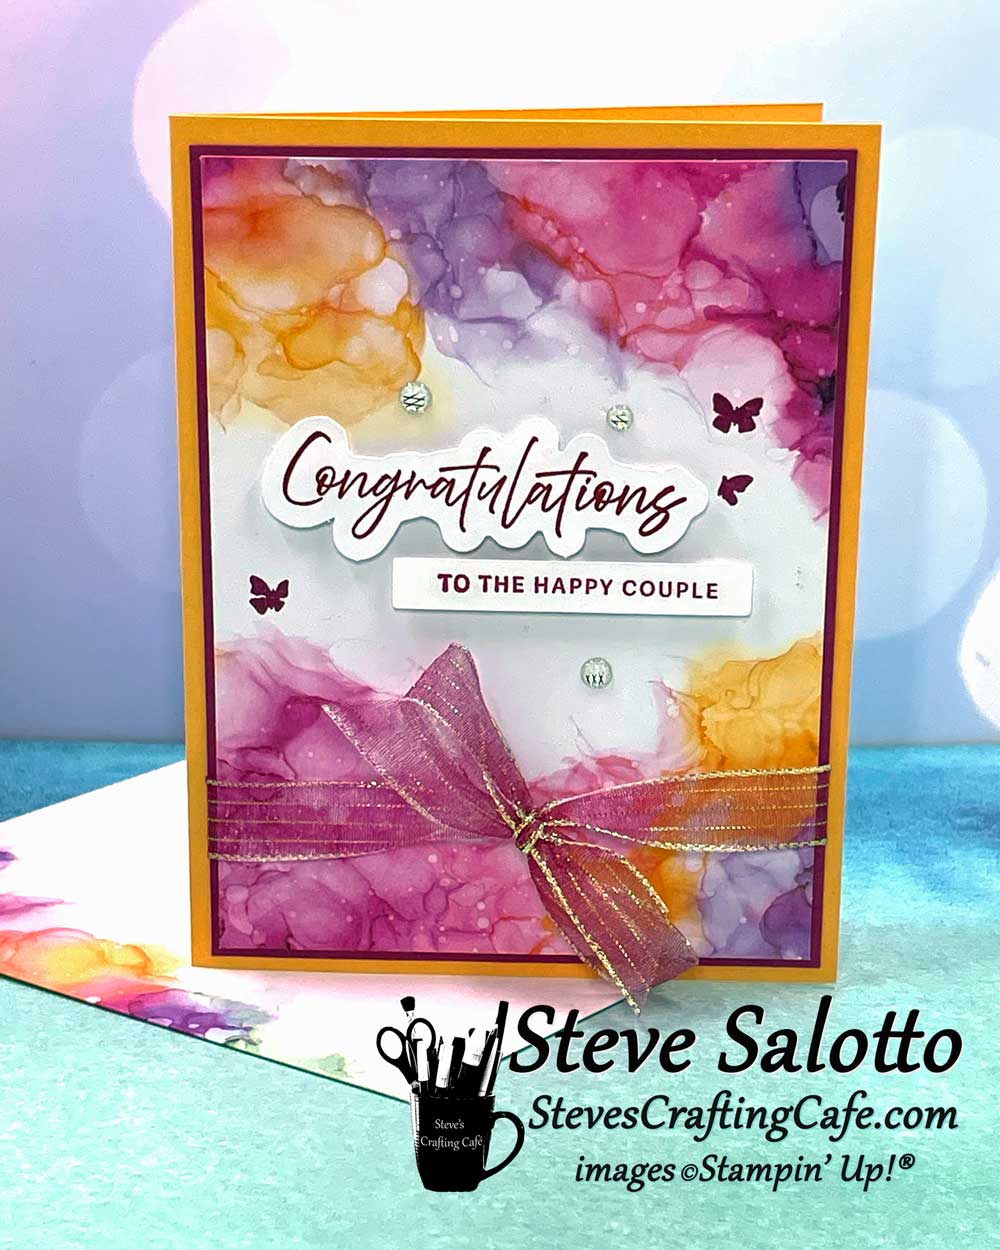
I matted a card front onto a piece of Blackberry Bliss card stock, then onto a Peach Pie card base. I colored a piece of Iridescent Trim with a Blackberry Bliss Stampin' Blend and tied it around the card.
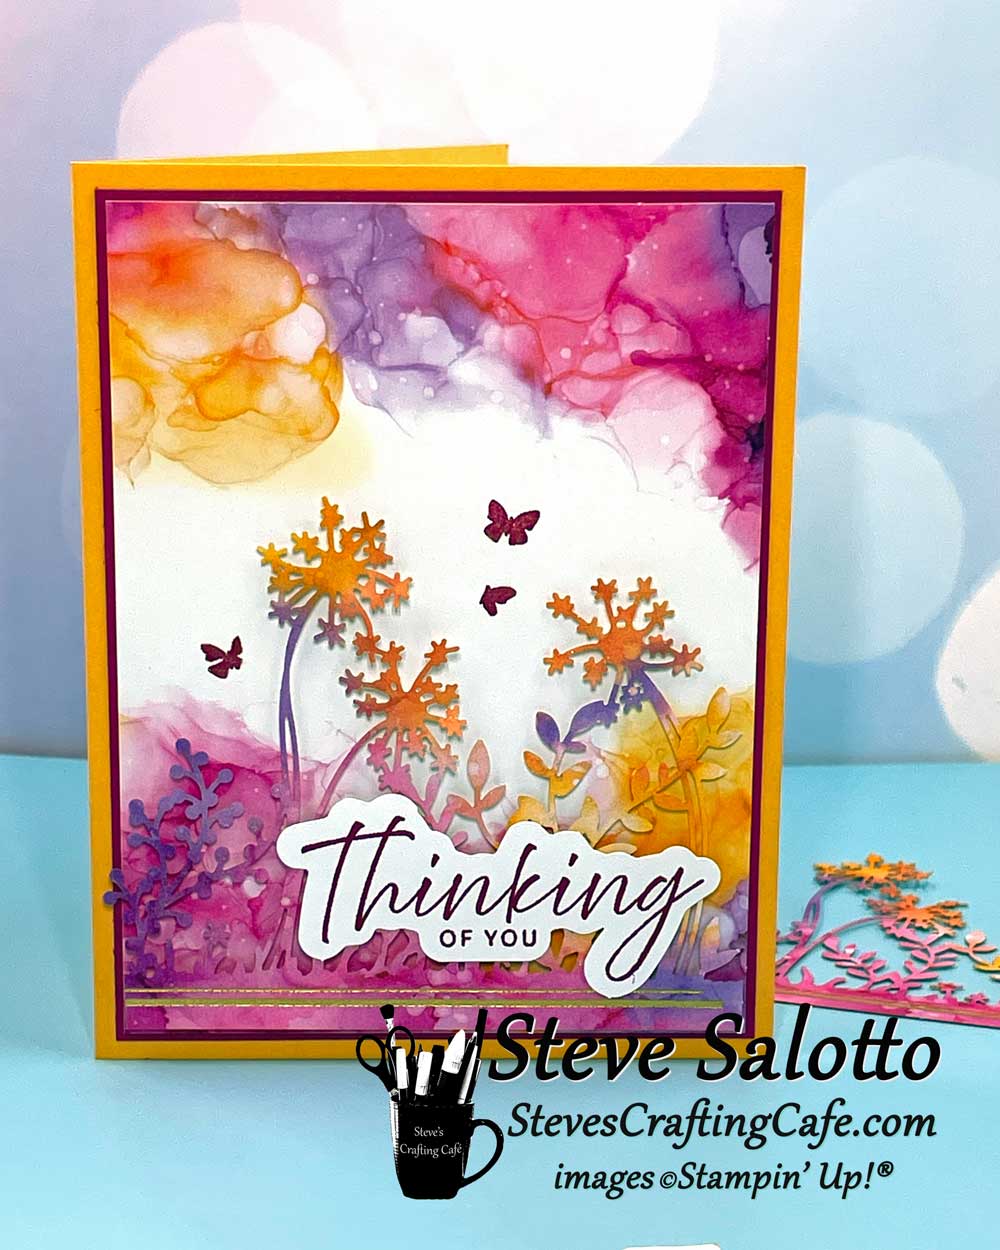
Another "step up" from one of the kit cards. I matted this on Berry Burst then used a Peach Pie card base. I cut the flowers and used only a portion of them.
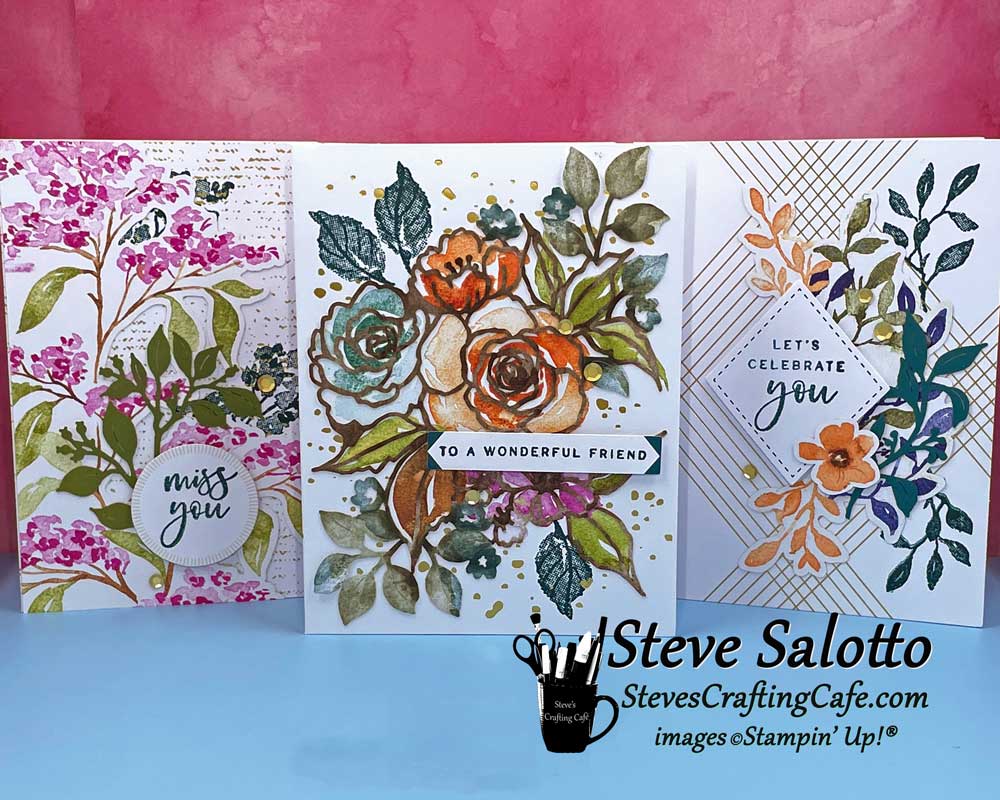
Kit Cards
Kit card #1
Kit card #2`
Kit Card #3
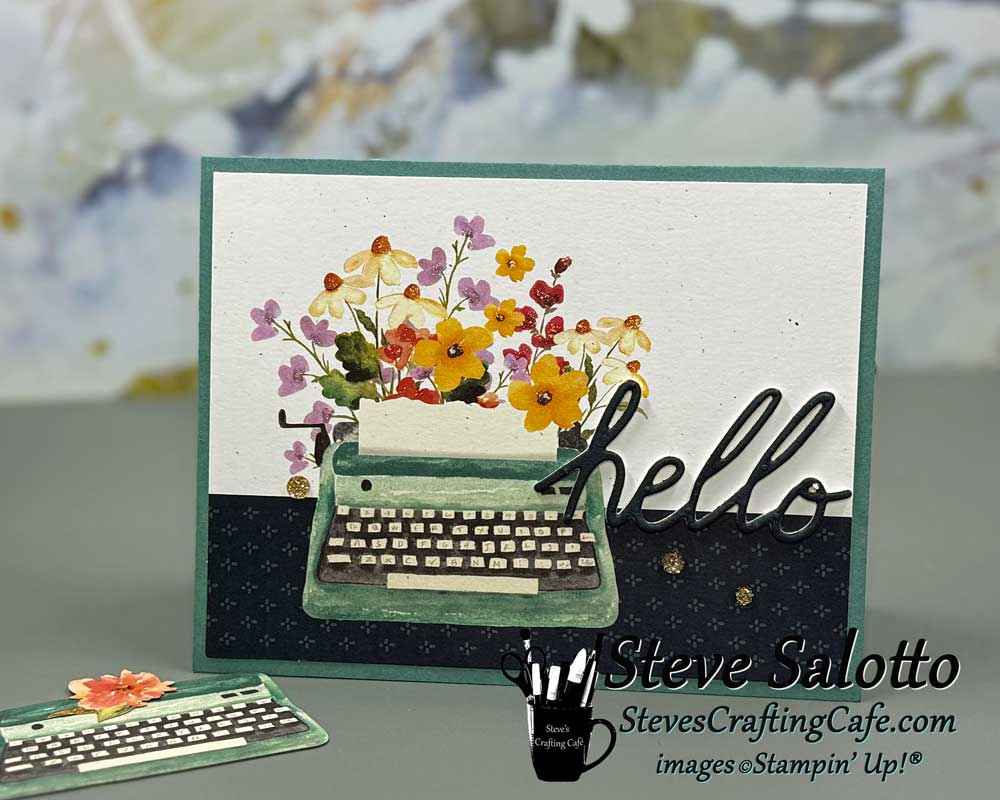
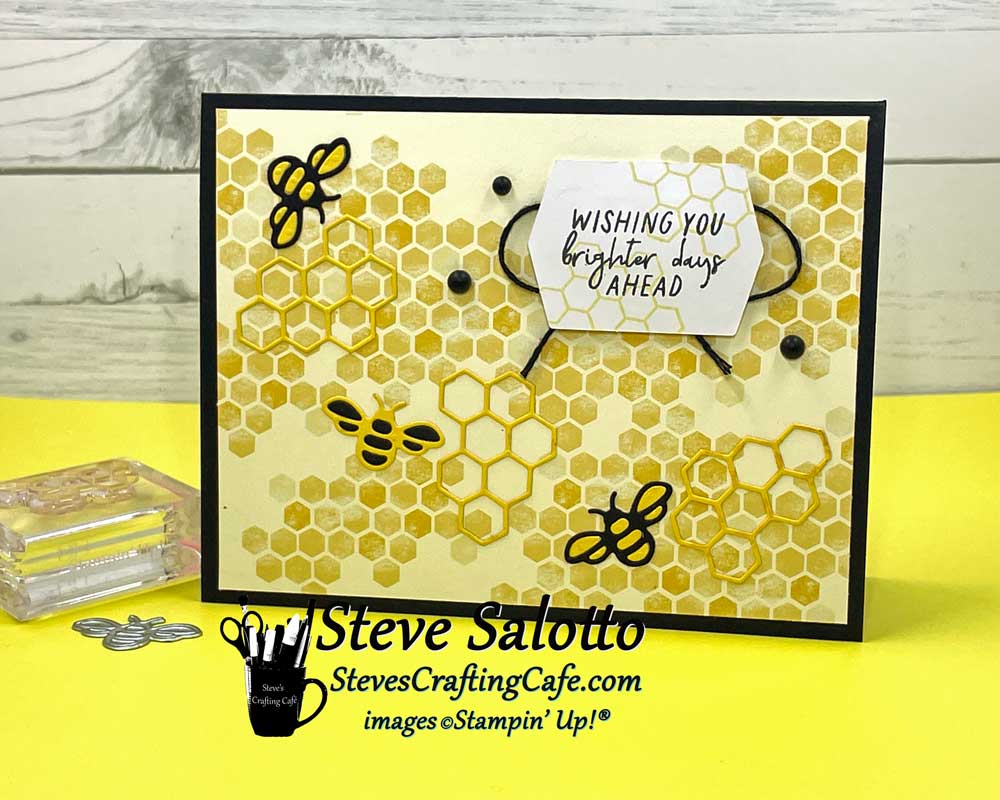
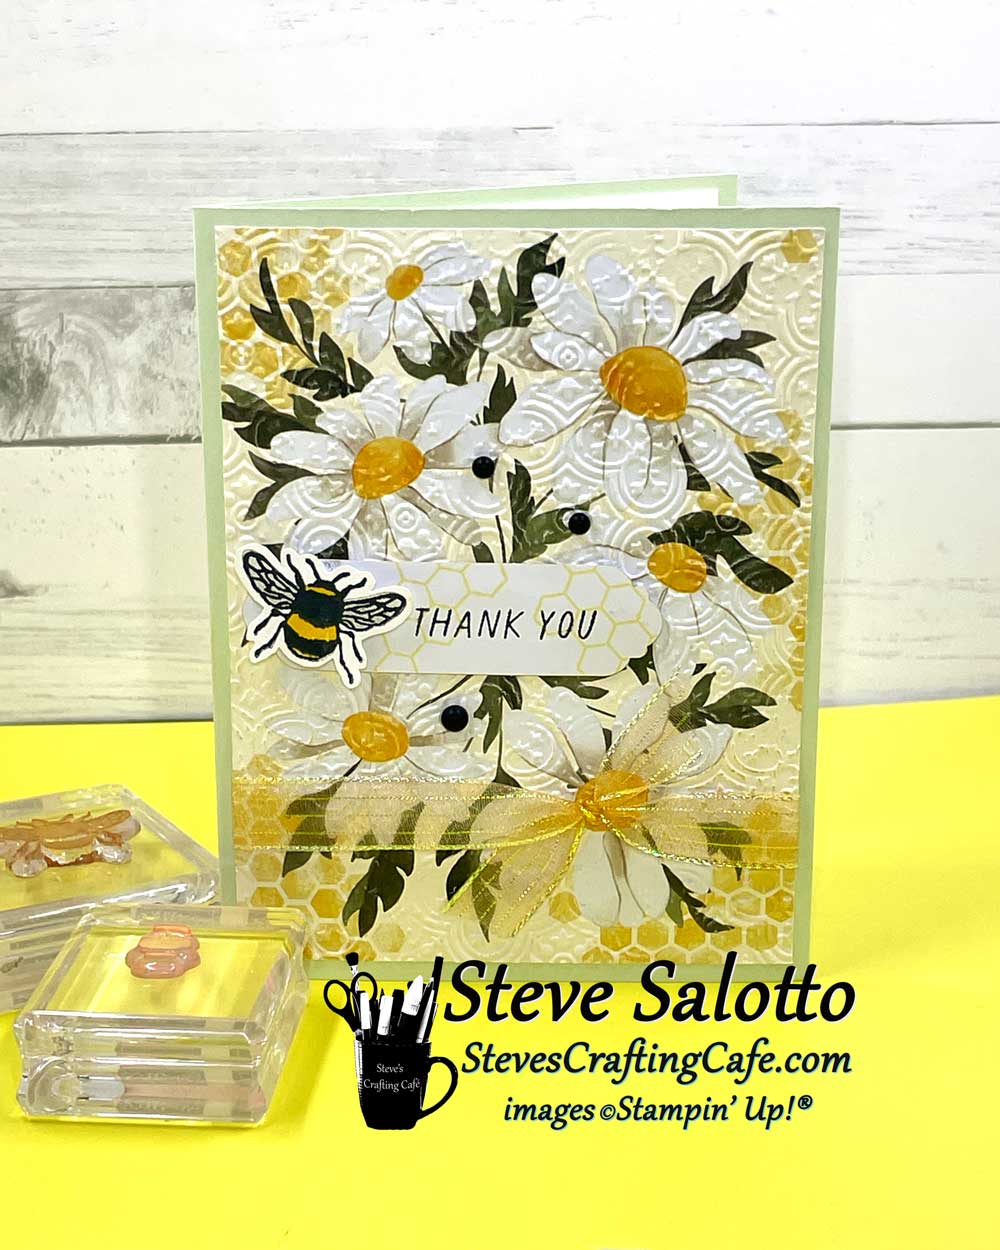
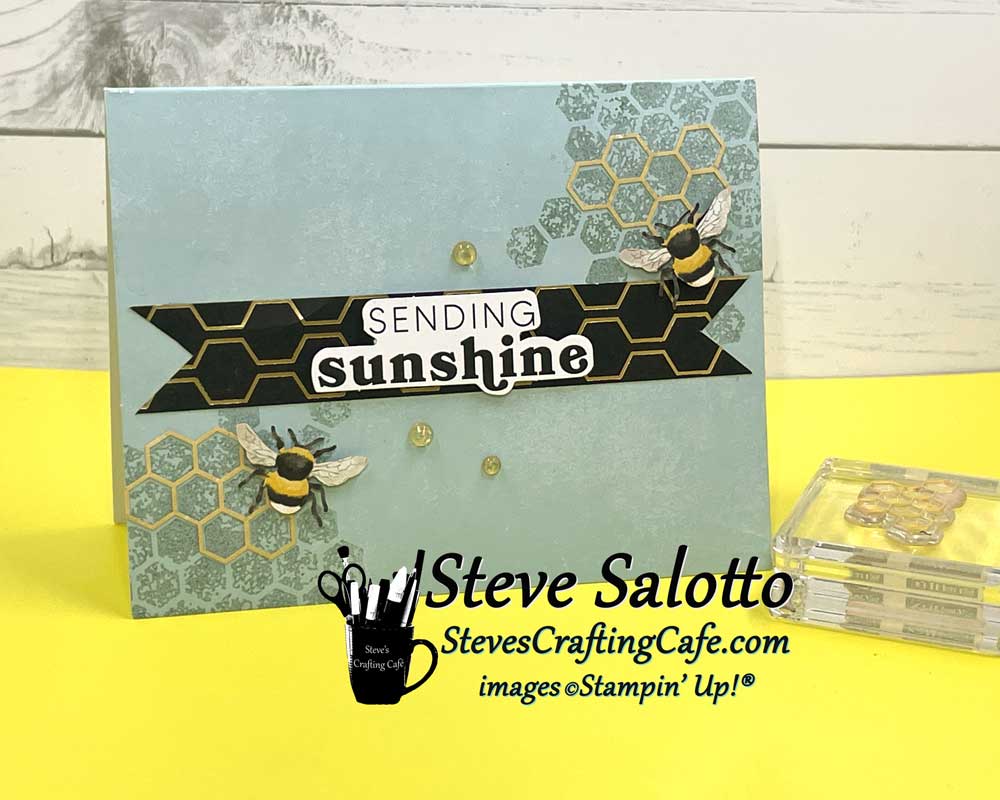
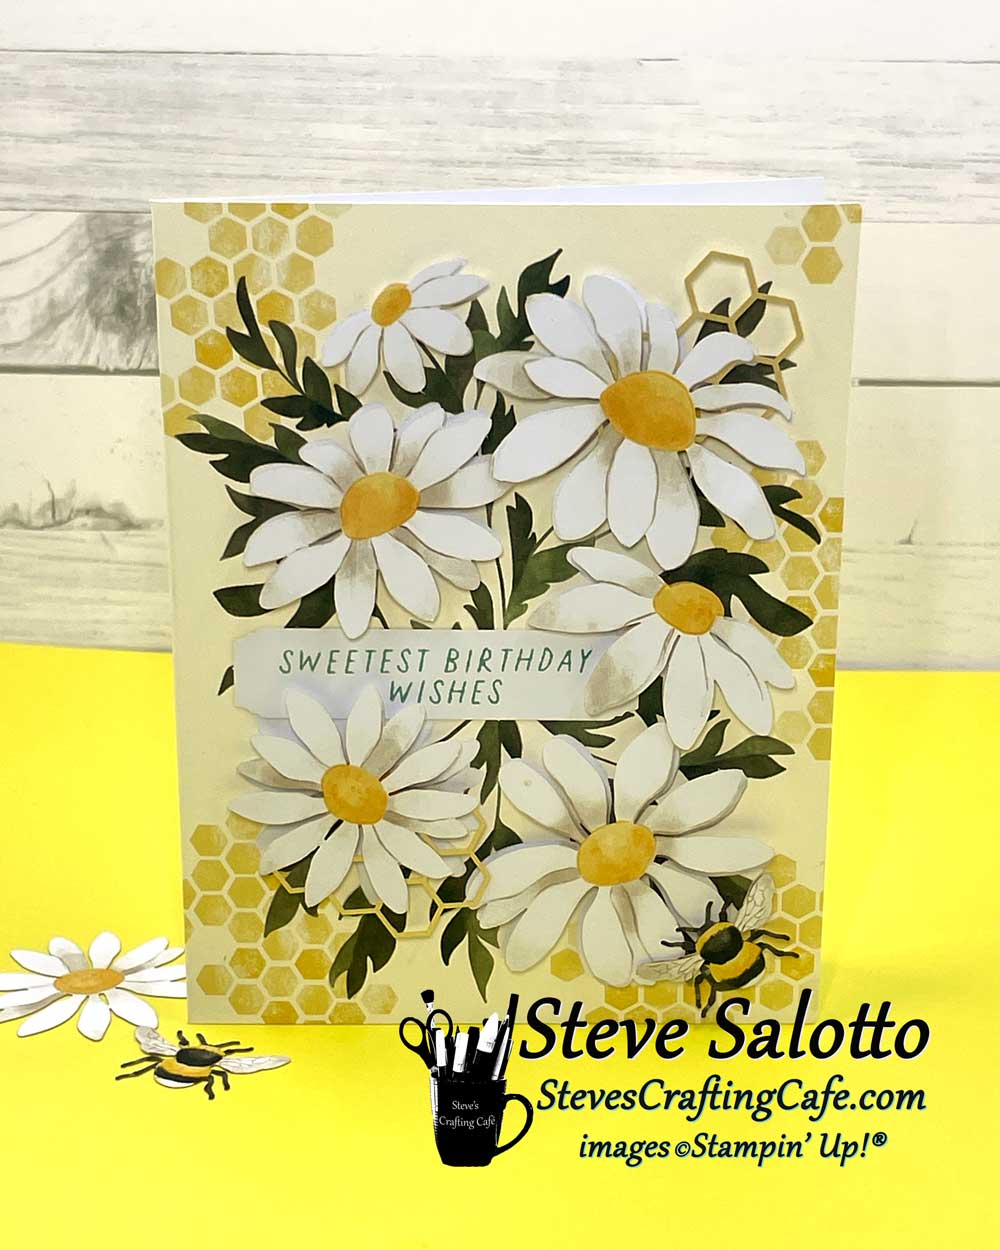
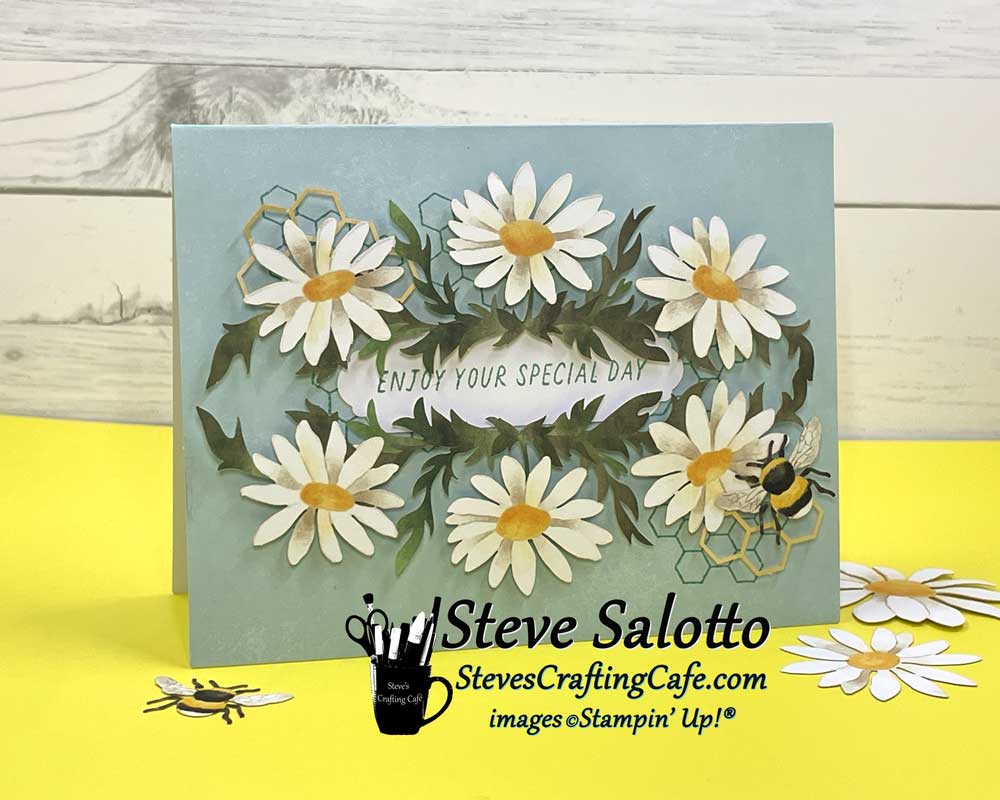
I love the numerous honeycomb options with this kit (stamp, die cut, printed elements) and I think I used all of them on this card.
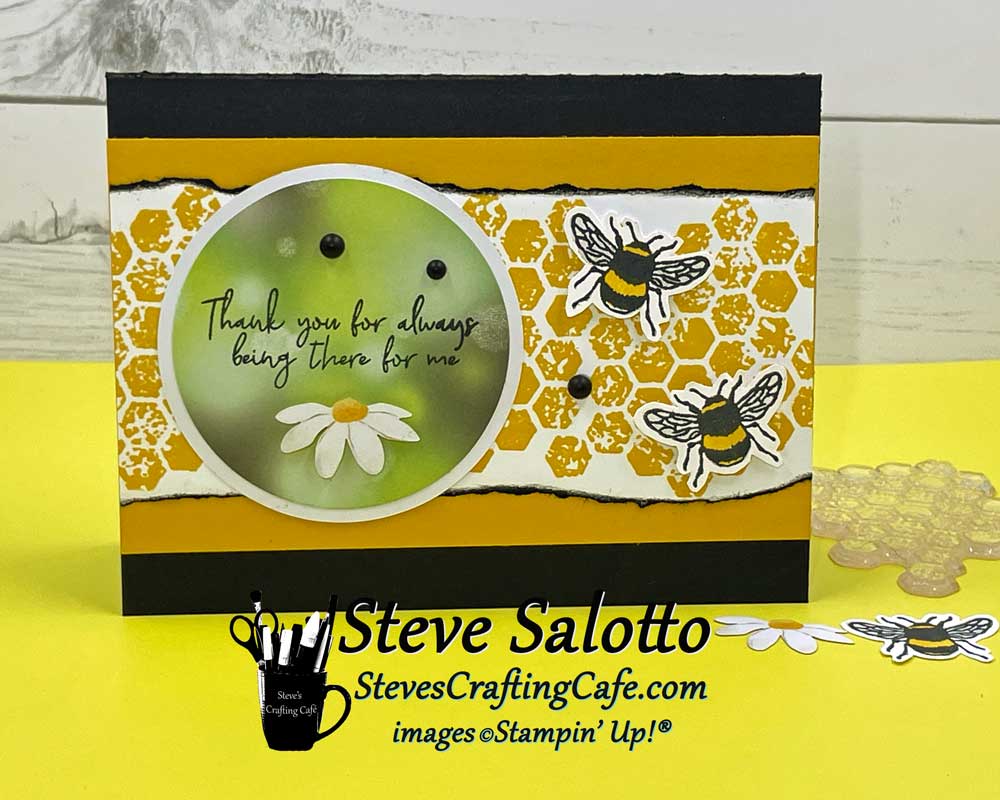
This card started with the honeycomb stamping and then just sort of took on a life of its own. I fussy cut the stamped bees and love how they look.
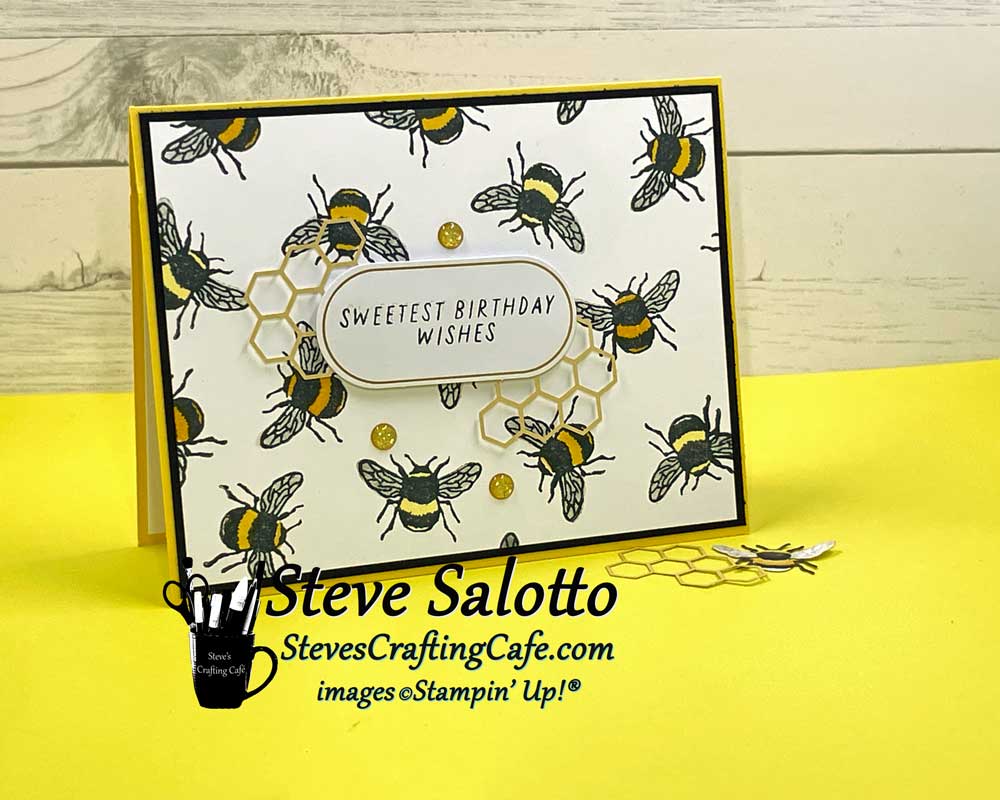
Okay, I went a little stamp-happy with the bees, but I just love them so much!!
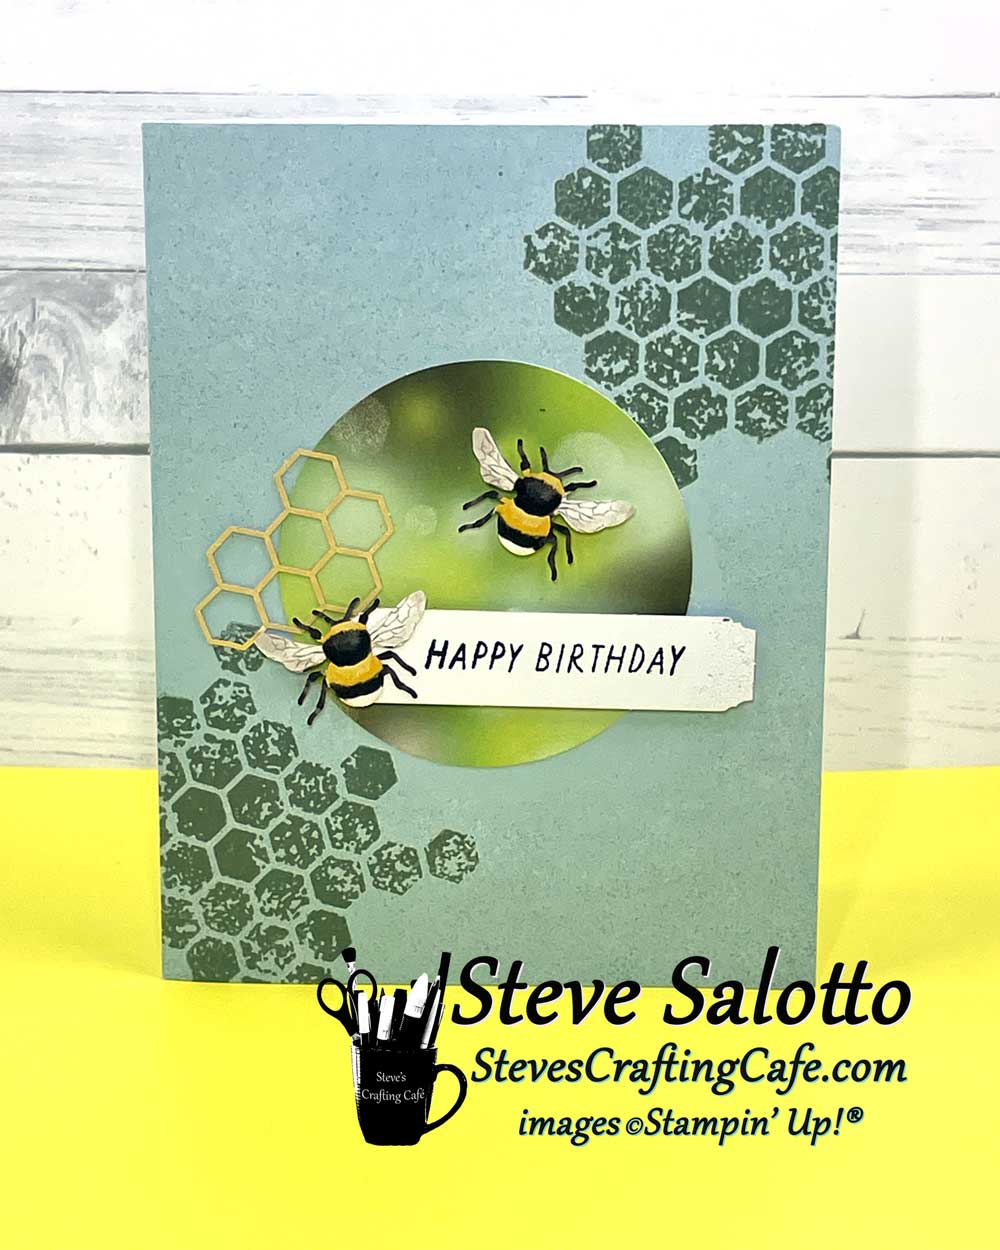
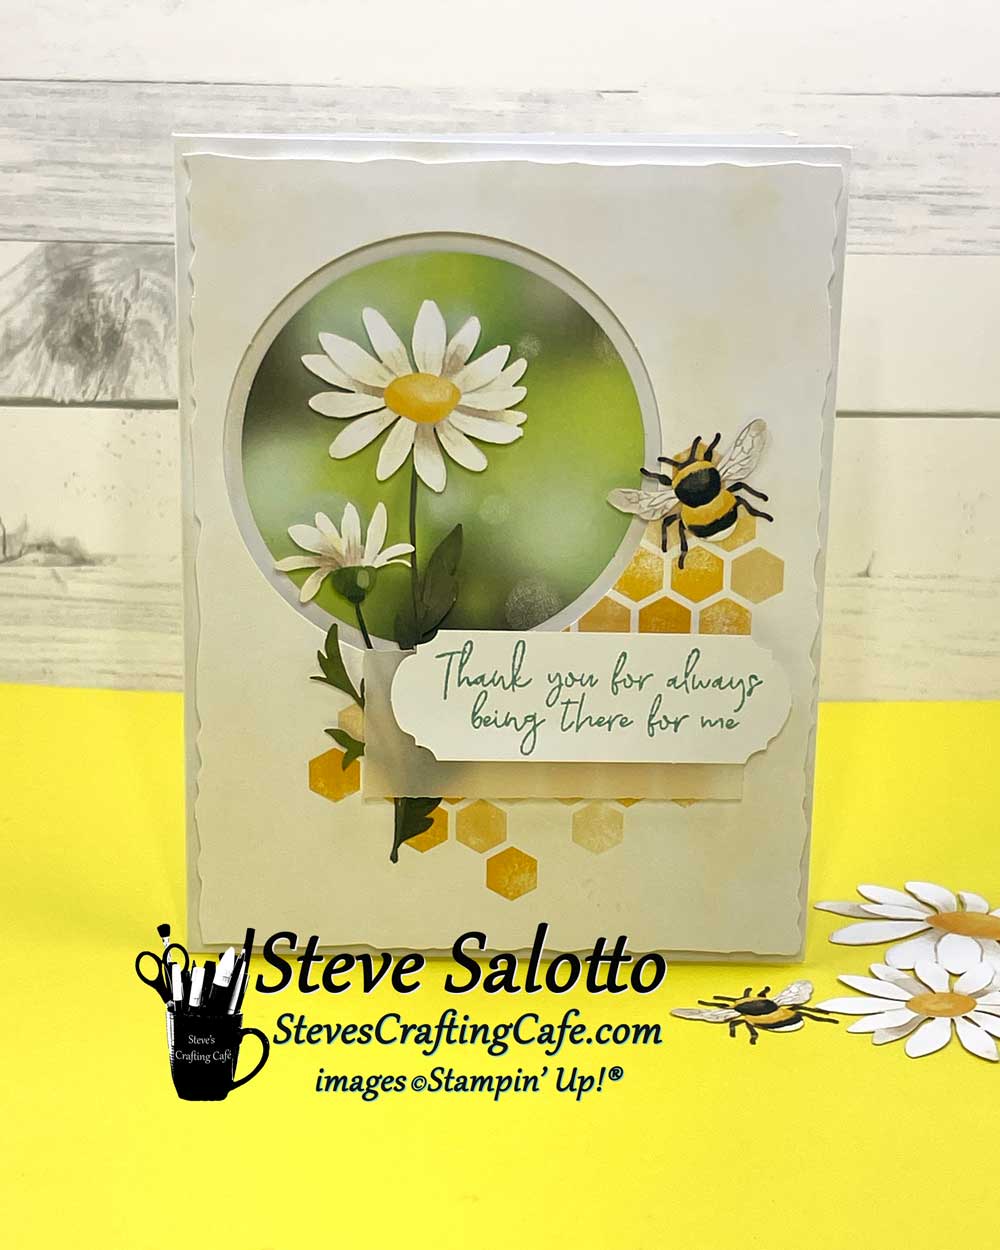
Everyone knows I love to ink blend with the leftover shapes from the punchout. That's how I created the circle on this card.
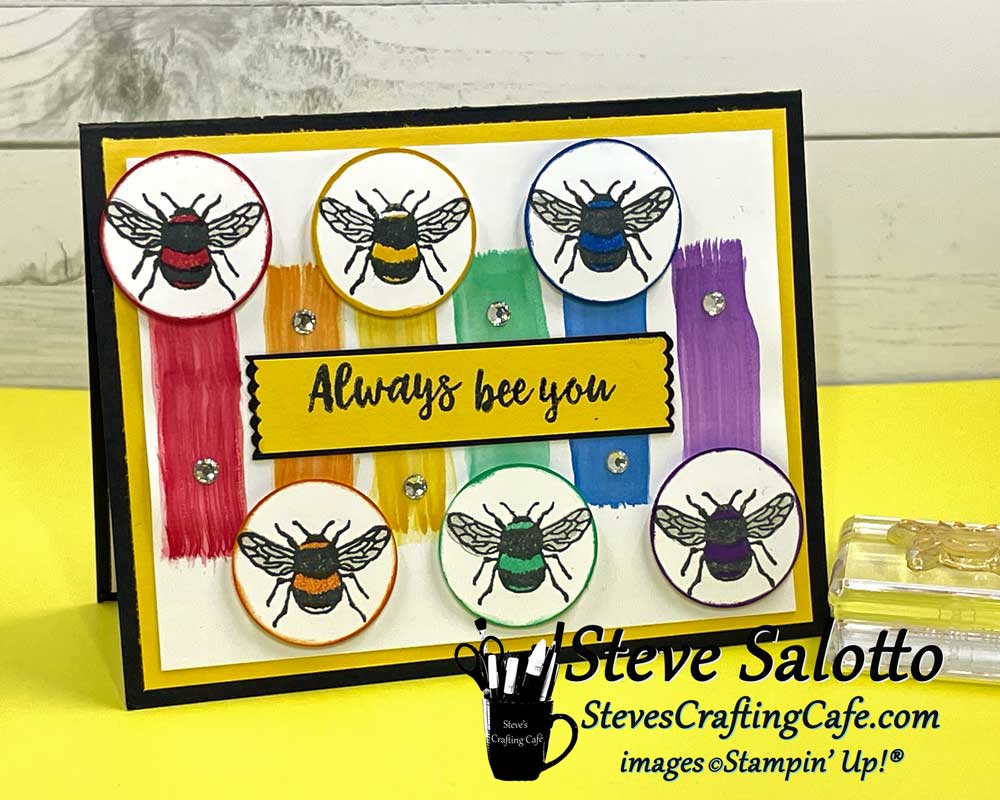
I usually make a "pride" card each year. I'm a little early on this one but I just loved the bees in the different colors.
I embossed this card front with the Distressed Tile 3D folder before mounting it to a Soft Sea Foam card base.
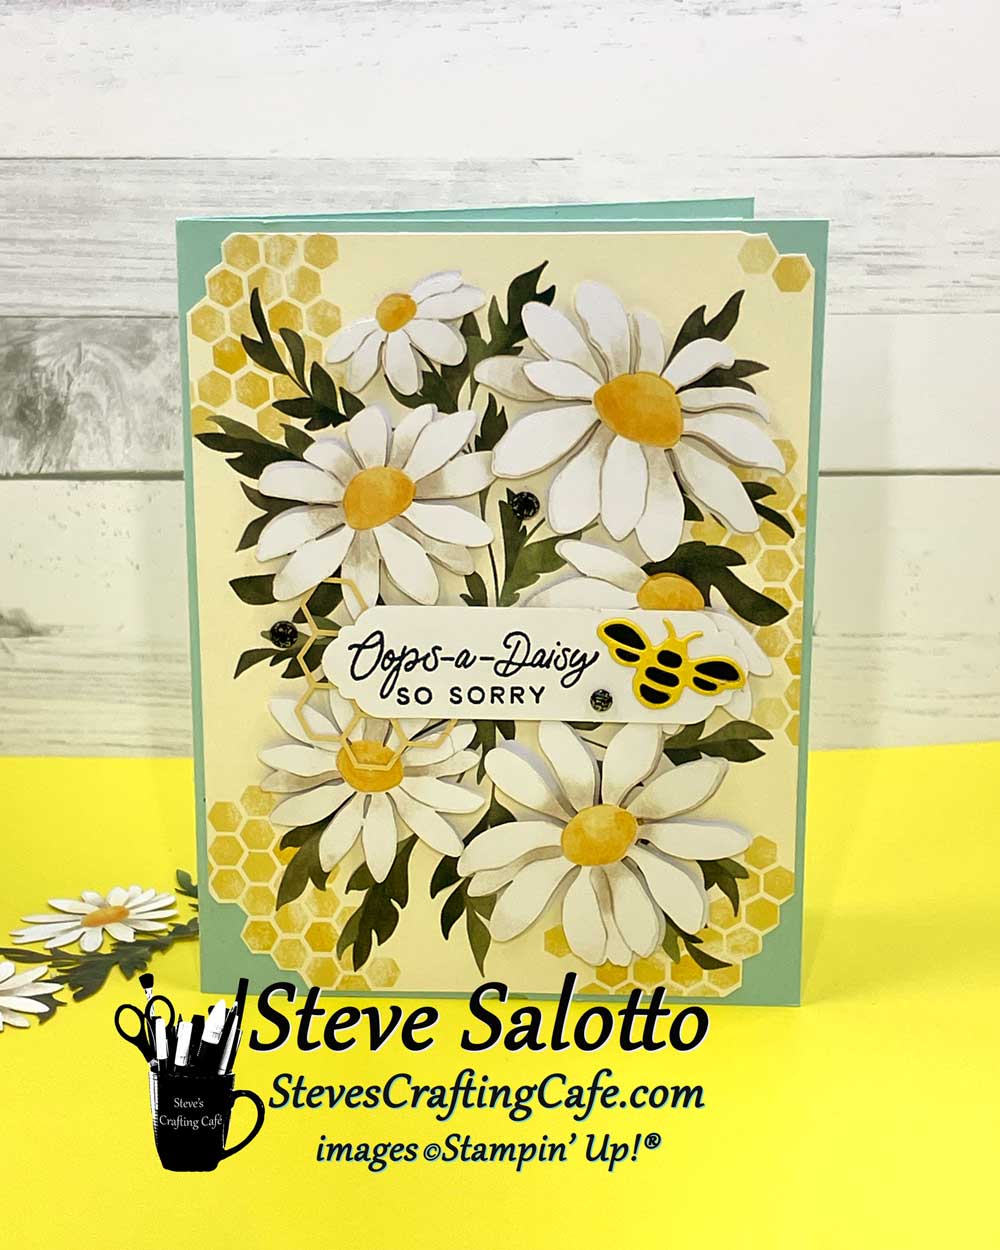
I loved this sentiment from the Cheerful Daisies stamp set. (Retiring soon.) I also tried a thing cutting the hives in the corners. I'm not sure if I like it or not, but it's different.
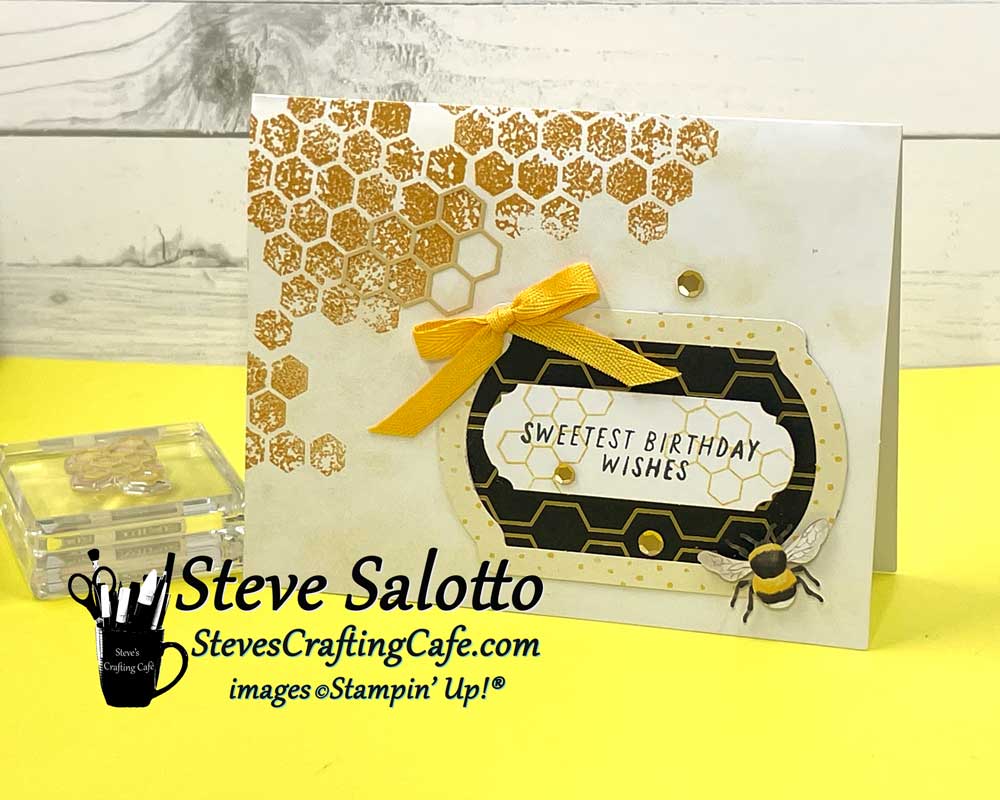
I stamped the hive in the upper left corner and added a die cut over it. I used a cutout leftover from an ephemera pack to frame the sentiment., and a piece of old DSP to back it.
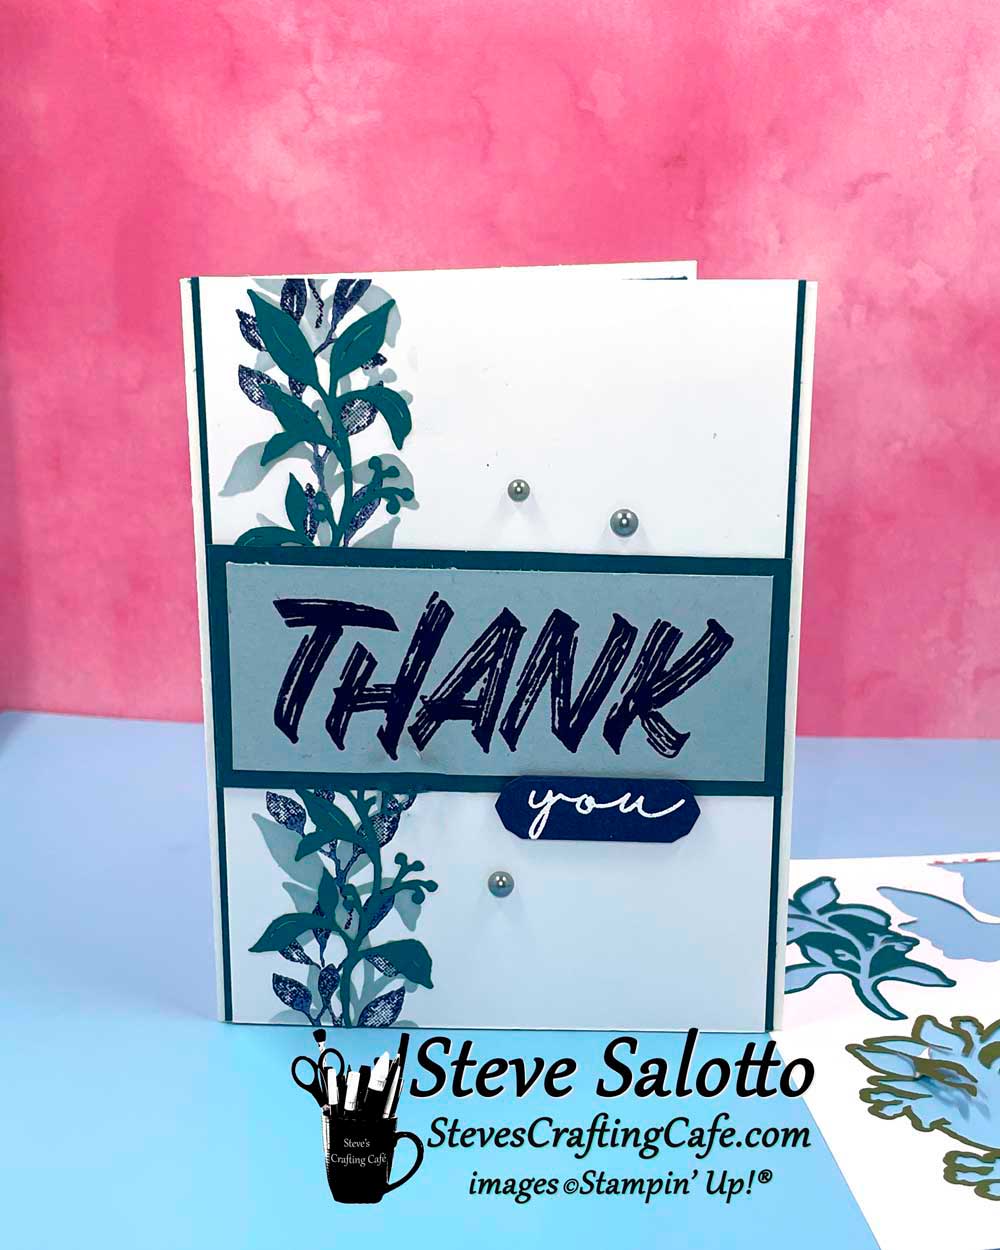
My masculine entry for this month. I stamped the hives in gray ink. And then went with the simplicity of the bees against the blurred circle. I love how it came out.
This was going to be my "masculine" card this month, but I wasn't sure if the paper and yellow dots are a little too girly. Either way, the old DSP really works for this card, and I love the ephemera sentiment.
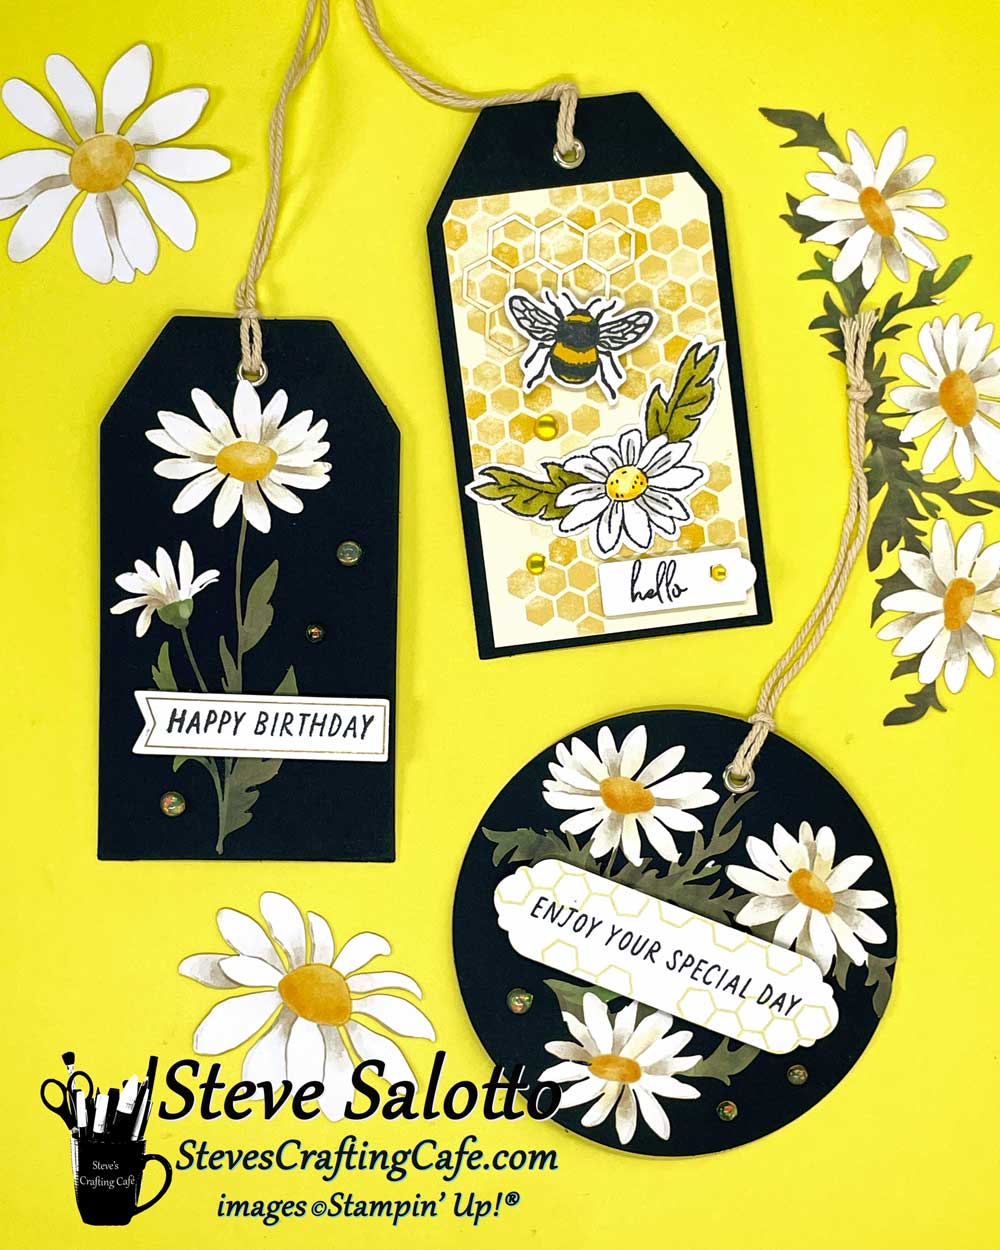
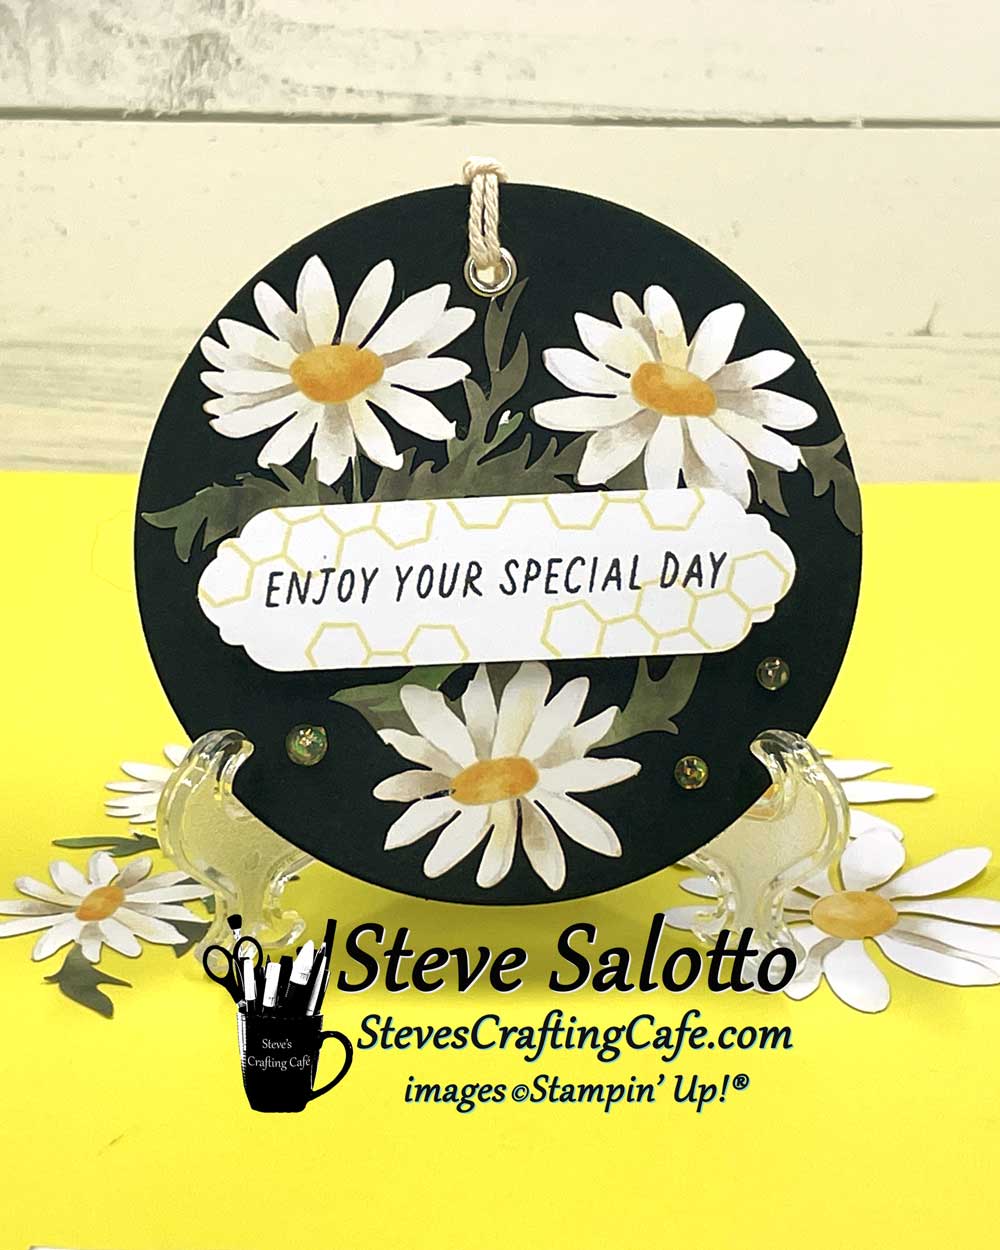
The three tags I made this month.
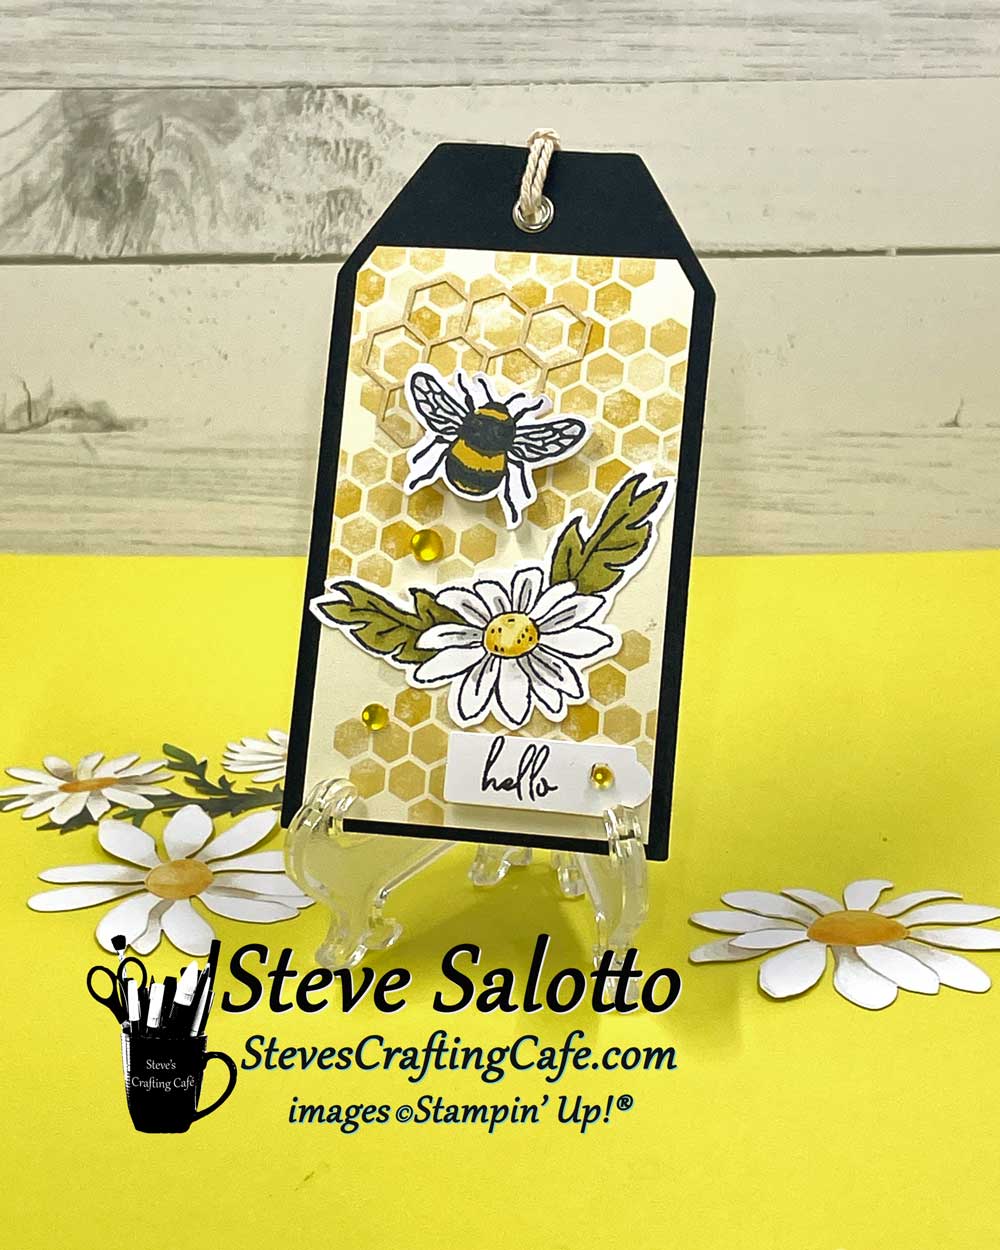
I stamped and colored the bee and flower for this tag.
How stunning are these die cuts against black tags? I love them! So, I kept the tag simple.
Another black tag with the die cuts glued to it.
Kit Card #1
Kit Card #2
Kit Card #3
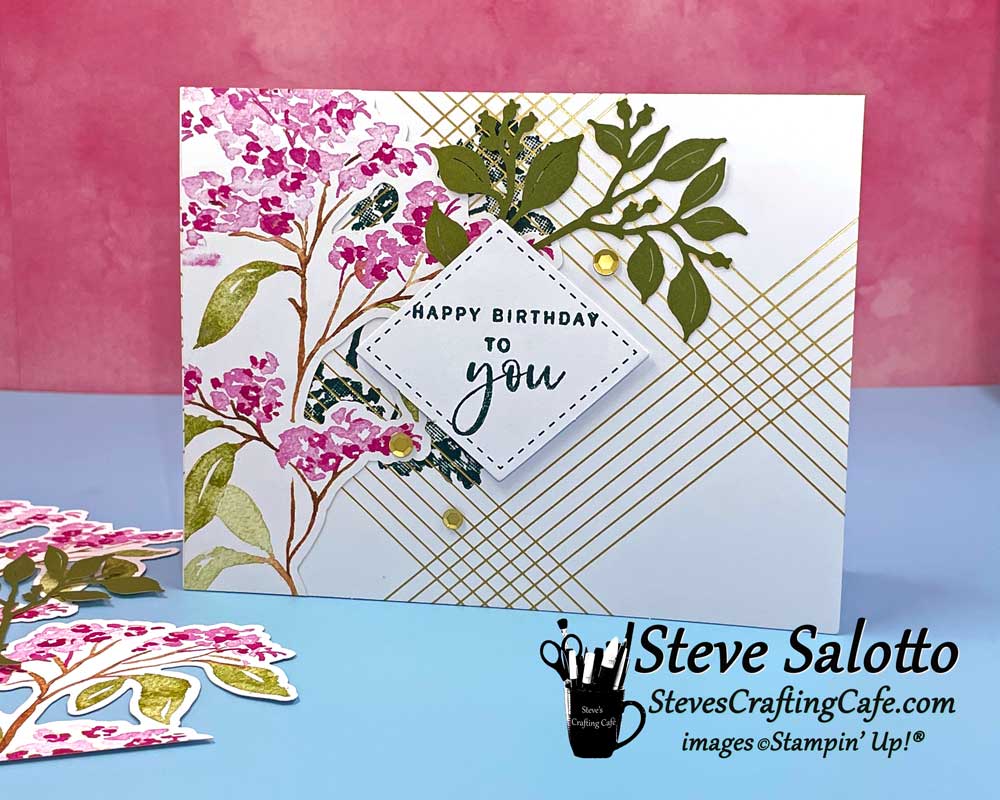
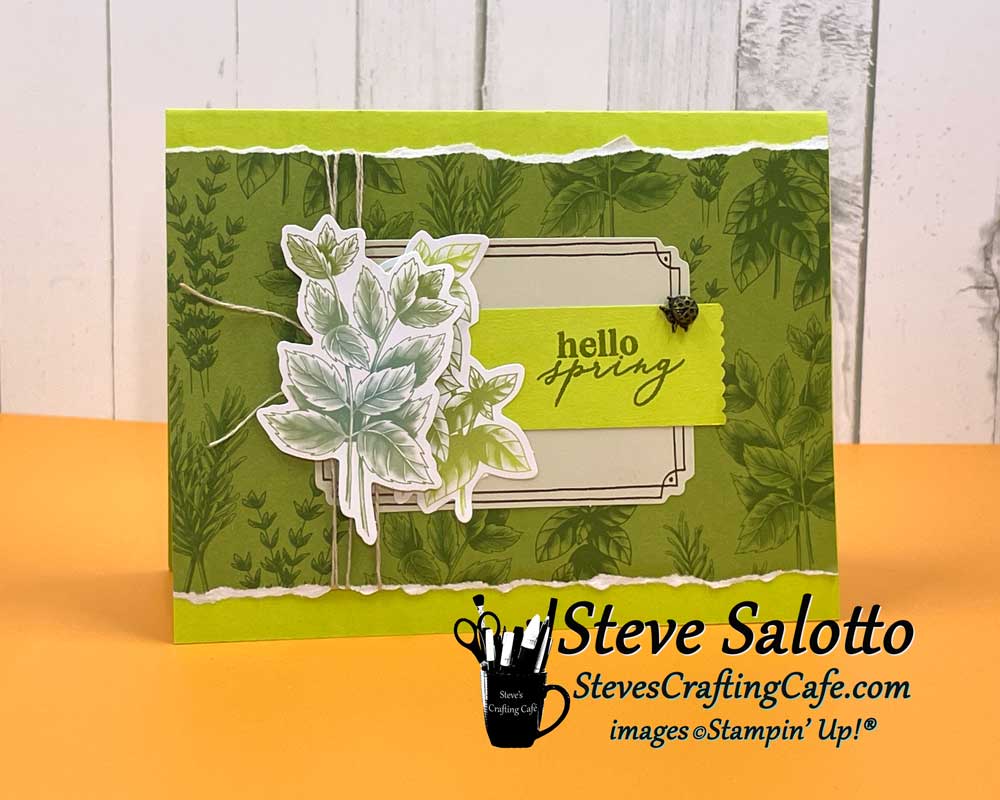
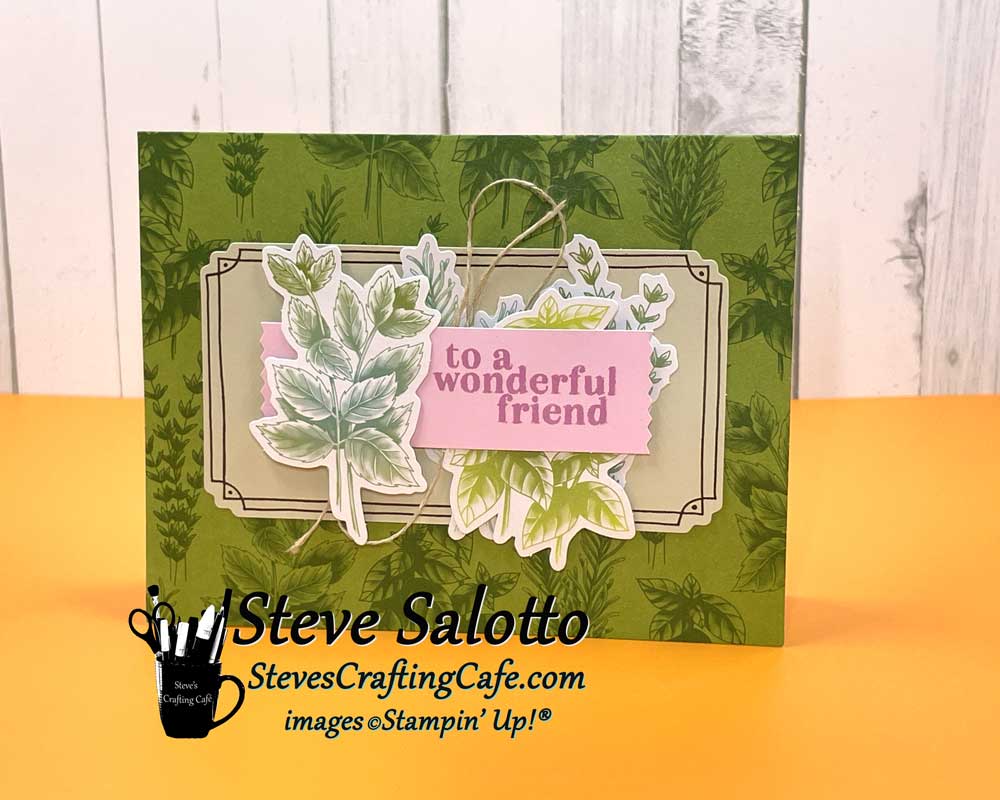
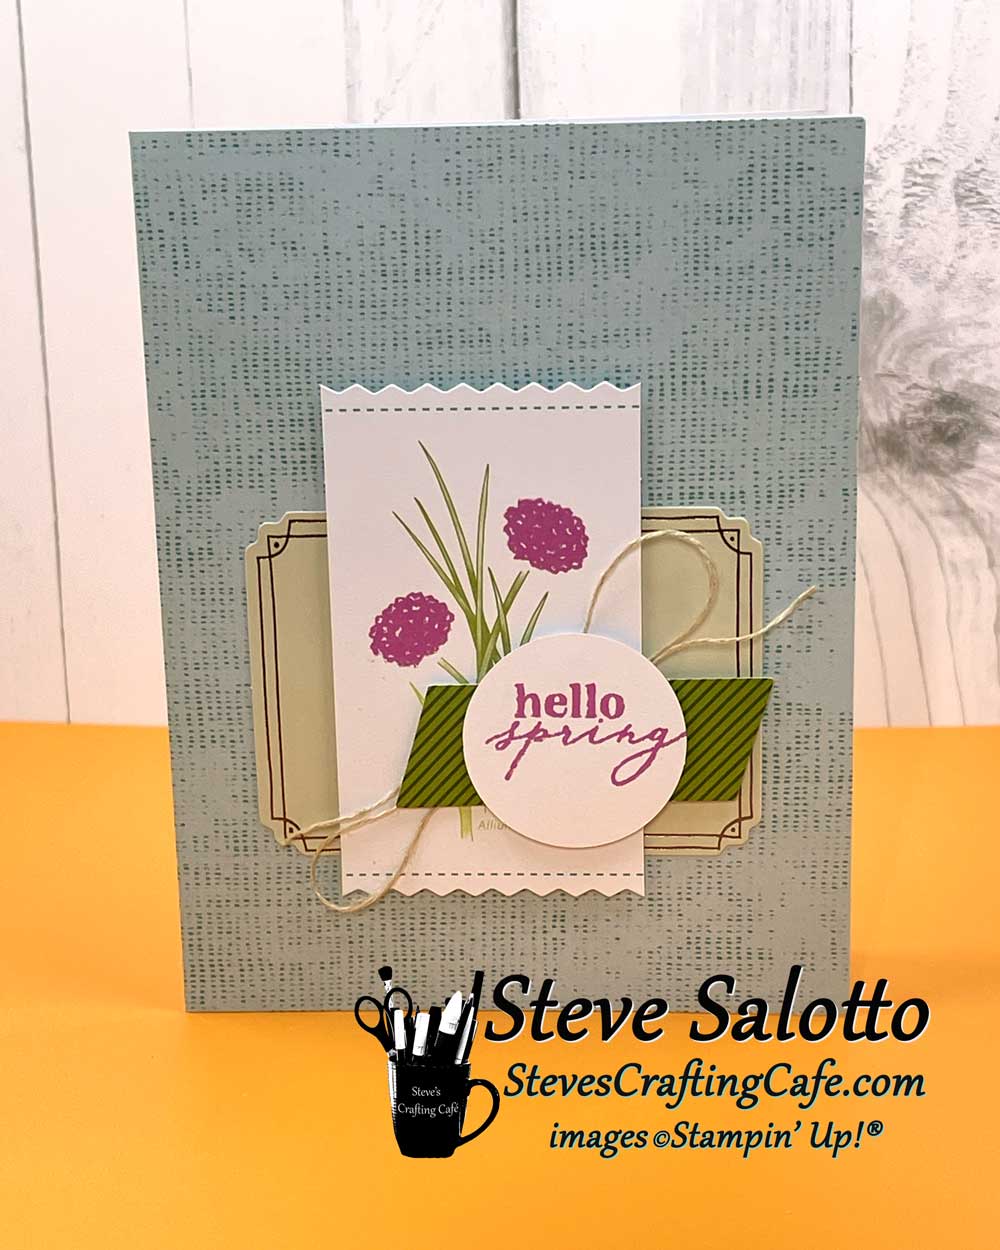
Here's my first alternate for "Hello, Spring." I used Lemon Lime Twist card stock as the base and something about that green patterned paper just screamed "Rip me!" 😊
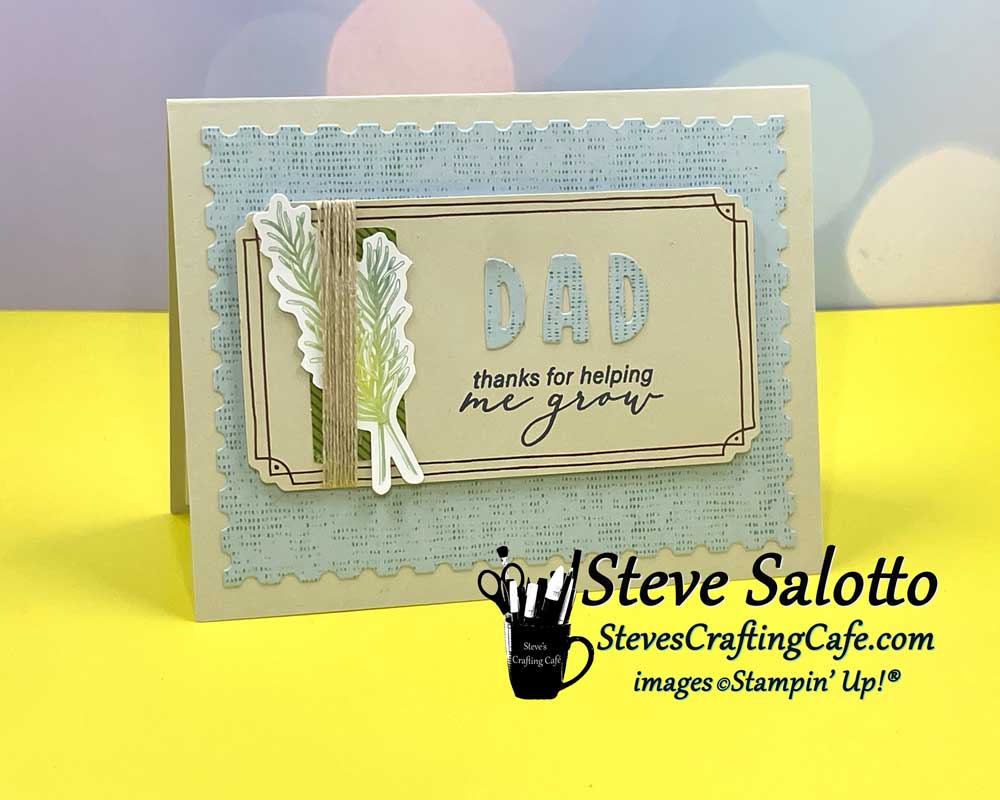
Here's my masculine alternate card for "Hello Spring." Since my card last month was so plain I wanted to make one this month that had a bunch of elements on it but could still be given to a man. I like the colors. They're softer than traditional blue and brown and really work for spring.
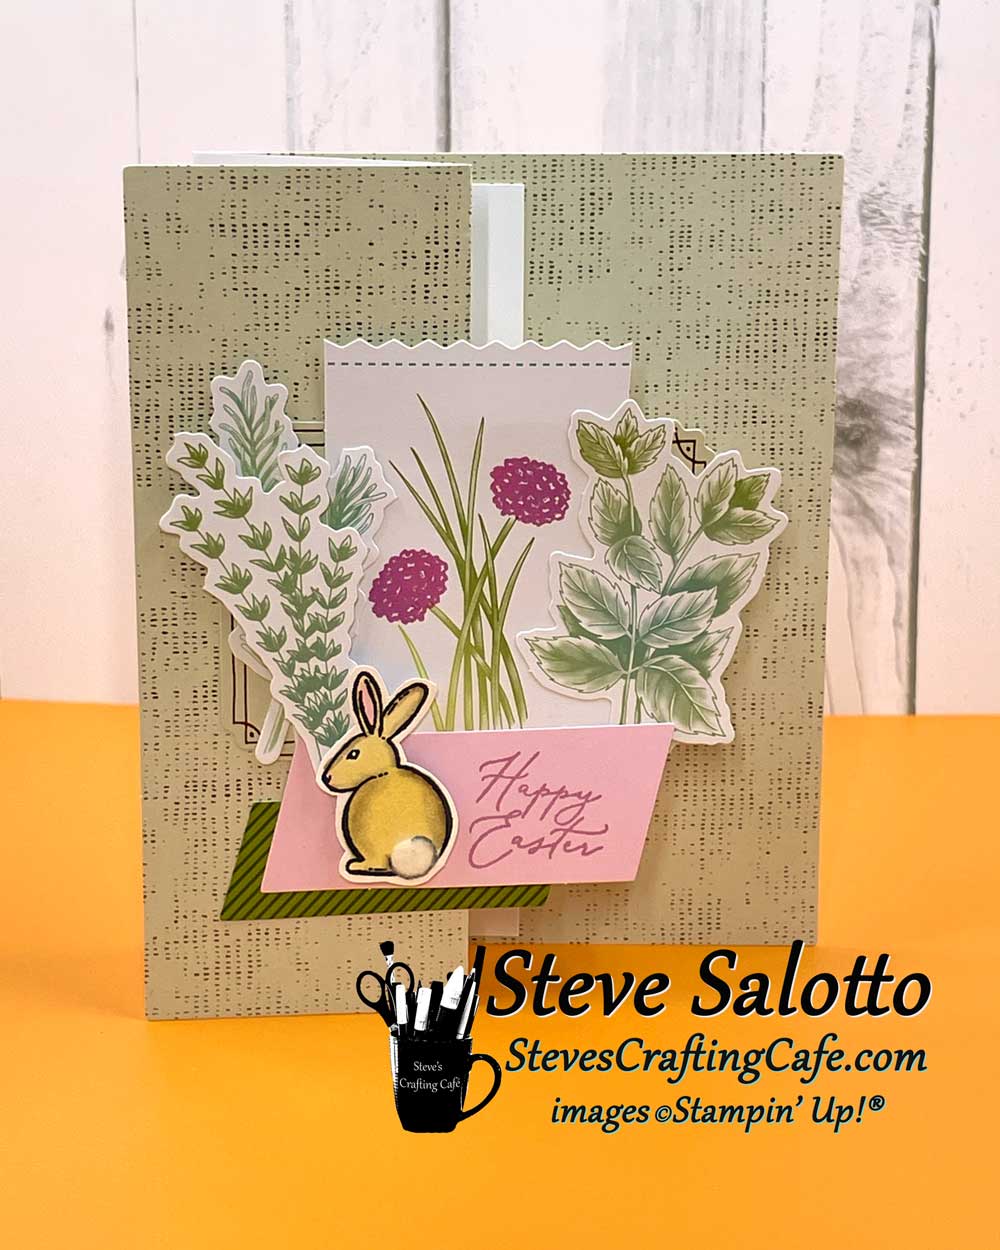
I used a bunny stamp from a Paper Pumpkin kit from 5 years ago. The rest is from this kit. This fancy fold is perfect to use on any card that has a printed front and back. I almost always make this fold with Paper Pumpkin because I like it so much.
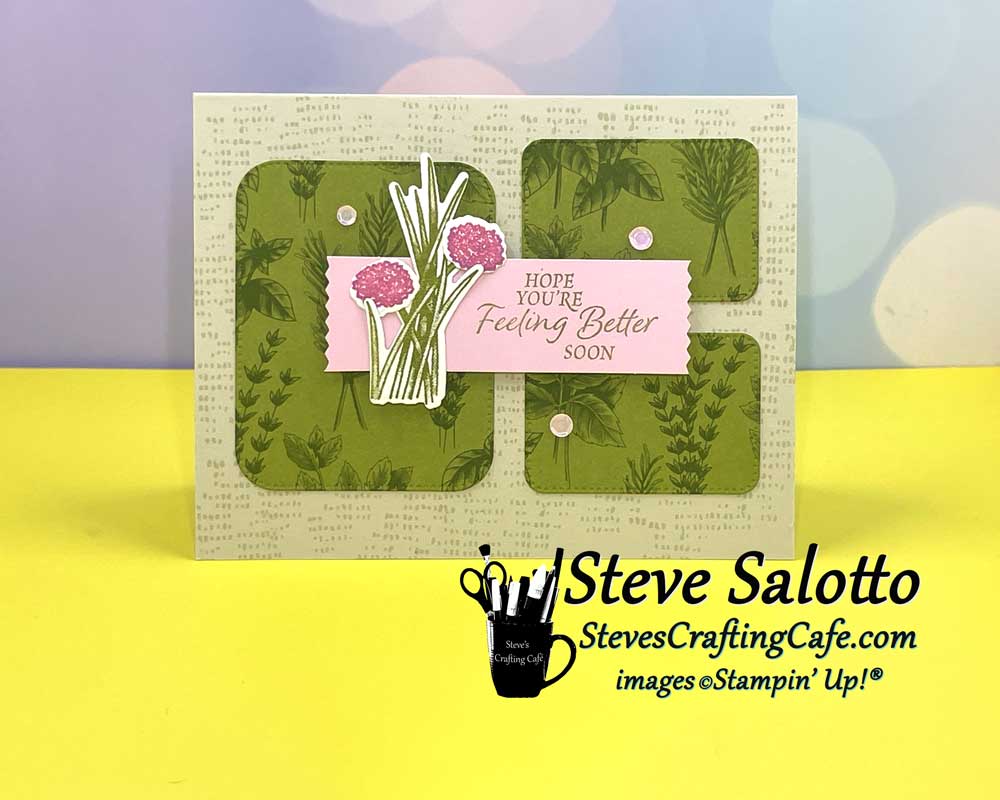
I created the background using a stamp from the set. I die cut the green paper to get the rectangles.
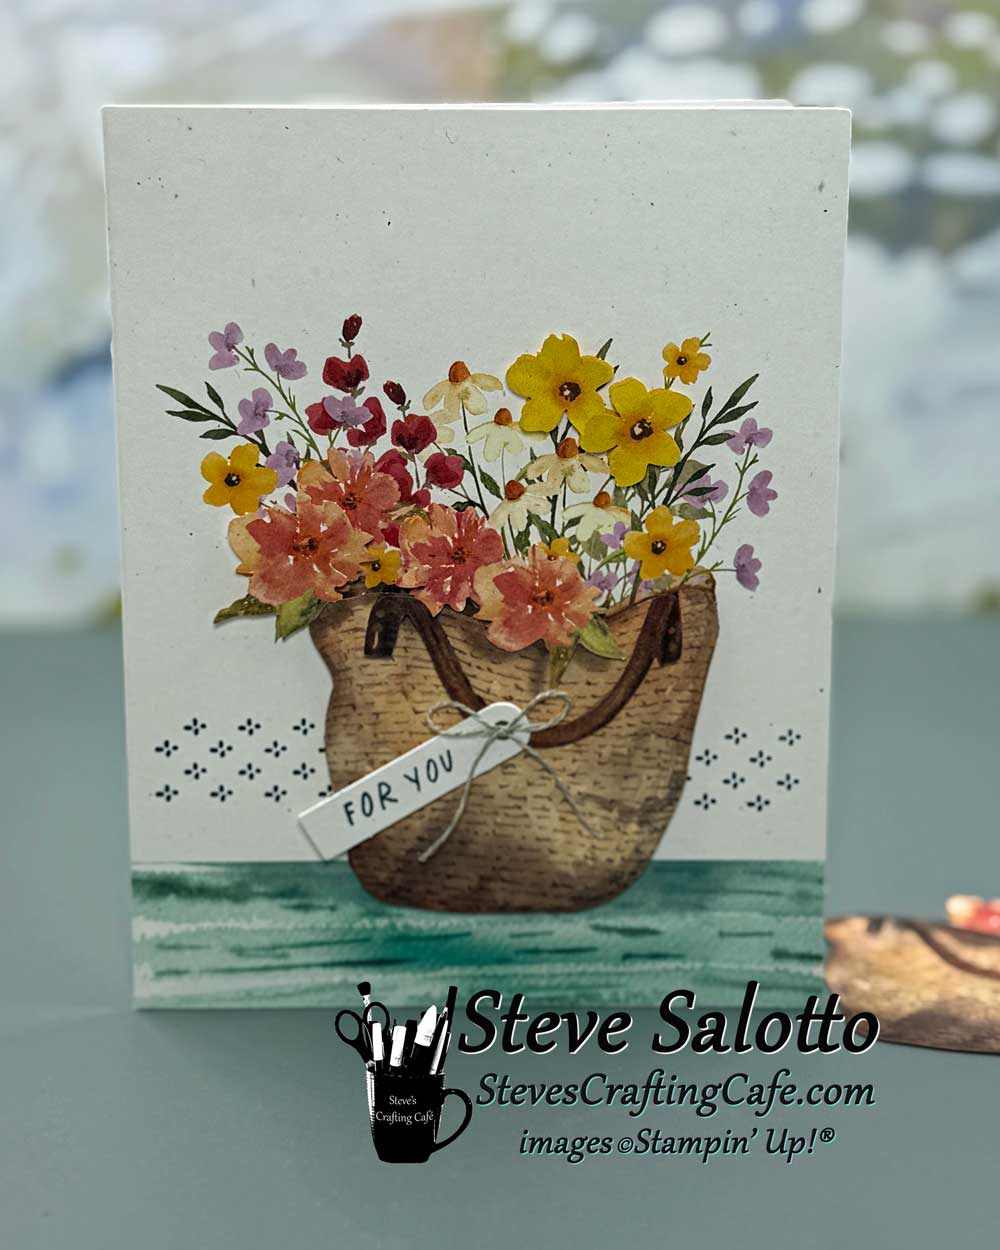
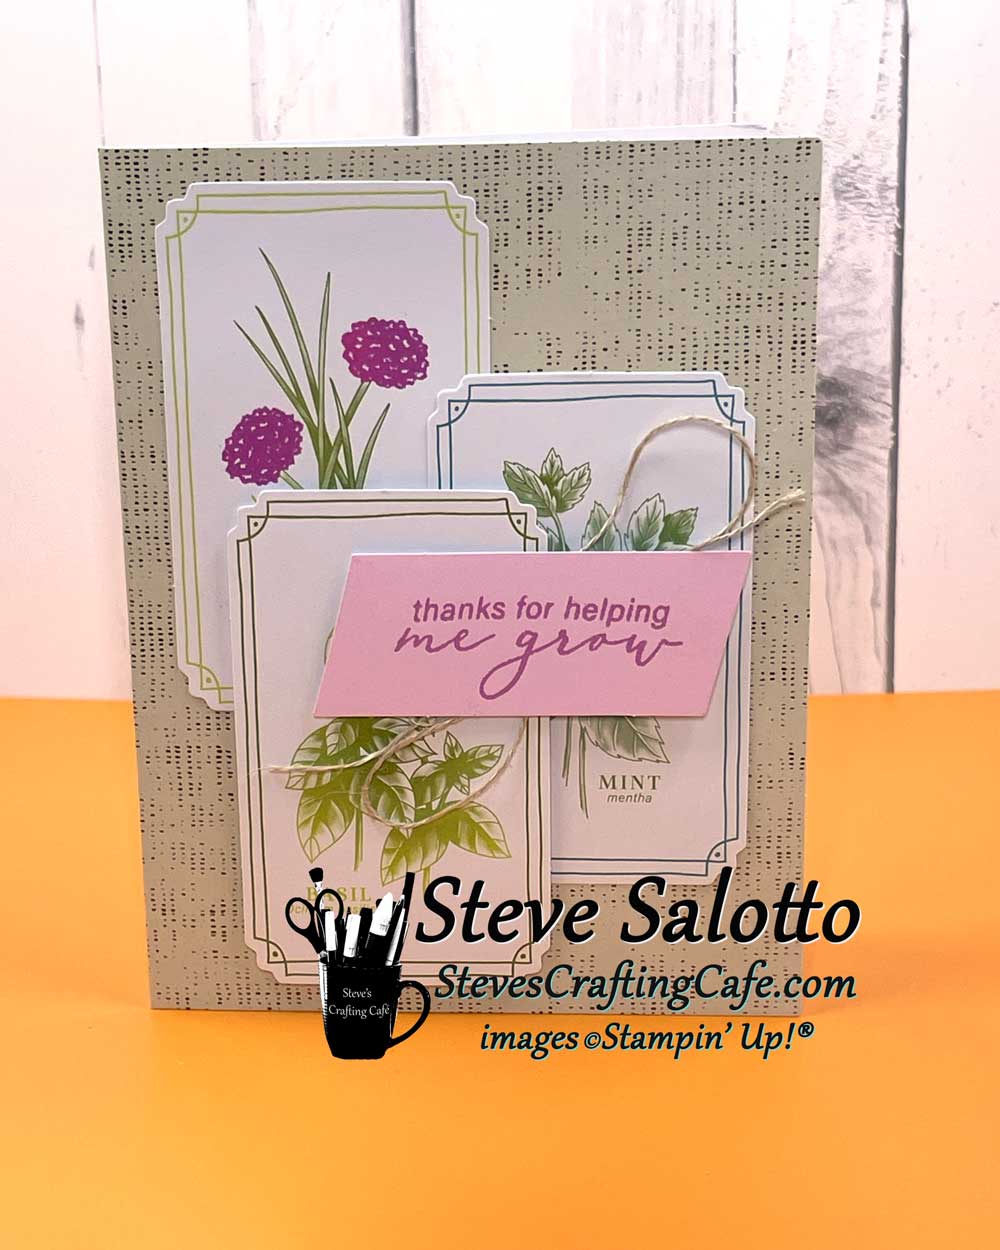
I really like how you can turn the chives in flowers. I also wanted to find a way to use the "For You" stamp that came with the kit.
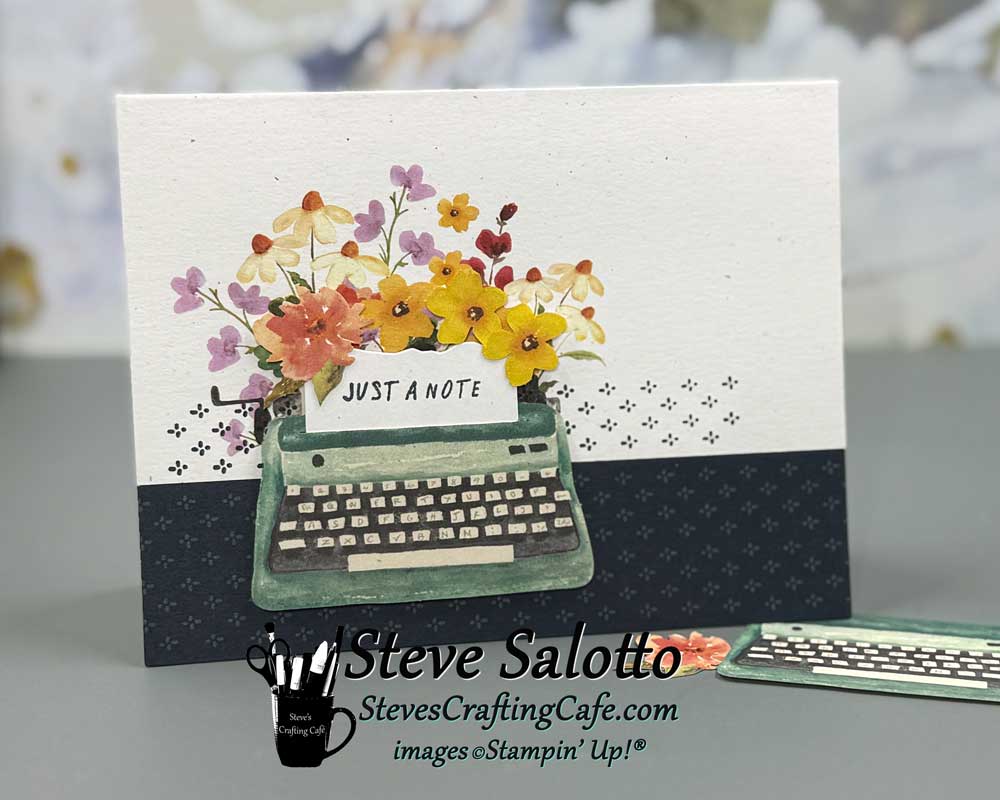
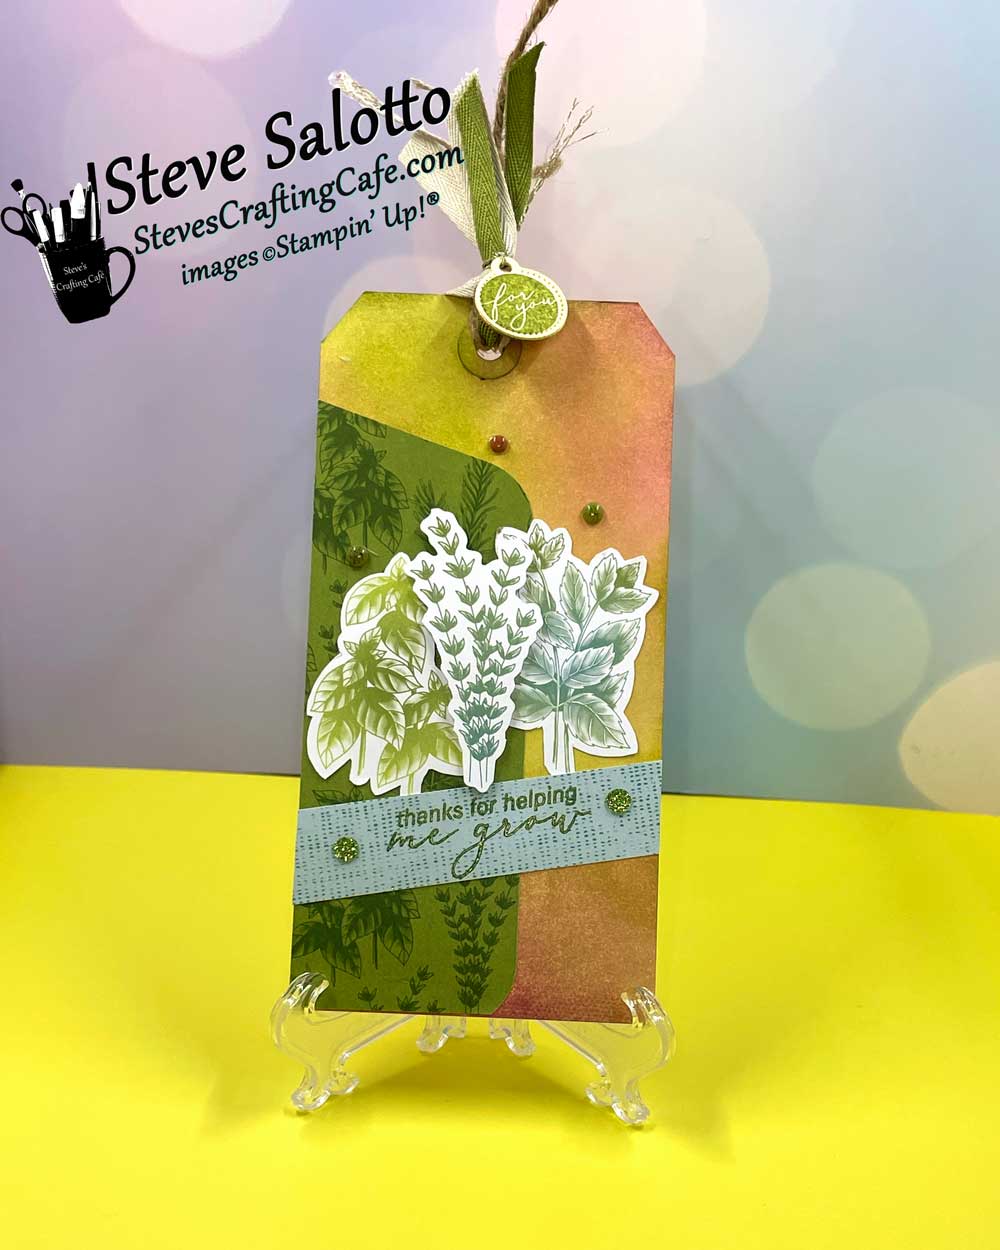
This sentiment is so cute pairing it with plants. A perfect Mother's Day or Father's Day tag.
Kit Card #1
Kit Card #2
Kit Card #3
I used the scraps left over from heart die cut punch-outs as stencils and blended inks over them with a blending brush.
I used the scraps left over from heart die cut punch-outs as stencils and blended inks over them with a blending brush.
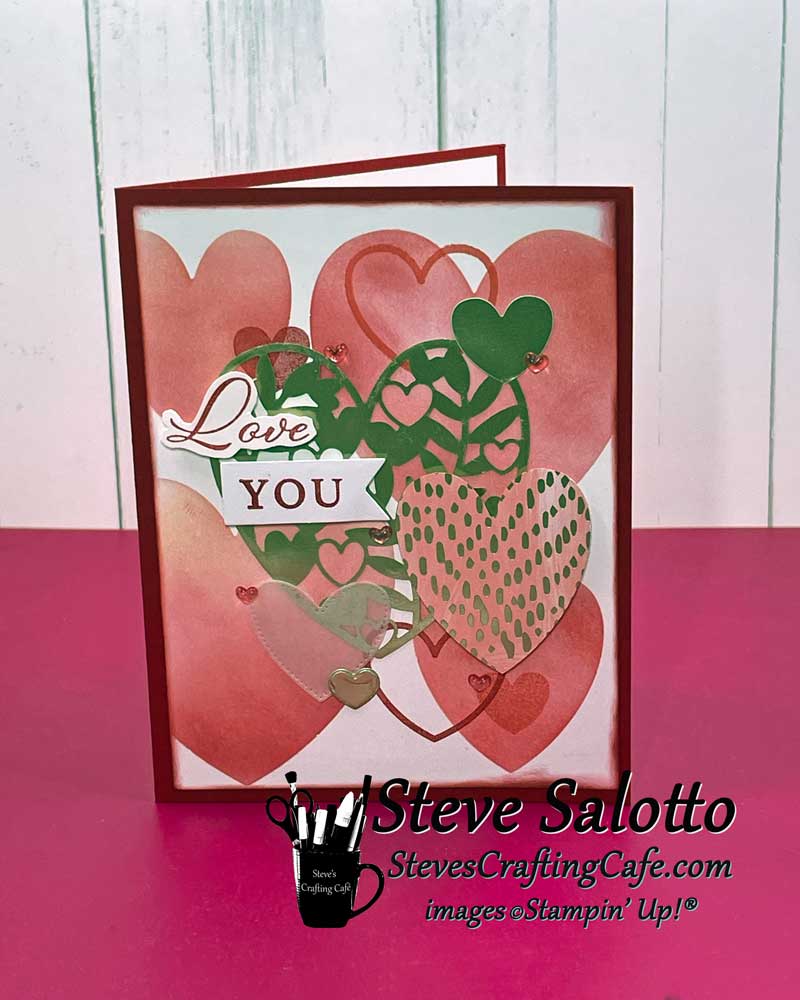
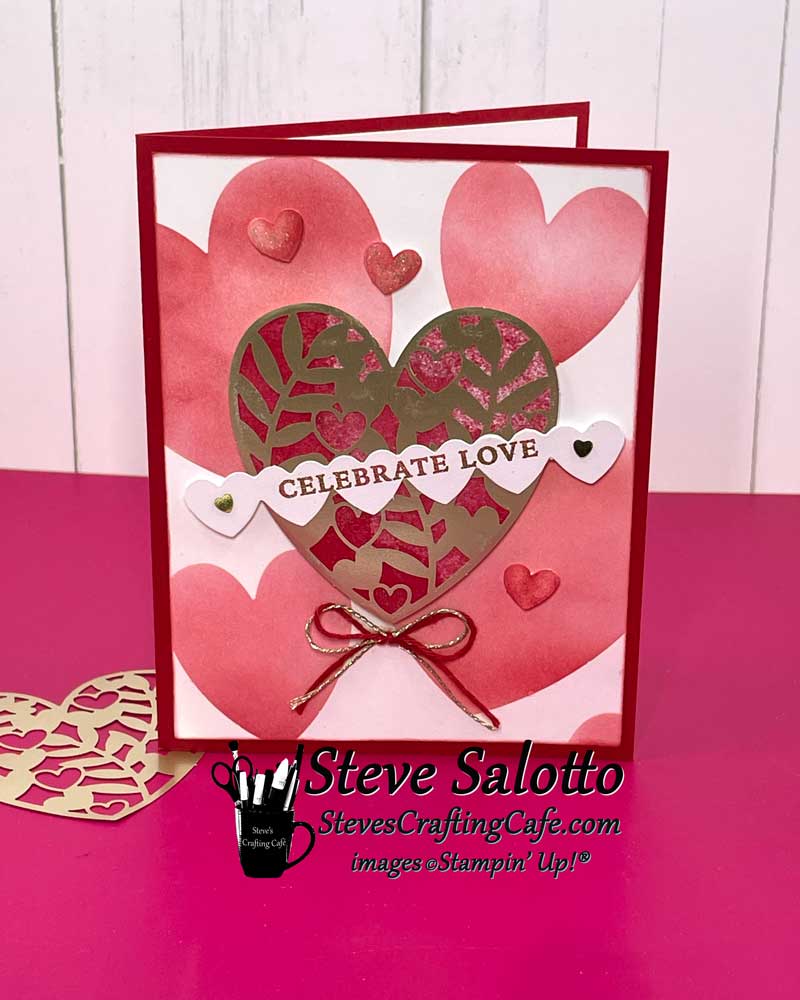
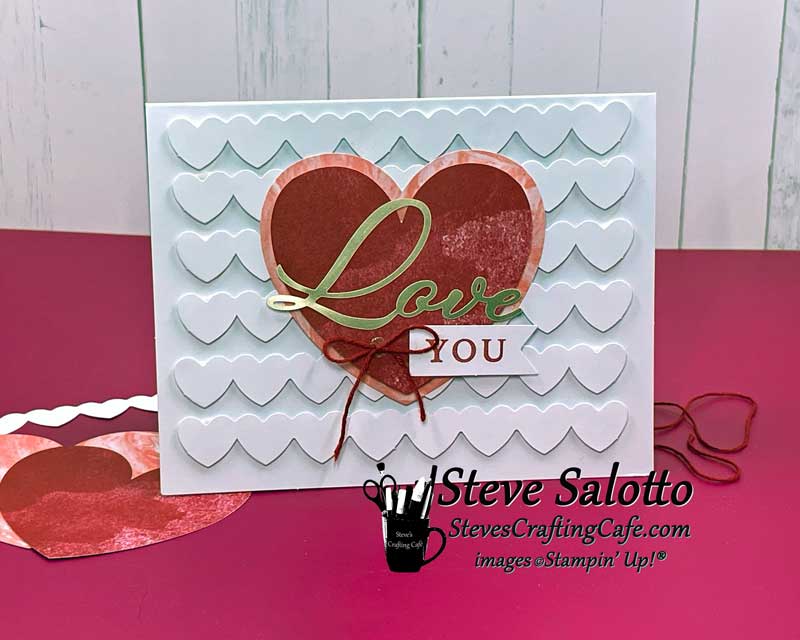
Here's my first alternate card for "Hearts for You." I used the heart from the add-on, "Spring is in the Air Dies." I stamped the sentiment in red ink then used clear embossing powder to make it stand out a little more. I also brushed Wink of Stella on the twine.
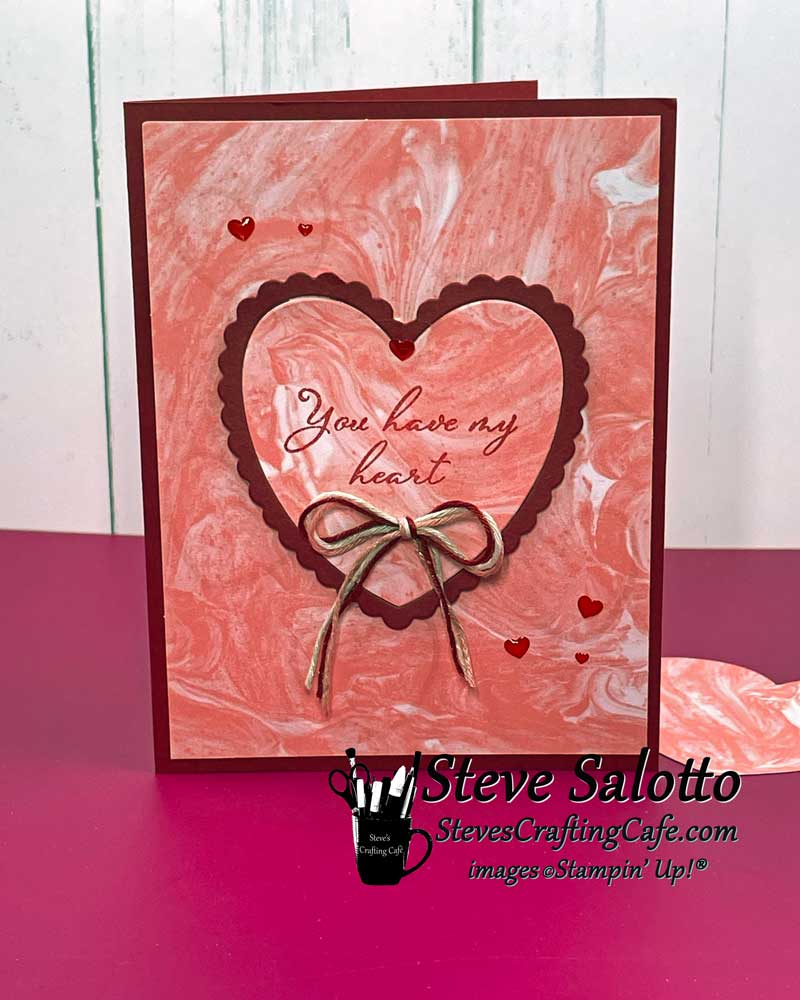
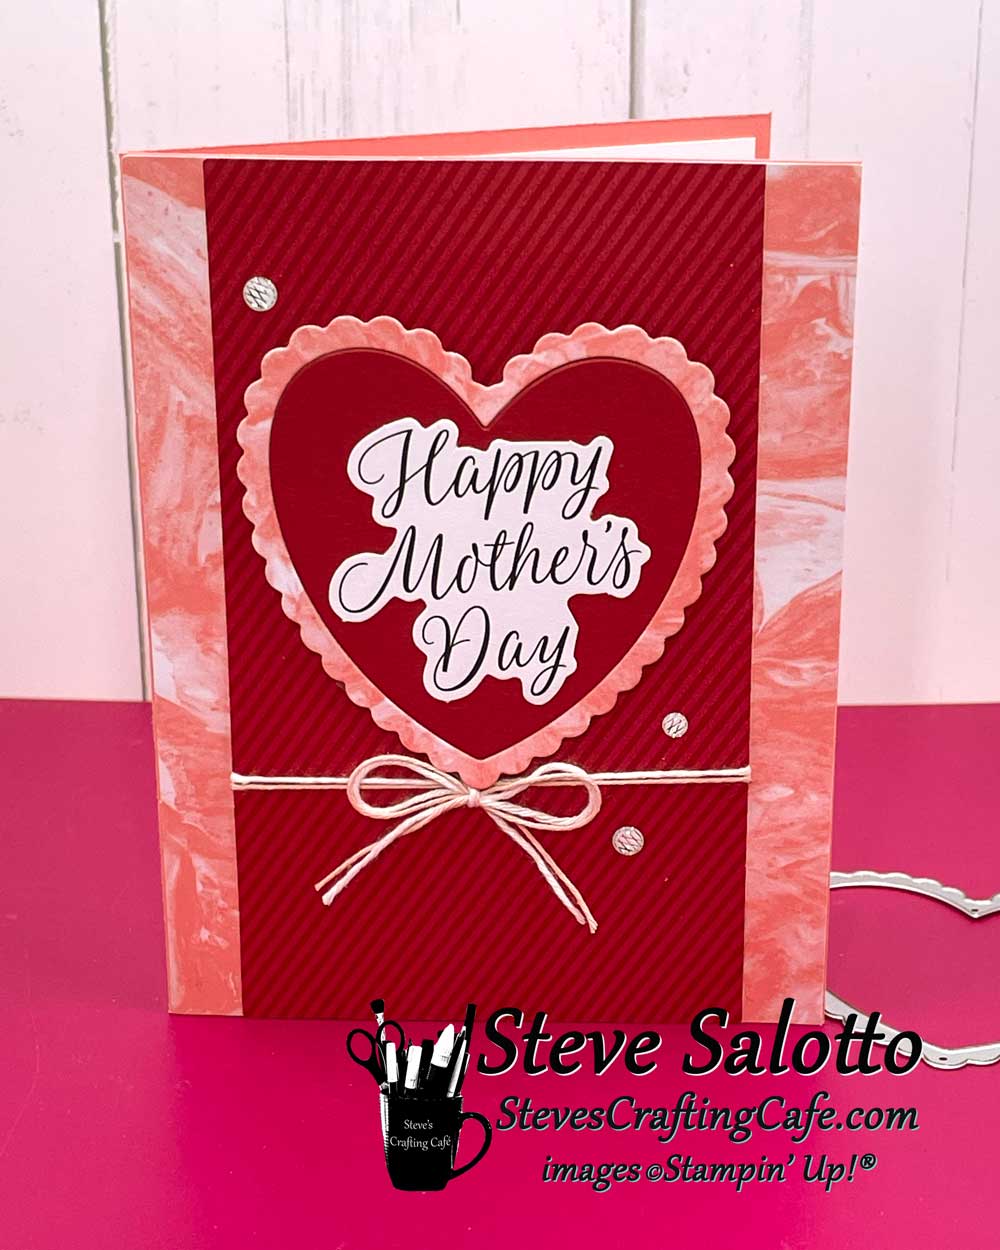
My masculine card alternate. I glued down the heart (which I cut from an envelope, careful that the lines went in the opposite direction) and I liked the look so much I decided to keep it simple. Really simple. I just added the tag with the sentiment and a couple dots. But I think it works well as a "card for him" because you know, we men are fairly simple. 😂
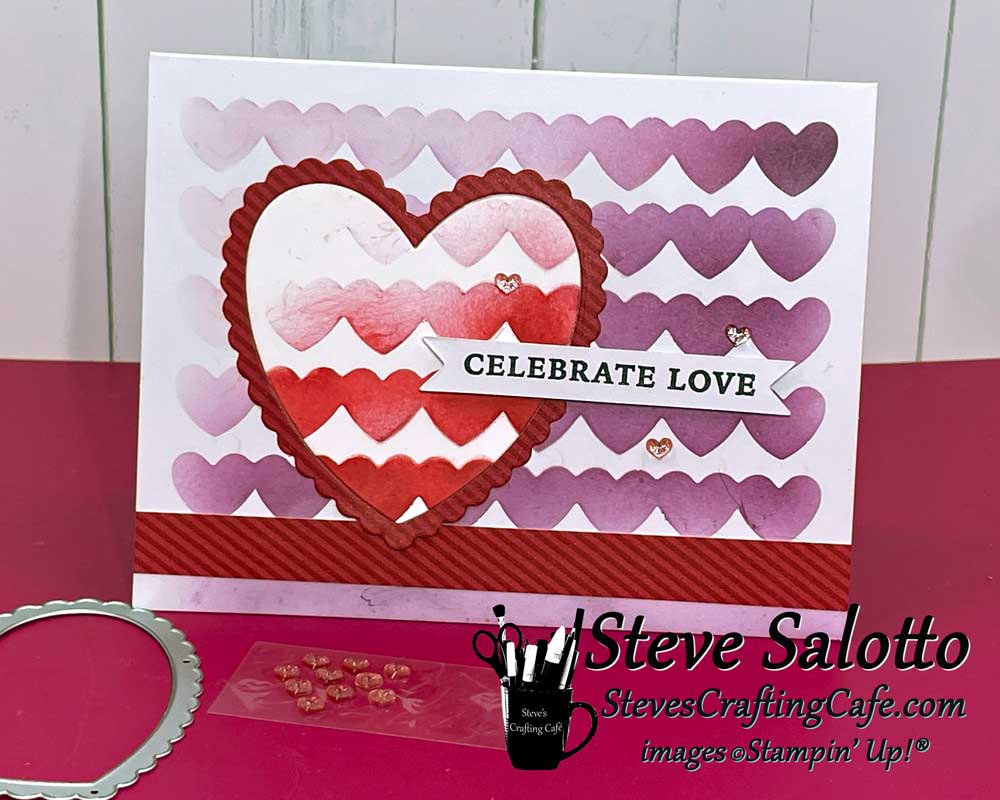
More ink blending fun. I used the punch out leftover from one of the heart strips and blended purple ink on the background and then red ink on a separate piece of card stock that I die cut into a heart. I accidentally got splotches of ink on the bottom of the card, so I added more ink and then added a strip of patterned paper to make it look like a border. 😀
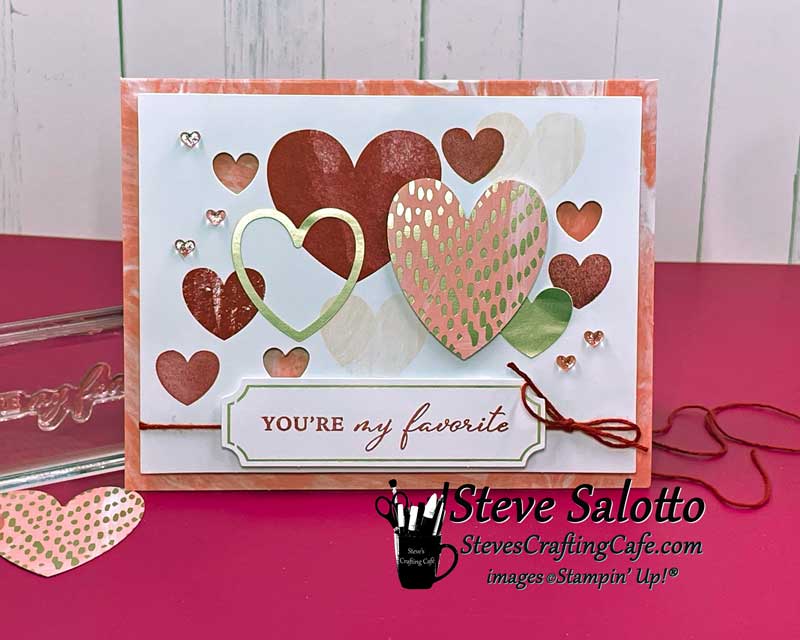
I used the heart from the add-on, "Spring is in the Air Dies" for this card and the sentiment comes from one of Stampin' Up!'s ephemera packs, "Greetings For All."
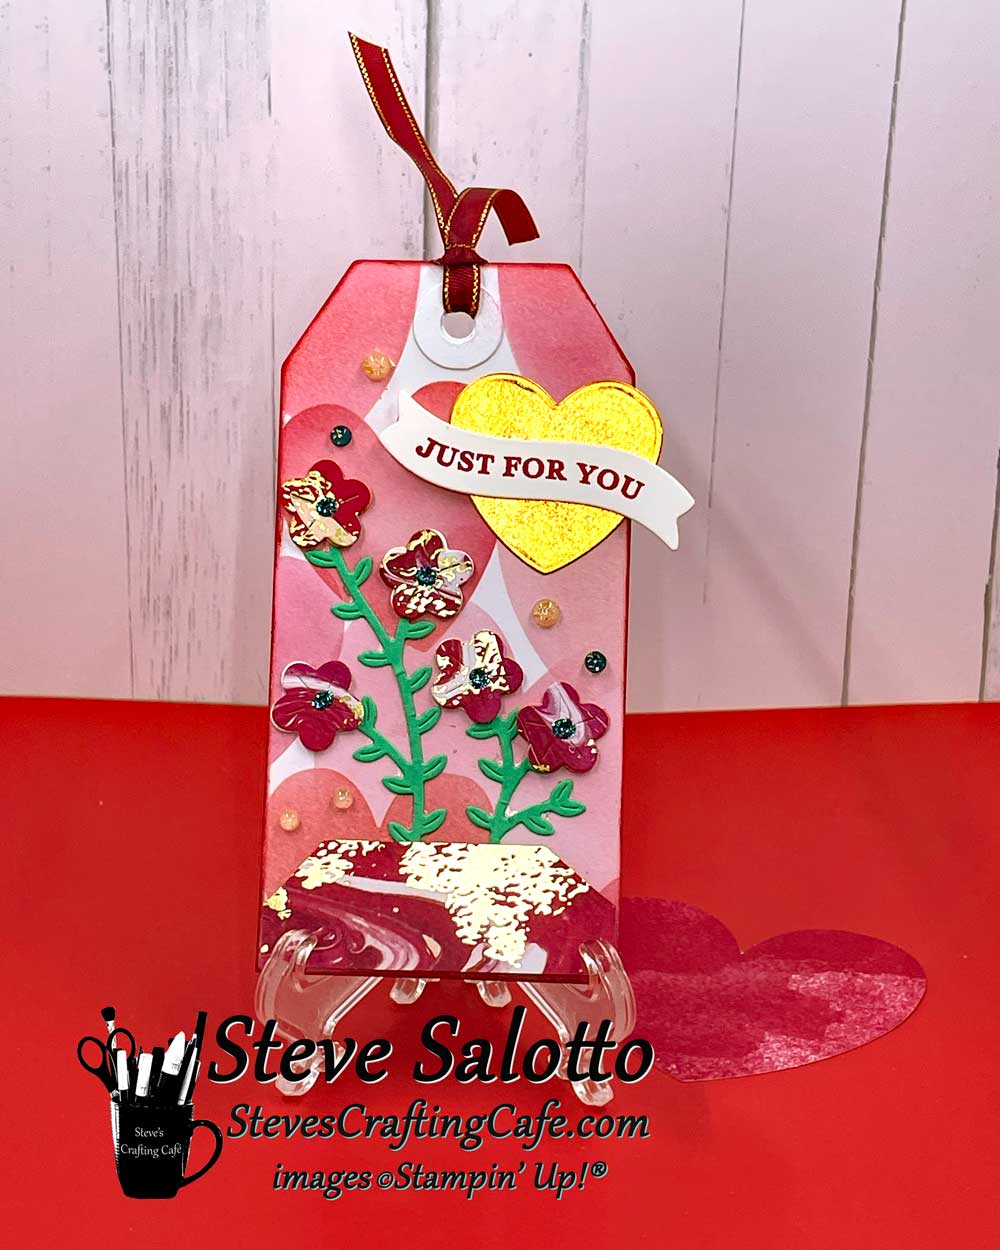
I want to make more tags this year so here's my first. I did some more ink blending and used the Linked Together Dies by Stampin' Up! for the flowers.
Kit Card #1
Kit Card #2
Kit Card #3
Check out these blog posts featuring some of my favorite cards above...
- “Ink Blending with Scraps Again” – see how I created the hearts backgrounds for January’s kit.
- “Use Envelopes in Your Designs” – learn how to cut up the envelopes to create even more cool designs.
Share this page…
Facebook
Pinterest
X
Email
Print